メインコンテンツにスキップ

Impression i7 Front Camera Replacement

必要な工具と部品

  1. Impression i7 Front Camera Replacement, Battery: 手順 1、 1の画像 1
    • Wedge the plastic opening tool into the seam nearest to the screen surface and begin to pry off the back of the device.

  2. Impression i7 Front Camera Replacement: 手順 2、 1の画像 1
    • Move the plastic opening tool along the perimeter of the device, loosening the entire back as you go.

  3. Impression i7 Front Camera Replacement: 手順 3、 1の画像 1
    • After the entire perimeter has been pried, remove the back of the device.

    • Be careful not to disconnect the speaker and microphone cables attached to the back of the tablet.

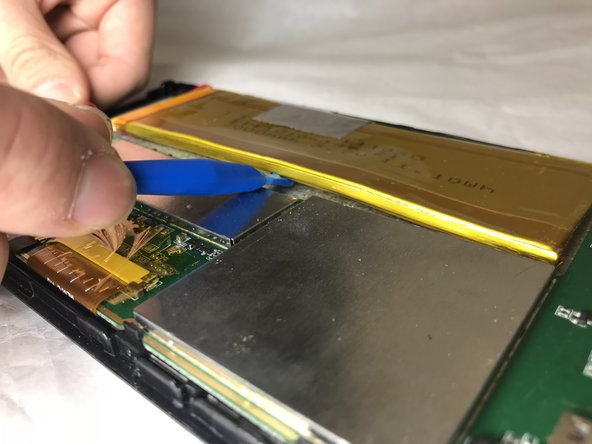
  4. Impression i7 Front Camera Replacement: 手順 4、 2の画像 1 Impression i7 Front Camera Replacement: 手順 4、 2の画像 2
    • Remove the transparent, orange tape from the edge of the battery.

    • Pry the battery off, using the plastic opening tool.

  5. Impression i7 Front Camera Replacement: 手順 5、 1の画像 1
    • Desolder the positive and negative leads.

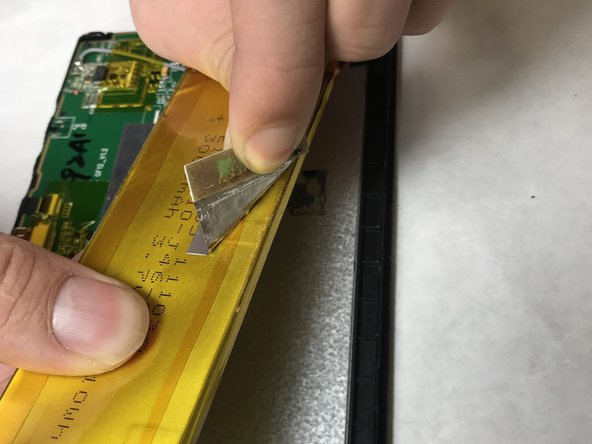
  6. Impression i7 Front Camera Replacement: 手順 6、 2の画像 1 Impression i7 Front Camera Replacement: 手順 6、 2の画像 2
    • Pull the battery away from the adhesive.

    • Peel the gray tape from the top of the battery.

  7. Impression i7 Front Camera Replacement, Front Camera: 手順 7、 1の画像 1
    • Gently pull the front camera connection out of its socket.

  8. Impression i7 Front Camera Replacement: 手順 8、 1の画像 1
    • Lift the camera unit from its housing. The unit should come out with minimal force.

終わりに

To reassemble your device, follow these instructions in reverse order.

作成者

1人の作成者と共同作成されました。

Cole Beaver

メンバー登録日: 11/05/18

390 ポイント

3のガイドは作成済み

チーム

IUPUI, Team S1-G5, Baechle Fall 2018 IUPUI, Team S1-G5, Baechle Fall 2018人のメンバー

IUPUI-BAECHLE-F18S1G5

3 メンバー

6のガイドは作成済み

0 件のコメント

コメントを追加

統計データ:

過去 24時間: 0

過去 7 日: 2

過去 30 日: 7

今までの合計 94