メインコンテンツにスキップ

IBM Thinkpad T60 Hard Drive Replacement

必要な工具と部品

  1. IBM Thinkpad T60 Hard Drive Replacement, Hard Drive: 手順 1、 1の画像 1
    • Turn the Thinkpad over so you can see the back.

    • Locate this screw in the bottom left-hand corner.

  2. IBM Thinkpad T60 Hard Drive Replacement: 手順 2、 1の画像 1
    • Using a #0 Phillips screwdriver, remove the 17.0 mm screw.

  3. IBM Thinkpad T60 Hard Drive Replacement: 手順 3、 1の画像 1
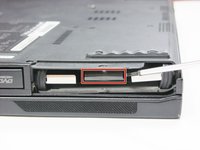
    • Carefully remove the plastic piece covering the hard drive port by pulling perpendicular to the side of the laptop.

  4. IBM Thinkpad T60 Hard Drive Replacement: 手順 4、 2の画像 1 IBM Thinkpad T60 Hard Drive Replacement: 手順 4、 2の画像 2
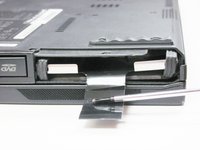
    • Use a small screwdriver to locate the black ribbon.

    • With the screwdriver, pull the black tab out of the slot.

  5. IBM Thinkpad T60 Hard Drive Replacement: 手順 5、 2の画像 1 IBM Thinkpad T60 Hard Drive Replacement: 手順 5、 2の画像 2
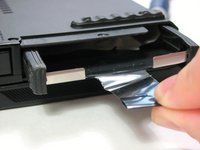
    • Pull gently on the black ribbon and the metal tray carrying the hard drive will slide out.

  6. IBM Thinkpad T60 Hard Drive Replacement: 手順 6、 1の画像 1
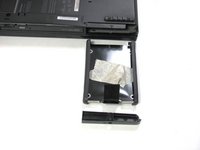
    • Remove the black plastic coverings on either side of the hard drive.

    • There is not a hard drive in this example, but the process is the same regardless.

終わりに

To reassemble your device, follow these instructions in reverse order.

7 の人々がこのガイドを完成させました。

作成者

10人の作成者と共同で作成されました。

Cody Kratochvil

メンバー登録日: 01/11/13

515 ポイント

5のガイドは作成済み

チーム

Cal Poly, Team 7-9, Maness Winter 2013 Cal Poly, Team 7-9, Maness Winter 2013人のメンバー

CPSU-MANESS-W13S7G9

4 メンバー

16のガイドは作成済み

0 件のコメント

コメントを追加

統計データ:

過去 24時間: 1

過去 7 日: 12

過去 30 日: 43

今までの合計 10,523