メインコンテンツにスキップ

IBM ThinkPad T30 Optical Drive Replacement

必要な工具と部品

  1. IBM ThinkPad T30 Optical Drive Replacement, Battery: 手順 1、 3の画像 1 IBM ThinkPad T30 Optical Drive Replacement, Battery: 手順 1、 3の画像 2 IBM ThinkPad T30 Optical Drive Replacement, Battery: 手順 1、 3の画像 3
    • Make sure the ThinkPad is off and the power supply is unplugged.

    • Flip the ThinkPad upside down with the bottom facing you.

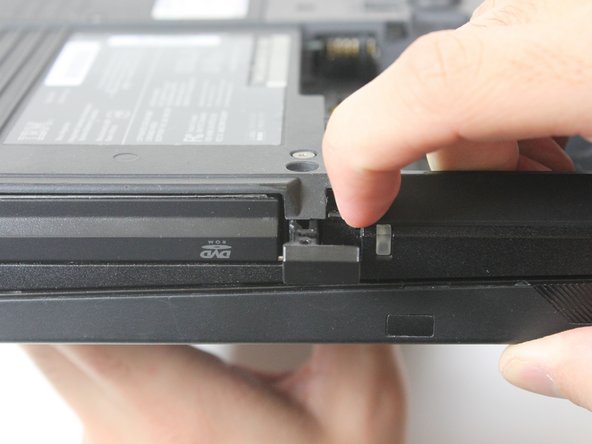
    • Slide the latch to the right into the unlock position.

    • While holding the latch in the unlock position, lift the battery out with your other hand.

  2. IBM ThinkPad T30 Optical Drive Replacement, Optical Drive: 手順 2、 1の画像 1
    • Locate the 4.8mm Phillips #0 screw on the far left of the ThinkPad, closest to the edge and above the battery, and unscrew it with a Phillips #0 screwdriver.

  3. IBM ThinkPad T30 Optical Drive Replacement: 手順 3、 2の画像 1 IBM ThinkPad T30 Optical Drive Replacement: 手順 3、 2の画像 2
    • On the side of the ThinkPad, locate a lock next to the optical drive. Use your fingernail to slide the lock to the right.

  4. IBM ThinkPad T30 Optical Drive Replacement: 手順 4、 2の画像 1 IBM ThinkPad T30 Optical Drive Replacement: 手順 4、 2の画像 2
    • Once it is unlocked, a small tab will pop out. Pull on the tab with your fingers.

    • The optical drive will easily slide out. Remove the optical drive.

終わりに

To reassemble your device, follow these instructions in reverse order.

ある他の人がこのガイドを完成しました。

作成者

5人の作成者と共同で作成されました。

Alex Kost

メンバー登録日: 10/05/12

271 ポイント

5のガイドは作成済み

チーム

Cal Poly, Team 3-20, Amido Fall 2012 Cal Poly, Team 3-20, Amido Fall 2012人のメンバー

CPSU-AMIDO-F12S3G20

3 メンバー

16のガイドは作成済み

0 件のコメント

コメントを追加

統計データ:

過去 24時間: 0

過去 7 日: 5

過去 30 日: 7

今までの合計 1,893