はじめに
Huawei P10 Liteスマートフォンのディスプレイを取り出して交換します。
ガラスがひび割れている場合は、目を保護するため保護メガネを着用してください。スクリーンにガムテープなどを装着するとデバイスをしっかりと握りやすくなります。
再組み立ての際は、必要な箇所に新しい接着剤を付けてください。再組み立てを始める前に、古いパーツから新しいパーツに移植し忘れていないものがないか点検してください。
必要な工具と部品
-
-
開口ピックの先端をバックカバーとミッドフレームの間に差し込み、スマートフォン周辺にスライドして接着剤を切断します。
-
吸盤ハンドルを使って、バックカバーを持ち上げると、開口ピックを差し込むきっかけを作れます。
-
-
-
ピンセットを使って、シールを剥がします。
-
#00プラスネジを2本外します。
-
2.5mm#00プラスネジを4本外します。
Schritt 3 und 4 kann man sich komplett sparen. Wozu auch. Kann gleich mit Schritt 5 weitergemacht werden, zuvor einfach das Flachbandkabel vom Fingerabdrucksensor an der Rückabdeckung abklemmen und fertig.
Translate what Bobby mcgee said:
Step 3 and 4 can be completely ignored. What for? You can continue with step 5, just disconnect the ribbon cable from the fingerprint sensor on the back cover and you're done.
However, the reason step 3 and 4 should not be skipped is Step 6 — Use an iOpener to loosen the adhesive beneath the battery. I.e., the adhesive cannot be easily removed without heat, however, that heat might damage the electric chips. Thus they’d better be removed first.
-
-
-
ピンセットを使って、メインボードシールドを取り外します。
-
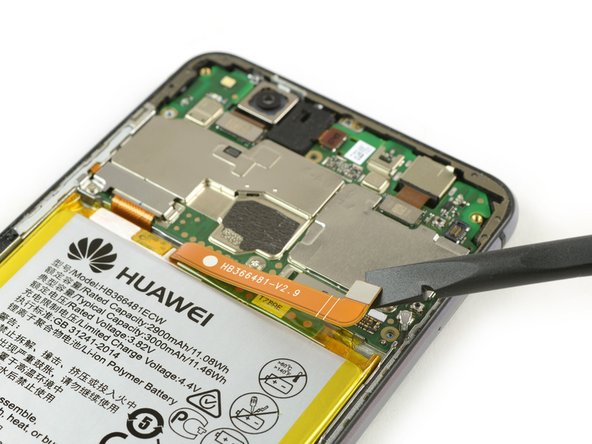
スパッジャーの平面側先端を使って、指紋センサーフレックスケーブルの接続を外します。
Welchen Klebstoff soll man verwenden?
Hallo Josef,
sollte bei deinem Ersatzteil kein Klebstoff oder Klebeband dabei gewesen sein, kannst du dünne Streifen Doppelseitiges Klebeband verwenden. Es gibt für das Huawei P10 Lite auch schon zugeschnittene Klebestreifen zu erwerben, hierbei gilt aber je nach Händler Rezessionen zu lesen, ob die Klebestreifen auch wirklich halten.
Hi darren,
pre-cut adhesive would be the best solution if you can source it. Otherwise a two-sided adhesive tape or carefully used E6000 adhesive glue will be your friend. -
-
-
-
バッテリーコネクタプレートを固定しているプラスネジを外します。
-
バッテリーコネクタプレートを取り外します。
-
スパッジャーの平面側先端を使って、バッテリーフレックスケーブルの接続を外します。
-
-
-
iOpenerを使って、バッテリーの下の接着剤を温めて柔らかくします。
-
バッテリーとミッドフレームの間にスパッジャーを差し込んで、隙間を作ります。
-
開口ピックを差し込むか、スパッジャーを使って、バッテリーしたの接着剤を乖離するため、隙間を作ります。
Ohne eine Erwärmung des Klebers ist die Entfernung des Akkus wirklich sehr hakelig und zeitintensiv!
Is it possible to soften the adhesive using isopropyl alcohol?
Hi Michele,
yes, the use of isopropyl alcohol is a common technique when removing a battery in a smartphone. Especially when the adhesive is very strong. Try to apply the alcohol to every corner of the battery and let it penetrate the adhesive for several minutes. Start the prying procedure with the spudger afterwards. In case the adhesive isn’t loose enough you can reapply isopropyl alcohol any time during the removal. Keep in mind, that there’s a gap in the midframe for the display flex cable. It can happen that the isopropyl alcohol runs trough that gap and loosens the adhesive of the display as well. When the display adhesive gets loose you’ll need replacement adhesive for the display. To avoid that, apply as less alcohol as possible at a time and take especially care during prying to avoid damage to the flex cables underneath the battery. The adhesive of the cables will get loose as well.
The battery was very hard to remove. Please note: it is glued everywhere around the ribbon cables at the bottom. The battery is not glued with little strips like the back cover. The spudger and the blue cutting triangles were not very strong and the plastic tip bent upon removal of the battery. I eventually got the battery out with a metallic spatula. Be careful not to rip the shining lining of the battery while cutting the adhesive. I don’t know how people get the battery out without bending it, also every YT video I watched had - slightly - bent batteries. The glue is so strong snd sticky I did not need to apply new adhesive strips.
If you are operating on aged ones:
The Old double sided tape doesn’t really much care about the heat from the iOpener.
Use a metal spudger (round edges) instead but use it with care. Slowly and evenly lift the battery and go around it in a circle. Stay close to the edges to not damage cables under the battery (seen in step 7). Start pushing closer towards the middle only when you can see the cables yet and are sure not to damage them.
If this still doesn’t bring you closer to lifting the battery safely:
Two Options:
1. Try to use some small drops of adhesive remover . Best to use not to much is use Q-Tips or Cotton Swabs to evenly apply the remover through a little crack under the battery.
2. Use unwaxed dental floss push it under the battery. Then gently move it upwards with a pulling-side-to-side motion. To accelerate the process you can also use ***adhesive remover***. The dental floss will soak it up (only works with unwaxed dental floss) and assure that it will only be where it’s needed.
-
-
-
ディスプレイ接続ブラケットに留められたプラスネジを外します。
-
ディスプレイ接続ブラケットを取り外します。
-
スパッジャーの平面側先端を使って、ディスプレイフレックスケーブルの接続を外します。
-


デバイスを再組み立てする際は、これらの手順を逆の順番に従って作業を進めてください。
デバイスを再組み立てする際は、これらの手順を逆の順番に従って作業を進めてください。
37 の人々がこのガイドを完成させました。
以下の翻訳者の皆さんにお礼を申し上げます:
100%

これらの翻訳者の方々は世界を修理する私たちのサポートをしてくれています。 あなたも貢献してみませんか?
翻訳を始める ›


2 件のコメント
hey bam ich habe ein glück wegend euch ifixit danke dafür die anleitung hat mich zu glück gebracht dank ifixit ist mein
huawei p10 lite heile danke für alles lg der besitzer des huawei p10 lite
Hallo,
soweit ich sehe, ist die Klebefolie nicht im Ersatzteil enthalten, und die vorgestanzte Klebefolie ist nicht (mehr) erhältlich. Statt dessen verweist ihr auf das doppelseitige Klebeband von tesa, das als Rolle erhältlich ist - aber in verschiedenen Breiten.
Welche Breite ist für diese Reparatur hier denn die passendste?
Und wird das phone damit wieder genauso staubdicht wie zuvor (man wird ja puzzlen müssen, und an den Übergangsstellen hat man Stöße statt durchgehende Verklebung…)?
Mit dem Saugnapf die Rückseite anheben hilft ungemein…
Matthias Eberle - 返信
Had to use blue wedge tool to wedge open bottom plate from the rim part in order to then use the tip of the blue opening pick under the back plate to then cut the glue. It’s like placing a pie server or knife under the plate once there’s a gap between the rim and the back plate.
Jane - 返信
Be careful, there’s a cable to fingerprint sensor, very close to the edge (see pictures below)… It’s very easy to cut it through with the pick, as I just learned :)
dambig - 返信