メインコンテンツにスキップ

Huawei Ascend W1 Display Replacement

必要な工具と部品

  1. Huawei Ascend W1 Display Replacement, The phone's orientation.: 手順 1、 1の画像 1
    • Flip the device over so that the back of the phone is facing you and the screen is against your palm.

  2. Huawei Ascend W1 Display Replacement, Removing the back cover.: 手順 2、 1の画像 1
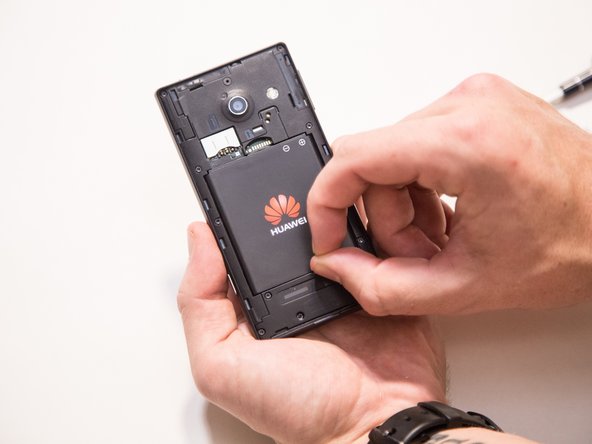
    • Locate the slit at the bottom of the back cover.

    • Using your fingernail, lift up on the back cover to expose the battery.

  3. Huawei Ascend W1 Display Replacement: 手順 3、 1の画像 1
    • Lift the back cover off the phone.

    • The back cover is snapped onto the phone so you will feel it unsnapping as you remove it.

  4. Huawei Ascend W1 Display Replacement, Removing the battery.: 手順 4、 3の画像 1 Huawei Ascend W1 Display Replacement, Removing the battery.: 手順 4、 3の画像 2 Huawei Ascend W1 Display Replacement, Removing the battery.: 手順 4、 3の画像 3
    • Find the indented notch at the base of the battery.

    • Lift the battery out of the phone with your fingers by pressing forward and lifting upward.

  5. Huawei Ascend W1 Display Replacement, Remove all the screws.: 手順 5、 2の画像 1 Huawei Ascend W1 Display Replacement, Remove all the screws.: 手順 5、 2の画像 2
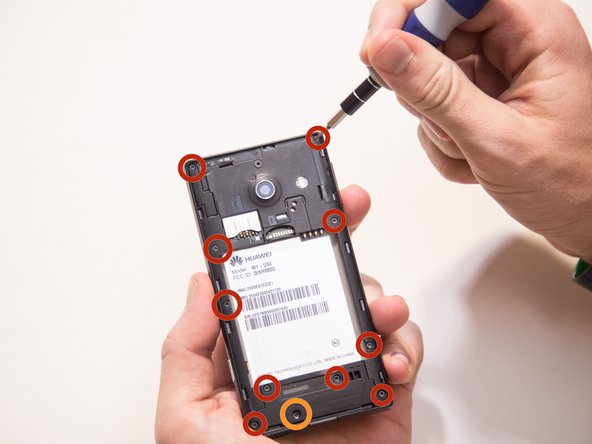
    • After removing the battery, remove the screws using a T6 screwdriver.

    • There are eleven screws that hold the middle cover to the rest of the phone.

    • The screw that is marked by the orange circle is covered by a white dot.

  6. Huawei Ascend W1 Display Replacement, Removing lower section of the middle cover.: 手順 6、 3の画像 1 Huawei Ascend W1 Display Replacement, Removing lower section of the middle cover.: 手順 6、 3の画像 2 Huawei Ascend W1 Display Replacement, Removing lower section of the middle cover.: 手順 6、 3の画像 3
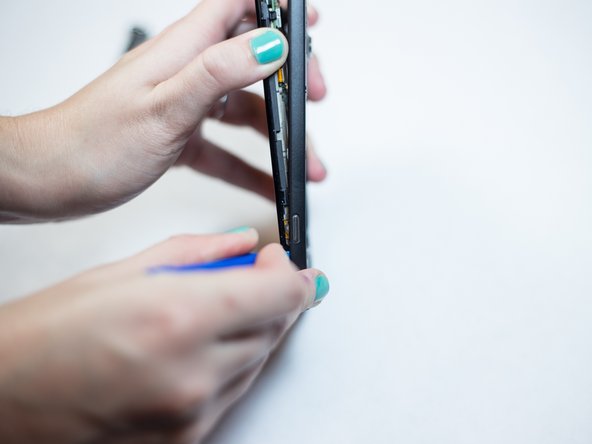
    • After all the screws are removed, use your fingers to remove the lower section of the middle cover.

    • Pull the lower section of the middle cover outward towards you, exposing the circuit board underneath.

  7. Huawei Ascend W1 Display Replacement, Removing the rest of the middle cover.: 手順 7、 3の画像 1 Huawei Ascend W1 Display Replacement, Removing the rest of the middle cover.: 手順 7、 3の画像 2 Huawei Ascend W1 Display Replacement, Removing the rest of the middle cover.: 手順 7、 3の画像 3
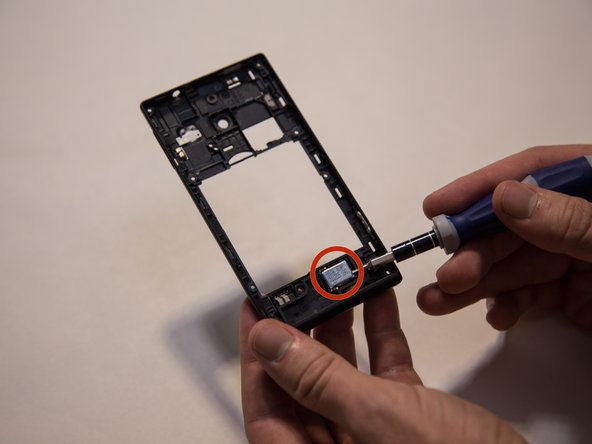
    • Begin working your way around the sides of the cover plate, unsnapping it gently.

    • The middle cover is a thin piece of plastic with the external speaker inside of it.

    • Be gentle as you remove circuit cover. The parts might break if you are too forceful.

  8. Huawei Ascend W1 Display Replacement, Locating the antenna.: 手順 8、 2の画像 1 Huawei Ascend W1 Display Replacement, Locating the antenna.: 手順 8、 2の画像 2
    • The middle covers are removed.

    • The antenna is a thin white wire that connects to the circuit board in two locations.

  9. Huawei Ascend W1 Display Replacement, Removing the antenna: 手順 9、 2の画像 1 Huawei Ascend W1 Display Replacement, Removing the antenna: 手順 9、 2の画像 2
    • Lift gently at each connector of the white wire to disconnect the antenna from the port.

  10. Huawei Ascend W1 Display Replacement, Motherboard: 手順 10、 3の画像 1 Huawei Ascend W1 Display Replacement, Motherboard: 手順 10、 3の画像 2 Huawei Ascend W1 Display Replacement, Motherboard: 手順 10、 3の画像 3
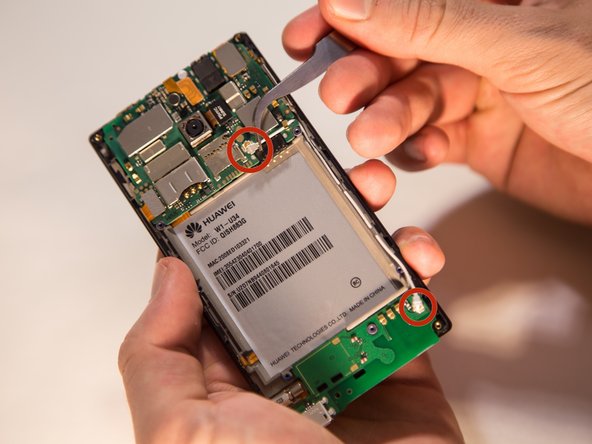
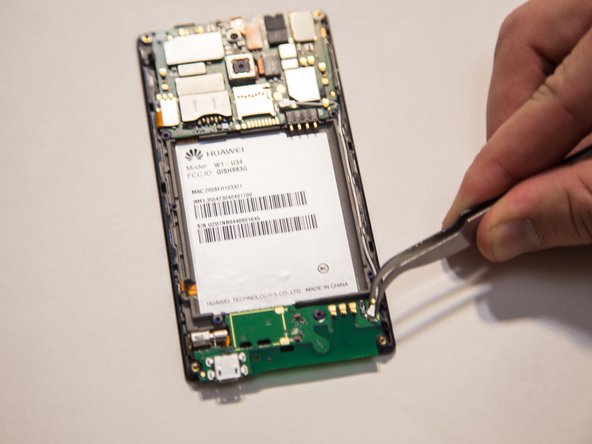
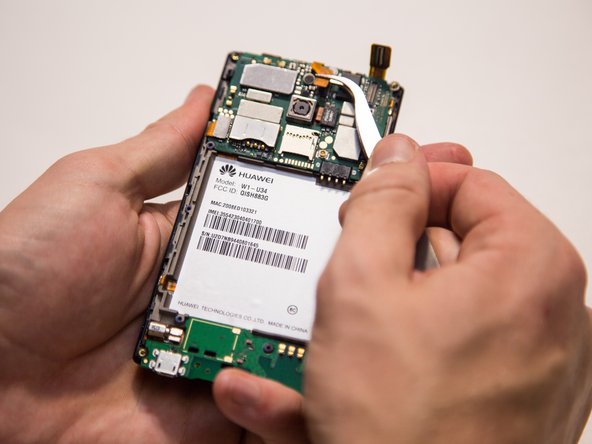
    • Use a plastic spudger or your fingers to gently pry up the four flex cables from the main board.

  11. Huawei Ascend W1 Display Replacement: 手順 11、 2の画像 1 Huawei Ascend W1 Display Replacement: 手順 11、 2の画像 2
    • With the back of the phone facing you, there will be a small black clip on the left side holding the main board in place.

    • Gently pry up near the small black clip with your fingers or a plastic spudger to detach the main board.

  12. Huawei Ascend W1 Display Replacement, Display: 手順 12、 2の画像 1 Huawei Ascend W1 Display Replacement, Display: 手順 12、 2の画像 2
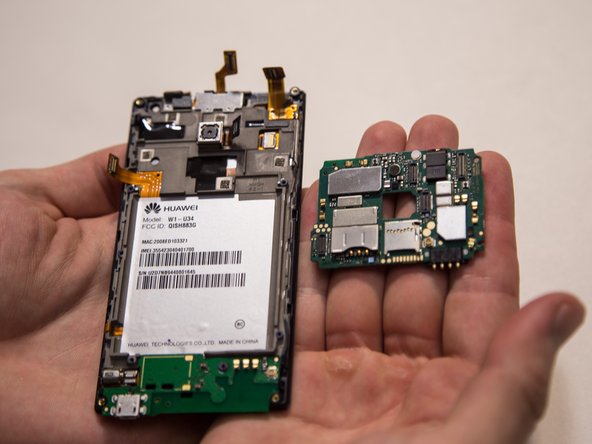
    • Gently pry up near the small black clip with a plastic spudger to detach the charging board.

  13. Huawei Ascend W1 Display Replacement: 手順 13、 2の画像 1 Huawei Ascend W1 Display Replacement: 手順 13、 2の画像 2
    • Apply heat using a heat gun or blow dryer in close proximity to the device. Then use the metal spudger to pry the display screen from the frame.

終わりに

To reassemble your device, follow these instructions in reverse order.

作成者

2人の作成者と共同で作成されました。

Tanner Cline

メンバー登録日: 11/01/18

169 ポイント

2のガイドは作成済み

チーム

IUPUI, Team S3-G2, Harley Fall 2018 IUPUI, Team S3-G2, Harley Fall 2018人のメンバー

IUPUI-HARLEY-F18S3G2

3 メンバー

4のガイドは作成済み

0 件のコメント

コメントを追加

統計データ:

過去 24時間: 0

過去 7 日: 1

過去 30 日: 8

今までの合計 507