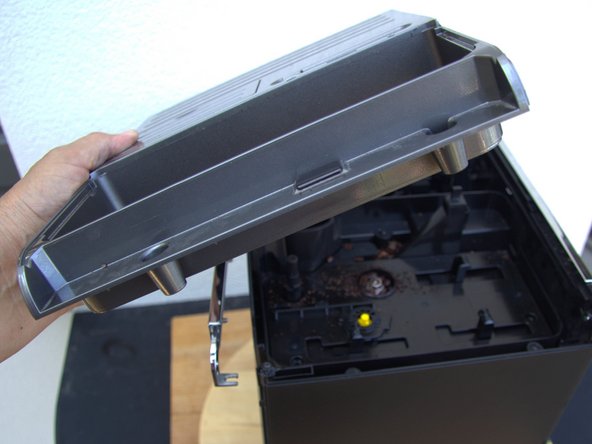
メインコンテンツにスキップ

How to open the Saeco Moltio housing (with metal frame)

必要な工具と部品

  1. How to open the Saeco Moltio housing (with metal frame), How to open the Saeco Moltio housing (with metal frame): 手順 1、 2の画像 1 How to open the Saeco Moltio housing (with metal frame), How to open the Saeco Moltio housing (with metal frame): 手順 1、 2の画像 2
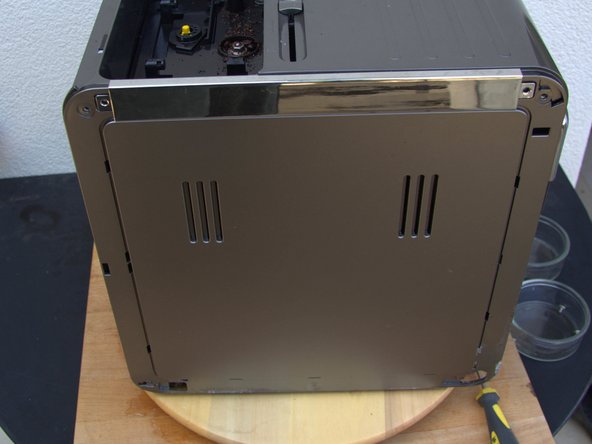
    • First check which model you have in front of you: Is the decorative frame made of chromed metal (picture 1) or of metallized plastic? (picture 2). In the second case follow this guide, in the first case you are in the right place here.

  2. How to open the Saeco Moltio housing (with metal frame): 手順 2、 1の画像 1
    • Never forget to remove the power!

    • Remove the water reservoir, the brew unit, the milk reservoir, the lid for the bean storage and the drip tray.

    • Remove the lock on the bean storage container by pushing the button inwards.

    • Lift the bean storage container out.

  3. How to open the Saeco Moltio housing (with metal frame): 手順 3、 2の画像 1 How to open the Saeco Moltio housing (with metal frame): 手順 3、 2の画像 2
    • Remove the 4 Torx T10 screws from the left metal frame.

    • Remove the lower 3 parts of the metal frame.

  4. How to open the Saeco Moltio housing (with metal frame): 手順 4、 3の画像 1 How to open the Saeco Moltio housing (with metal frame): 手順 4、 3の画像 2 How to open the Saeco Moltio housing (with metal frame): 手順 4、 3の画像 3
    • Open the maintenance lid.

    • Remove the Torx T10 screw from the metal frame.

    • Remove the 4 Torx T10 screws from the corners of the metal frame.

    • The maintenance lid is fixed to the back of the metal frame. Lift it away outwards to remove it.

    • Remove the lower parts of the metal frame.

  5. How to open the Saeco Moltio housing (with metal frame): 手順 5、 2の画像 1 How to open the Saeco Moltio housing (with metal frame): 手順 5、 2の画像 2
    • Remove the 4 Torx T10 screws.

    • The upper part of the right metal frame is secured by 2 partially hidden Torx T10 screws. You can reach the back one of the two through the opening in the right corner in the back. Loosen the screw in order to slide the metal frame slightly outwards.

    • Remove the 2 screws holding the closing mechanism for the bean storage container.

    • The screw at the front of the metal frame should now be within reach and you can remove the metal frame completely. This wasn't done this way here however.

  6. How to open the Saeco Moltio housing (with metal frame): 手順 6、 2の画像 1 How to open the Saeco Moltio housing (with metal frame): 手順 6、 2の画像 2
    • Carefully lift the upper cover from the device.

    • When reassembling the device, make sure the slider for the unlocking mechanism of the bean storage container is pushed back into its place correctly.

    • Lift the unlocking mechanism out of the bean storage container.

  7. How to open the Saeco Moltio housing (with metal frame): 手順 7、 2の画像 1 How to open the Saeco Moltio housing (with metal frame): 手順 7、 2の画像 2
    • In the next step, the carrier plate for the bean container will be removed. Do not remove it yet because a data cable still connects it to the sensor on the bean lid.

    • The plate is secured with five Torx T10 screws. Remove those if you have not done so already.

    • Lift the plate, but do not remove it entirely yet. The sensor for the bean compartment's lid has to be removed first.

  8. How to open the Saeco Moltio housing (with metal frame): 手順 8、 2の画像 1 How to open the Saeco Moltio housing (with metal frame): 手順 8、 2の画像 2
    • Carefully push aside and remove the lid by the bean lid sensor.

    • Let the sensor drop through the opening.

    • Remove the carrier plate for the bean lid.

  9. How to open the Saeco Moltio housing (with metal frame): 手順 9、 2の画像 1 How to open the Saeco Moltio housing (with metal frame): 手順 9、 2の画像 2
    • The left side is still attached via two Torx T10 screws at the top. Remove them.

  10. How to open the Saeco Moltio housing (with metal frame): 手順 10、 2の画像 1 How to open the Saeco Moltio housing (with metal frame): 手順 10、 2の画像 2
    • Now the left side is clear and can be removed upwards.

終わりに

To reassemble your device, follow these instructions in reverse order.

4 の人々がこのガイドを完成させました。

以下の翻訳者の皆さんにお礼を申し上げます:

de en

100%

これらの翻訳者の方々は世界を修理する私たちのサポートをしてくれています。 あなたも貢献してみませんか?
翻訳を始める ›

作成者

1人の作成者と共同作成されました。

VauWeh

メンバー登録日: 10/19/15

202,869 ポイント

246のガイドは作成済み

チーム

Repair is War on Entropy Repair is War on Entropy人のメンバー

Community

25 メンバー

1,110のガイドは作成済み

7 件のコメント

I got it open, the reason I opened it was because when I turn the power on, nothing happened, any suggestions?

clintmacbeth - 返信

If there is no power, you may have to check if there is any fuse which is gone.

But normally a fuse is not burning without a reason. So there could be some other defect, maybe water is dripping onto some elctronic circuit or also maybe the power supply is dead.

Be careful when working with/near main voltage!

adrock0801 -

Great instruction! I had to open my Moltio before and it took me some time to figure out how to do without breaking anything.

adrock0801 - 返信

echt super diese Anleitung! Hoffe auf weitere solche Beiträge. Mit freundlichen Grüßen

Kurt Bühlmann - 返信

There is a tool sign and number 22 on the screen. Can someone help me please

Marshad al marshad - 返信

In another case this was the solution: "The control cable between the control unit and the circuit board must have been exposed to moisture. Hardly to see. Contact spray and a little cleaning helped."

VauWeh -

コメントを追加

統計データ:

過去 24時間: 1

過去 7 日: 9

過去 30 日: 88

今までの合計 8,861