メインコンテンツにスキップ

How to clean and maintain Acer Aspire 4920 ventilation system

必要な工具と部品

  1. How to clean and maintain Acer Aspire 4920 ventilation system, How to clean and maintain Acer Aspire 4920 ventilation system: 手順 1、 1の画像 1
    • This laptop was bought in 2008 and it have never been disassembled to maintain. Before maintaince, we should turn it off and unplug it for AC source.

  2. How to clean and maintain Acer Aspire 4920 ventilation system: 手順 2、 1の画像 1
    • Now, turn the laptop upside-down. We push 2 buttons to take out the battery. Then remove 6 screws to open the cover as shown in the picture

  3. How to clean and maintain Acer Aspire 4920 ventilation system: 手順 3、 1の画像 1
    • After unscrewing, we lift up leftside of the cover and gently shake it to take out.

    • Take care of the small plastic patches. Do not make them broken. They help to lock the cover firmly to the bottom housing of the laptop

  4. How to clean and maintain Acer Aspire 4920 ventilation system: 手順 4、 2の画像 1 How to clean and maintain Acer Aspire 4920 ventilation system: 手順 4、 2の画像 2
    • This model is designed perfectly for maintenance. We can see all the main components after removing the cover.

    • We can maintain the ventilation system without removing RAM, HDD, Wifi Card, keyboard like other models.

  5. How to clean and maintain Acer Aspire 4920 ventilation system: 手順 5、 1の画像 1
    • There are 4 screws numbered from 1 to 4. We should remove them in order of sequence, from 1 to 4. Use screwdriver to twist anticlockwise

  6. How to clean and maintain Acer Aspire 4920 ventilation system: 手順 6、 2の画像 1 How to clean and maintain Acer Aspire 4920 ventilation system: 手順 6、 2の画像 2
    • Unplug Fan jack. Then gently lift up the heat sink and pull it towards you to take it out

  7. How to clean and maintain Acer Aspire 4920 ventilation system: 手順 7、 3の画像 1 How to clean and maintain Acer Aspire 4920 ventilation system: 手順 7、 3の画像 2 How to clean and maintain Acer Aspire 4920 ventilation system: 手順 7、 3の画像 3
    • CPU use Thermal Glue and GPU use Thermal Pad to transfer heat to the heat sink. After years, they become dry, which reduce ability to transfer heat. We have to replace both Glue and Pad.

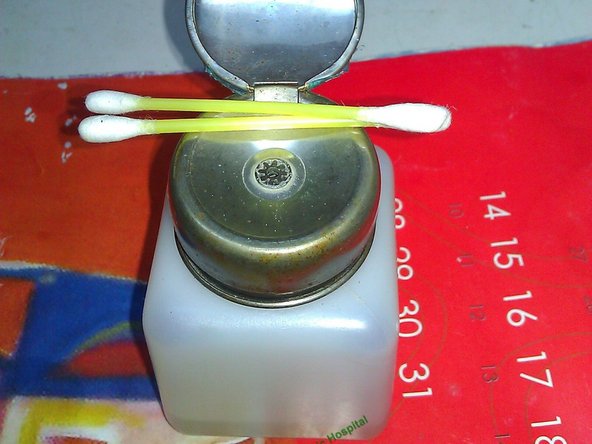
    • Use soft cloth (or wet tissue), soft cotton ear-pick and Acetone to clean 2 chips (CPU, GPU), heat sink thoroughly.

  8. How to clean and maintain Acer Aspire 4920 ventilation system: 手順 8、 2の画像 1 How to clean and maintain Acer Aspire 4920 ventilation system: 手順 8、 2の画像 2
    • Remove these 3 screws to take the fan out of housing

  9. How to clean and maintain Acer Aspire 4920 ventilation system: 手順 9、 2の画像 1 How to clean and maintain Acer Aspire 4920 ventilation system: 手順 9、 2の画像 2
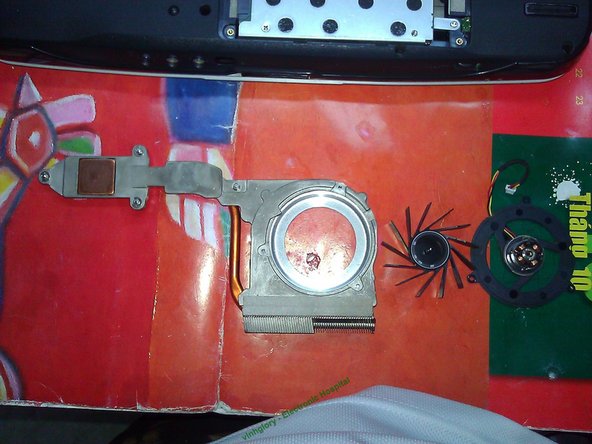
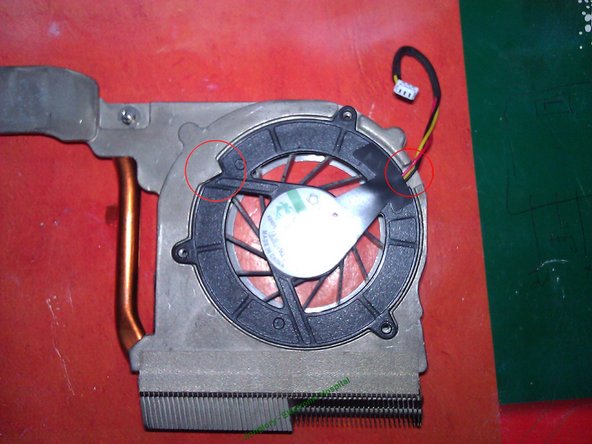
    • Take out the fan wing by lift it up. There's a magnetic ring that sucks stator coil. We can feel a little hard to pull out. Just give some more force and we can take out easily without breaking it.

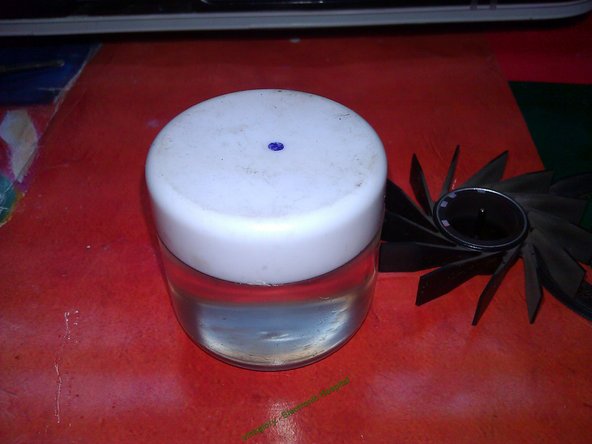
    • Afterwards, use Grease (a kind of component to lubricate fan axis). This help to make fan operate silently and fast

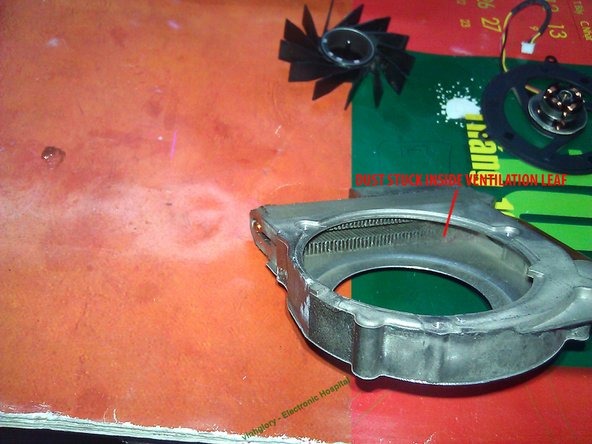
    • Remember to clean fan wing, fan base thoroughly

  10. How to clean and maintain Acer Aspire 4920 ventilation system: 手順 10、 3の画像 1 How to clean and maintain Acer Aspire 4920 ventilation system: 手順 10、 3の画像 2 How to clean and maintain Acer Aspire 4920 ventilation system: 手順 10、 3の画像 3
    • Now we clean the housing. Remove the dust stuck inside and outside ventilation leaves by a brush. Using a high pressure pump to clean is much better in this situation

  11. How to clean and maintain Acer Aspire 4920 ventilation system: 手順 11、 2の画像 1 How to clean and maintain Acer Aspire 4920 ventilation system: 手順 11、 2の画像 2
    • After cleaning fan and its housing. We assemble fan wing back to fan base. The n assemble fan set back to the housing.

    • Take care of the marks to assemble the fan correctly

  12. How to clean and maintain Acer Aspire 4920 ventilation system: 手順 12、 2の画像 1 How to clean and maintain Acer Aspire 4920 ventilation system: 手順 12、 2の画像 2
    • Apply new Thermal Glue and Thermal Pad to CPU and GPU chips. Be ready to reassemble the heat sink!

  13. How to clean and maintain Acer Aspire 4920 ventilation system: 手順 13、 1の画像 1
    • Put back heat sink into its right position. Adjust it so that screws lay on their right position.

    • Screw in order of sequence, from 1 to 4 firmly

    • Reconnect the fan jack to the fan outlet on the mainboard

    • Reassemble the back cover

    • Reassemble the battery

    • Now it is finished. Open your laptop. Start the OS. Use some applications such as "CPUID Hardware Monitor", "Temp core", "Everest Ultimate Edition" to check temperature of CPU, GPU, Hard disk, RAM. Their temperature is now lower than before.

    • End of guide! Thanks you for your attention!

終わりに

To reassemble your device, follow these instructions in reverse order.

2 の人々がこのガイドを完成させました。

作成者

4人の作成者と共同で作成されました。

vinhglory

メンバー登録日: 08/10/14

182 ポイント

1ガイドが承認済み

チーム

Electronic Hospital Electronic Hospital人のメンバー

Business

1 メンバー

1のガイドは作成済み

2 件のコメント

Excellent guide! I did this to my laptop several times.

I usually find a lot of dust in the inside square corners of the fan housing. Excellent machine with this minor flaw that needs to be addressed every 2 years in my experience.

It runs Lubuntu extremely fast and outperforms i3 and i5 machines with just 2GB Ram and no Windslows...

kindhearted02 - 返信

KH02, are you using Lubuntu on this model? 4920? Did you find all drivers for it to work on Linux?

I dug up my old 4920G a week ago, I just ordered a new processor for it, going from T5550 up to the T9500. I got 4gb ram already, and a 64gb ssd to replace the HD with.

tomdegerth -

コメントを追加

統計データ:

過去 24時間: 0

過去 7 日: 3

過去 30 日: 11

今までの合計 2,155