必要な工具と部品
-
-
Tape the top part of the printer and scanner together
-
*note : I started with the paper trays already removed
-
-
-
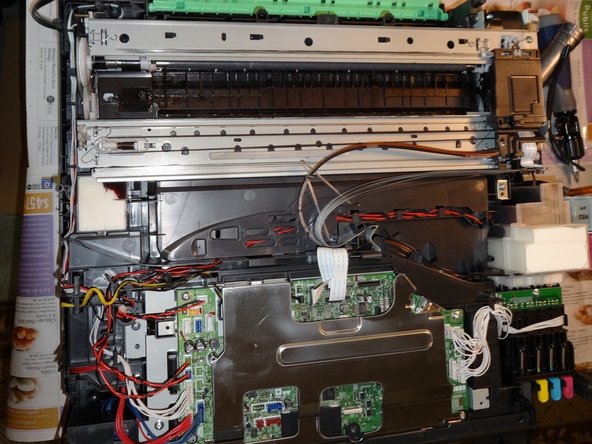
Remove the cover on the right side exposing the ribbon cable gently use the twizzers in the tabs to release it
-
Unplug the ribbon cable and slid it out
-
*note for reassembly: the ribbon cable placement holders can be removed to make it easier to re-thread the ribbon cable by gently pushing down the tabs with the spudger
-
-
-
-
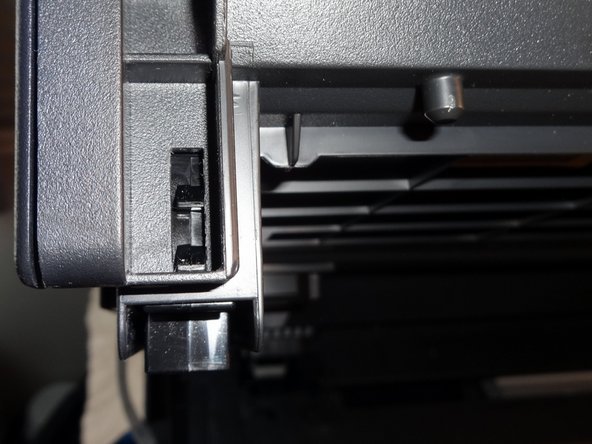
Remove the front corners by gently pulling upwards
-
Open the back paper jam cover.
-
-
-
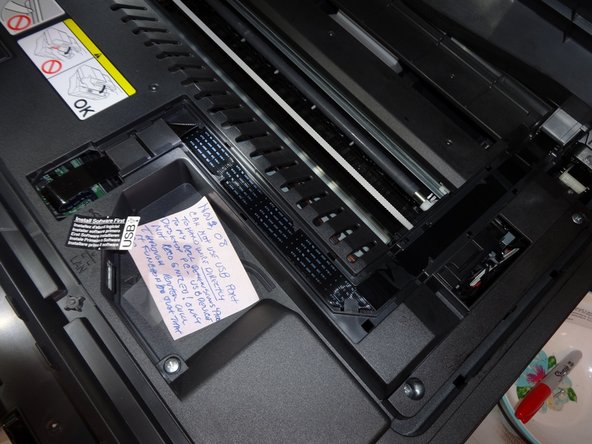
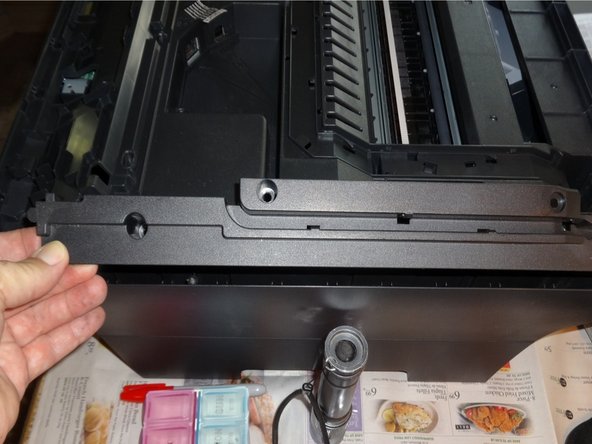
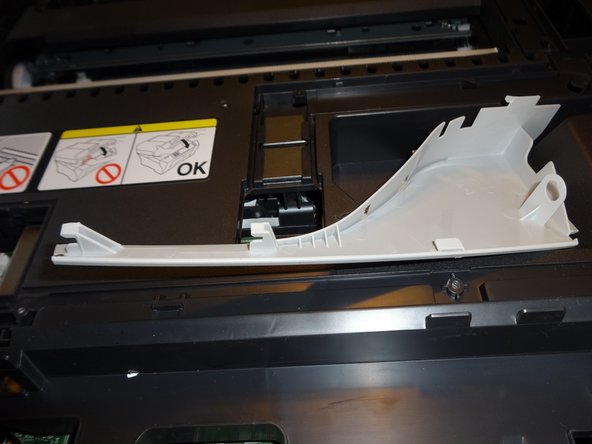
Lift off the cover and put aside out of the way
-
-
-
Slide the clear print head guide wire off the tab on the right side
-
*note: Put on gloves if you haven't already. It can get messy.
-
-
-
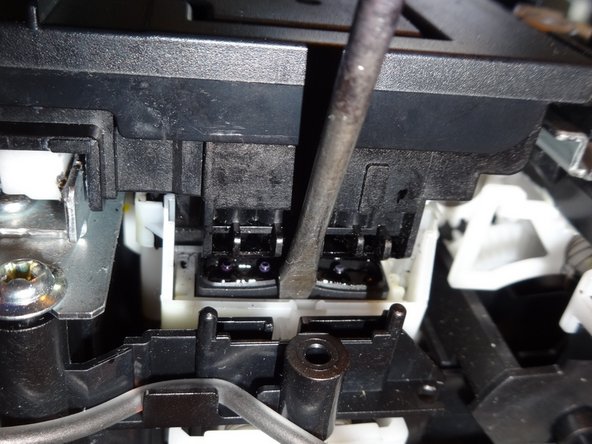
Using a spudger, press down on the plastic housing of the park carriage that the print head rests on.
-
Slide the print head to the left freeing it to move
-
-
-
Slide the print head left until it is at the end of the rail. You can feel it release (lift upwards when it aligns with the cut out notch)
-
Push the print head unit towards the back of the device and lift the unit from the back rail
-
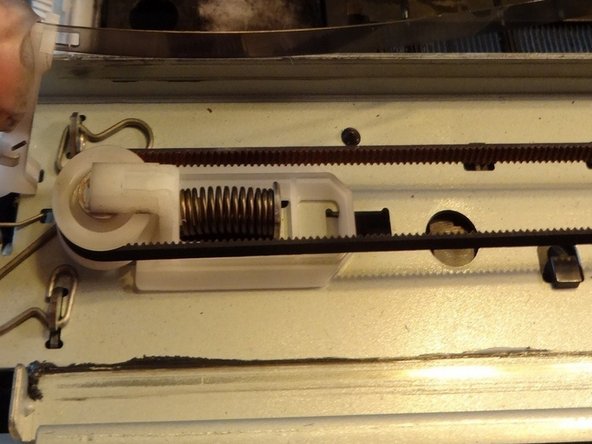
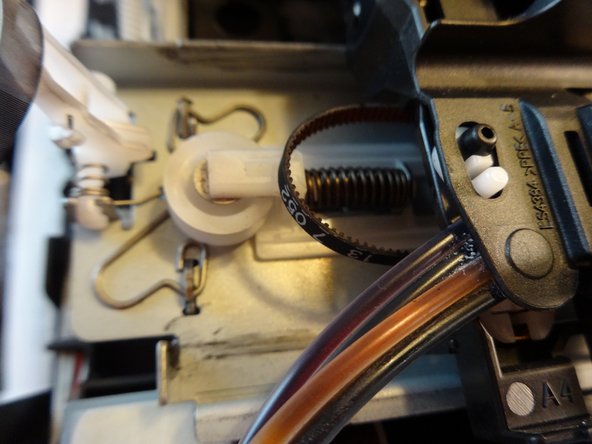
Using the spudger, press the spring section of the white pulley
-
Release the conveyor from the pulley while the spring is still compressed
-
Remove the conveyor from the gear on the other side of the device
-
-
-
How to clean with paper towel
-
Tear a single sheet of paper towel in half. Fold the sheet in half several times until it is about 1/2 inch wide.
-
Put a few drops of distilled water on top of the paper towel and lay it in the trough under the print head,. Move the print head over the towel and let it sit for at least 15 minutes. This will soften the ink on the print head.
-
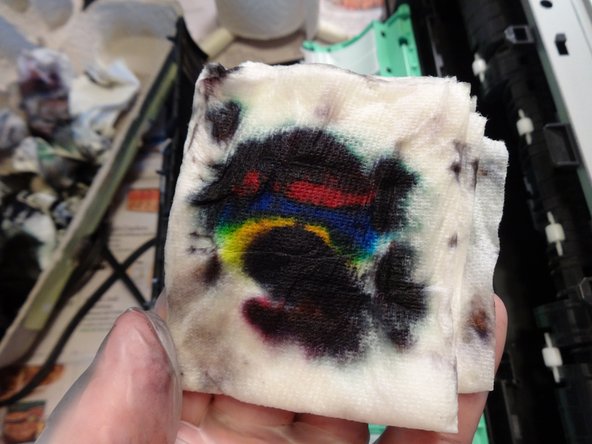
Move print head assembly back to its resting position. You will probably notice that the paper towel now has one big black blob of ink on it. (There is so much excess ink on the print head that all the colors are mixing to make black.)
-
If you cannot clearly see individual colors, then dampen another spot on the paper towel and move the print head back over the newly dampened spot on the paper towel. Continue repeating this until you see all the individual colors.
-
*note: when reassembling be certain to move the print head back to its resting position (the extreme right side above the park carriage)
-


To reassemble your device, follow these instructions in reverse order.
To reassemble your device, follow these instructions in reverse order.
13 の人々がこのガイドを完成させました。

24 件のコメント
Thanks for the guide. But I don't think you need to tear apart the printer to do that, just start a print cycle and when the printhead moves, plug the printer off. then you can freely move the printhead and put the paper towel under it.
Thank you! Thank you! I was getting no magenta ink at all - I tried this, took me 2 minutes and viola! It works perfectly now! Thank you!!!!!
Yes! Best comment ever! Saved me so much work. Let it sit 15 mins, instant success did 1 Cleaning and perfect printing.
Hello Filipe,
I have a problem with my printer and I came across this page. I have a Brother MFC-240C printer.
How do I reach the printerhead to clean it? Do I need to take off the top cover to reach it?
Thank you for your help.
Thanks Filipe for the extra advice :) I had already tried the paper towel method on my printer it did not work for me my print head was damaged and I had to replace it. I could not find any strip downs of my Printer at the time of posting this tutorial so I thought it was more useful for others in the future going this route