はじめに
This guide shows how to replace the battery in a Timex Expedition wristwatch.
必要な工具と部品
-
-
Removing the back requires a very thin jewelers screwdriver. I found one in an eyeglass repair kit that worked. Look for a place on the edge of the back plate where it is very slightly raised. Insert the screwdriver tip and pry upwards. It may not pop off all at once, it might take several incremental nudges before it releases.
-
-
-
With the back off, I found that the battery is held in place at the bottom by a "T" shaped bracket secured by a very tiny screw. Delicately removing the screw, the bracket came off and I replaced the battery (CR2016). Then using my fingernails I dropped the tiny screw back in place and secured the bracket.
-
-
-
-
Unfortunately, when I tested the alarm, it didn't work. The solution, it turns out, is that the back of the watch must be in a particular orientation. The correct orientation of the back plate is shown here.
-
You can test it by just holding the back plate in place with the fingers of one hand, and with the other hand pull out the alarm button. It should beep. If it doesn't beep, try adjusting the position of the back plate and try to hold it securely.
-
-
-
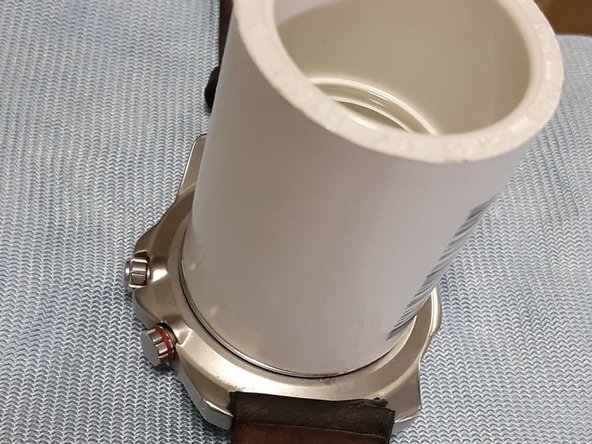
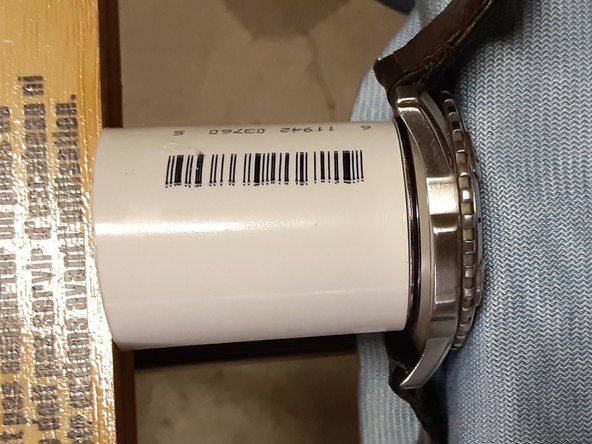
Once you have the back plate in the proper orientation it needs to be pressed into place. I found it impossible to perform this by hand. Eventually I found a short length of 3/4" PVC pipe.
-
Align the pipe with the back plate.
-
Place the watch and pipe in a vise. (Soft cloth used to protect the watch face). Slowly tighten the vise and you'll hear a pop when the back plate snaps into place.
-


With the watch reassembled, verify that it is functioning to your satisfaction.
With the watch reassembled, verify that it is functioning to your satisfaction.
5 の人々がこのガイドを完成させました。