メインコンテンツにスキップ

How to Replace a Wooden Gate Latch

必要な工具と部品

  1. How to Replace a Wooden Gate Latch, Gate Latch: 手順 1、 2の画像 1 How to Replace a Wooden Gate Latch, Gate Latch: 手順 1、 2の画像 2
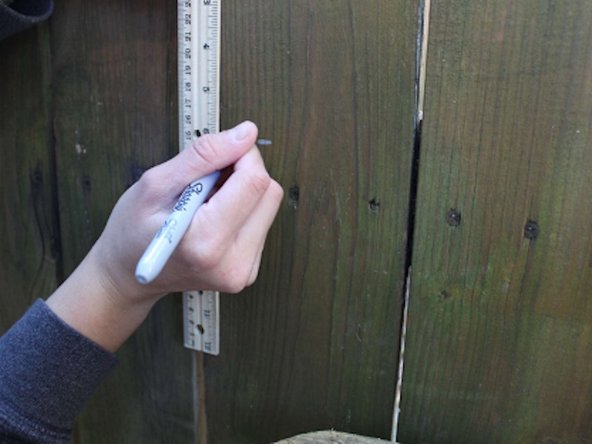
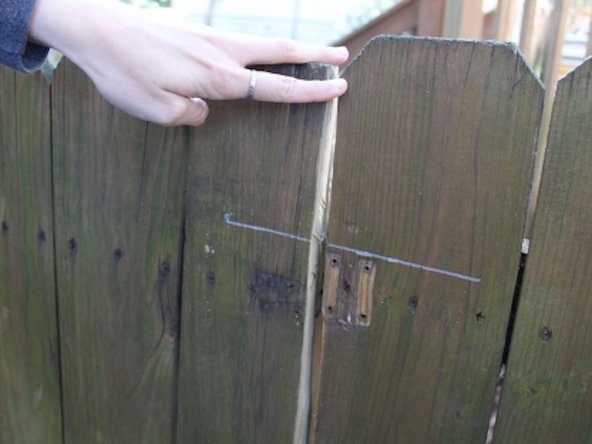
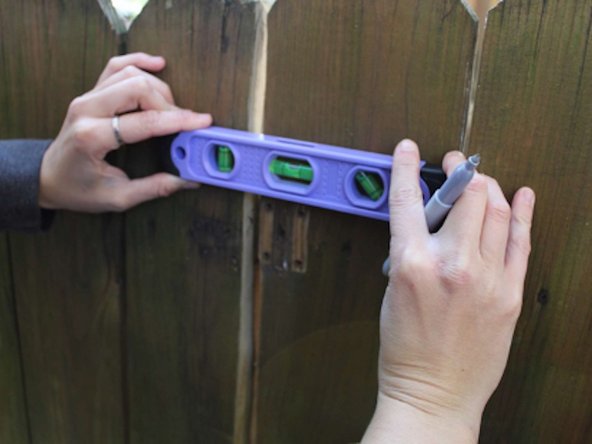
    • Using a ruler and a sharpie, draw a line starting at the bottom corner of the gate to the top corner of the gate, to ensure it is parallel with the rest of the gate.

  2. How to Replace a Wooden Gate Latch: 手順 2、 1の画像 1
    • Place a level on the gate to ensure that the gate is properly level.

  3. How to Replace a Wooden Gate Latch: 手順 3、 3の画像 1 How to Replace a Wooden Gate Latch: 手順 3、 3の画像 2 How to Replace a Wooden Gate Latch: 手順 3、 3の画像 3
    • Starting at the bottom of the gate, place the power saw on the sharpie line and cut along the entirety of the line.

    • Do saw from the opposite side of the fence.

  4. How to Replace a Wooden Gate Latch: 手順 4、 2の画像 1 How to Replace a Wooden Gate Latch: 手順 4、 2の画像 2
    • Using a ruler, measure 6 inches down from the top of the gate and mark that spot using a sharpie.

  5. How to Replace a Wooden Gate Latch: 手順 5、 3の画像 1 How to Replace a Wooden Gate Latch: 手順 5、 3の画像 2 How to Replace a Wooden Gate Latch: 手順 5、 3の画像 3
    • Using a ruler, measure 6 inches down from the top of the adjacent fence and mark the spot using a sharpie

  6. How to Replace a Wooden Gate Latch: 手順 6、 3の画像 1 How to Replace a Wooden Gate Latch: 手順 6、 3の画像 2 How to Replace a Wooden Gate Latch: 手順 6、 3の画像 3
    • At the marked location on the gate, attach the latch for the gate using a power drill and screws.

  7. How to Replace a Wooden Gate Latch: 手順 7、 3の画像 1 How to Replace a Wooden Gate Latch: 手順 7、 3の画像 2 How to Replace a Wooden Gate Latch: 手順 7、 3の画像 3
    • On the adjacent fence at the marked spot attach the second half of the latching mechanism using a power drill and screws.

  8. How to Replace a Wooden Gate Latch: 手順 8、 3の画像 1 How to Replace a Wooden Gate Latch: 手順 8、 3の画像 2 How to Replace a Wooden Gate Latch: 手順 8、 3の画像 3
    • Sand the edge of the gate that was cut using a power sander until the edge is smooth and fits properly when closing the gate.

終わりに

To reassemble your device, follow these instructions in reverse order.

作成者

1人の作成者と共同作成されました。

Gracie

メンバー登録日: 10/07/20

157 ポイント

1ガイドが承認済み

チーム

University of Memphis, Team S3-G7, Willis Fall 2020 University of Memphis, Team S3-G7, Willis Fall 2020人のメンバー

UM-WILLIS-F20S3G7

1 メンバー

1のガイドは作成済み

0 件のコメント

コメントを追加

統計データ:

過去 24時間: 0

過去 7 日: 9

過去 30 日: 41

今までの合計 1,090