メインコンテンツにスキップ

How to Repair a Loose Impress Mighty Mite Fan

必要な工具と部品

  1. How to Repair a Loose Impress Mighty Mite Fan, How to Repair a Loose Impress Mighty Mite Fan: 手順 1、 3の画像 1 How to Repair a Loose Impress Mighty Mite Fan, How to Repair a Loose Impress Mighty Mite Fan: 手順 1、 3の画像 2 How to Repair a Loose Impress Mighty Mite Fan, How to Repair a Loose Impress Mighty Mite Fan: 手順 1、 3の画像 3
    • Remove the single 0.8 mm screw using a Phillips #2 screwdriver. Use a pair of pliers to hold the hexagon nut so that it makes the process easier.

  2. How to Repair a Loose Impress Mighty Mite Fan: 手順 2、 2の画像 1 How to Repair a Loose Impress Mighty Mite Fan: 手順 2、 2の画像 2
    • Disconnect the hinges that hold the fan covers together.

  3. How to Repair a Loose Impress Mighty Mite Fan: 手順 3、 2の画像 1 How to Repair a Loose Impress Mighty Mite Fan: 手順 3、 2の画像 2
    • Remove the front cover and set it aside.

  4. How to Repair a Loose Impress Mighty Mite Fan: 手順 4、 3の画像 1 How to Repair a Loose Impress Mighty Mite Fan: 手順 4、 3の画像 2 How to Repair a Loose Impress Mighty Mite Fan: 手順 4、 3の画像 3
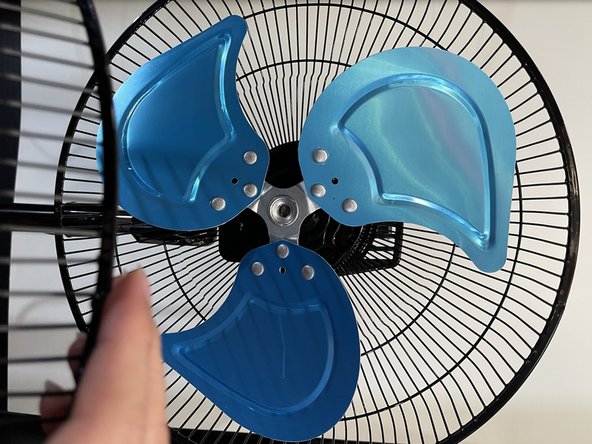
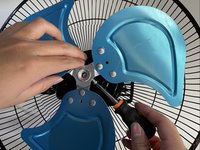
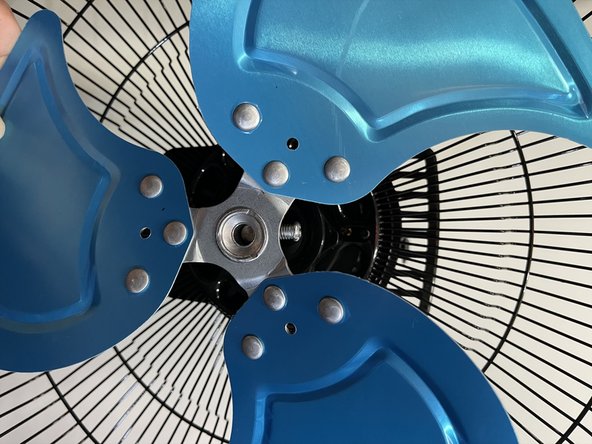
    • Use the Phillips #2 screwdriver to remove the 1.4 mm screw that holds the fan blades to the fan.

  5. How to Repair a Loose Impress Mighty Mite Fan: 手順 5、 2の画像 1 How to Repair a Loose Impress Mighty Mite Fan: 手順 5、 2の画像 2
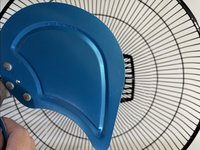
    • Remove the fan blades and set them aside.

  6. How to Repair a Loose Impress Mighty Mite Fan: 手順 6、 3の画像 1 How to Repair a Loose Impress Mighty Mite Fan: 手順 6、 3の画像 2 How to Repair a Loose Impress Mighty Mite Fan: 手順 6、 3の画像 3
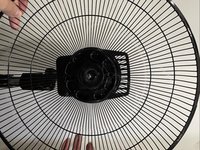
    • Position the fans back cover correctly aligned with its placeholders.

    • The placeholders are small and black which are not too visible on camera. There are two placeholders and they are shaped like cylinders.

  7. How to Repair a Loose Impress Mighty Mite Fan: 手順 7、 3の画像 1 How to Repair a Loose Impress Mighty Mite Fan: 手順 7、 3の画像 2 How to Repair a Loose Impress Mighty Mite Fan: 手順 7、 3の画像 3
    • Twist the big knob clockwise, that holds the back cover, until it is tight and you can no longer twist.

    • The back cover must be correctly placed on its holders before this step.

  8. How to Repair a Loose Impress Mighty Mite Fan: 手順 8、 3の画像 1 How to Repair a Loose Impress Mighty Mite Fan: 手順 8、 3の画像 2 How to Repair a Loose Impress Mighty Mite Fan: 手順 8、 3の画像 3
    • Place the fan blades back onto the fan and start screwing the 1.4 mm cross head screw into the clockwise direction until it is flat and can no longer screw.

  9. How to Repair a Loose Impress Mighty Mite Fan: 手順 9、 3の画像 1 How to Repair a Loose Impress Mighty Mite Fan: 手順 9、 3の画像 2 How to Repair a Loose Impress Mighty Mite Fan: 手順 9、 3の画像 3
    • Place the front cover back onto the fan with the punch-holes aligned so that the small bolt can go through.

    • These punch-holes should be aligned and you should be able to see through it.

  10. How to Repair a Loose Impress Mighty Mite Fan: 手順 10、 3の画像 1 How to Repair a Loose Impress Mighty Mite Fan: 手順 10、 3の画像 2 How to Repair a Loose Impress Mighty Mite Fan: 手順 10、 3の画像 3
    • Place the .8 mm cross head screw back inside the punch-hole and start screwing the hexagon nut by hand so that this process is easier.

    • Do not tighten this too much as you might need to repeat the whole process in the future of your fans usage.

  11. How to Repair a Loose Impress Mighty Mite Fan: 手順 11、 2の画像 1 How to Repair a Loose Impress Mighty Mite Fan: 手順 11、 2の画像 2
    • Close the hinges so that the covers are joined back together.

終わりに

To repeat the process start from step 1.

作成者

1人の作成者と共同作成されました。

Alexis S

メンバー登録日: 10/05/21

193 ポイント

1ガイドが承認済み

チーム

CSU Los Angeles, Team 11-20, Grodsky Fall 2021 CSU Los Angeles, Team 11-20, Grodsky Fall 2021人のメンバー

CSULA-GRODSKY-F21S11G20

1 メンバー

1のガイドは作成済み

0 件のコメント

コメントを追加

統計データ:

過去 24時間: 0

過去 7 日: 11

過去 30 日: 29

今までの合計 707