メインコンテンツにスキップ

How to Remove Wax and Blockage from Starkey Halo RIC Aid Replacement

必要な工具と部品

  1. How to Remove Wax and Blockage from Starkey Halo RIC Aid Replacement, Starkey Halo RIC Aid Wax Guard: 手順 1、 3の画像 1 How to Remove Wax and Blockage from Starkey Halo RIC Aid Replacement, Starkey Halo RIC Aid Wax Guard: 手順 1、 3の画像 2 How to Remove Wax and Blockage from Starkey Halo RIC Aid Replacement, Starkey Halo RIC Aid Wax Guard: 手順 1、 3の画像 3
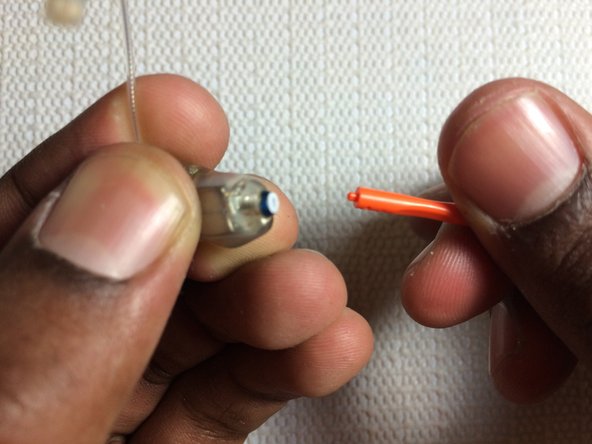
    • Detach the receiver from Starkey Halo Receiver-In-Canal hearing aid.

    • Place the receiver with its small hole away from the surface.

    • This is assuming that the problem lies within the receiver (wax and other blockage).

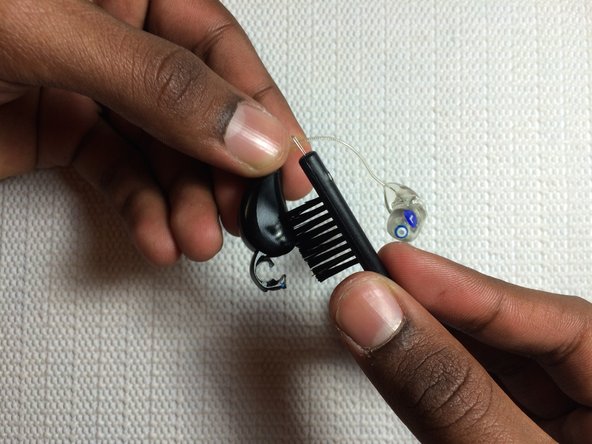
    • If you know that there is no problem with the receiver and want to clean the microphone, move on to Step 4.

  2. How to Remove Wax and Blockage from Starkey Halo RIC Aid Replacement: 手順 2、 3の画像 1 How to Remove Wax and Blockage from Starkey Halo RIC Aid Replacement: 手順 2、 3の画像 2 How to Remove Wax and Blockage from Starkey Halo RIC Aid Replacement: 手順 2、 3の画像 3
    • Take the Hear Clear Receiver wax guard and carefully insert the orange end into the receiver’s hole.

    • The orange end is used to remove the old wax guard, and the white end consists of the new wax guard.

    • Rotate the wax guard continuously while inserting it, so as to gain a firm grip on the old wax guard.

    • There will be wax in the receiver that might fall out while you rotate the orange end, so make sure you perform this action with newspaper under.

    • Gently pull the stick out.

    • It should have the receiver’s old wax guard attached to it.

  3. How to Remove Wax and Blockage from Starkey Halo RIC Aid Replacement: 手順 3、 3の画像 1 How to Remove Wax and Blockage from Starkey Halo RIC Aid Replacement: 手順 3、 3の画像 2 How to Remove Wax and Blockage from Starkey Halo RIC Aid Replacement: 手順 3、 3の画像 3
    • Rotate the stick 180 degrees with the clean wax guard facing the receiver.

    • Carefully insert the stick inside the receiver, and twist it.

    • Gently pull the stick off.

    • The clean white wax guard should have latched itself onto the receiver.

    • By replacing the receiver’s old wax guard with a new one, you have effectively removed all wax and blockage from the receiver.

  4. How to Remove Wax and Blockage from Starkey Halo RIC Aid Replacement: 手順 4、 3の画像 1 How to Remove Wax and Blockage from Starkey Halo RIC Aid Replacement: 手順 4、 3の画像 2 How to Remove Wax and Blockage from Starkey Halo RIC Aid Replacement: 手順 4、 3の画像 3
    • Carefully plug the clean receiver back into the black microphone.

    • Proceed to clean the battery holder with the small brush.

    • This clears any possible debris or moisture.

終わりに

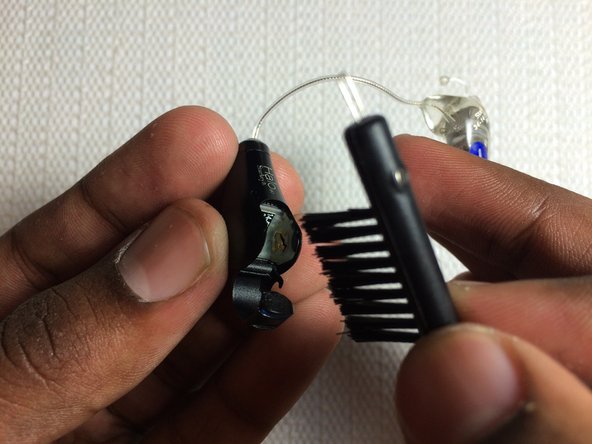
To do this with your other hearing aid, follow the same steps written above. If there is no noticeable change in the RIC Receiver, it is recommended to check for electrical or mechanical defects in the microphone.

5 の人々がこのガイドを完成させました。

作成者

3人の作成者と共同で作成されました。

Ashwin Ramanathan

メンバー登録日: 04/08/15

227 ポイント

1ガイドが承認済み

チーム

Cal Poly, Team 30-4, Green Spring 2015 Cal Poly, Team 30-4, Green Spring 2015人のメンバー

CPSU-GREEN-S15S30G4

5 メンバー

6のガイドは作成済み

0 件のコメント

コメントを追加

統計データ:

過去 24時間: 1

過去 7 日: 4

過去 30 日: 19

今までの合計 5,180