メインコンテンツにスキップ

How to Operate the Timer Relay Box

必要な工具と部品

  1. How to Operate the Timer Relay Box, Power the box: 手順 1、 2の画像 1 How to Operate the Timer Relay Box, Power the box: 手順 1、 2の画像 2
    • Connect the box to the mains power using an IEC C13 cable (kettle cable)

    • Check the switch is turned on.

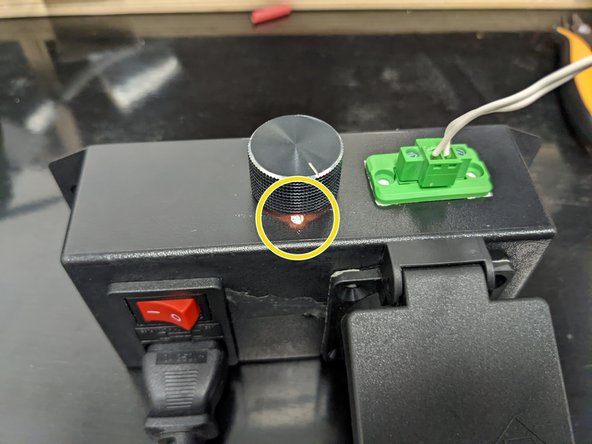
    • Wait a few seconds, the LED under the knob will hold green to indicate the system is operating.

  2. How to Operate the Timer Relay Box, Connect the button trigger: 手順 2、 1の画像 1
    • Connect the button cable to the timer box, as shown.

  3. How to Operate the Timer Relay Box, Connect the equipment: 手順 3、 1の画像 1
    • Connect the equipment you would like the box to switch on and off.

  4. How to Operate the Timer Relay Box, Set the box to calibration mode: 手順 4、 1の画像 1
    • Turn the system off and on using the switch at the power input

    • Push and hold the rotary knob, while the system is being powered on. Release the knob when the LED is solid purple.

    • The LED will begin to flash blue when ready.

  5. How to Operate the Timer Relay Box, Set the trigger delay: 手順 5、 1の画像 1
    • Turn the knob clockwise to increase the delay, and counter clockwise to decrease. The delay changes in 0.5 second increments.

    • Turn the knob until the desired delay is achieved.

    • Press the knob to set the delay. The LED will flash green when the delay has been saved.

  6. How to Operate the Timer Relay Box, Set the power delay: 手順 6、 1の画像 1
    • Turn the knob clockwise to increase the delay, and counter clockwise to decrease. The delay changes in 0.5 second increments.

    • Turn the knob until the desired delay is achieved.

    • Press the knob to set the delay. The LED will flash green when the delay has been saved.

  7. How to Operate the Timer Relay Box, Operate the Timer Box: 手順 7、 3の画像 1 How to Operate the Timer Relay Box, Operate the Timer Box: 手順 7、 3の画像 2 How to Operate the Timer Relay Box, Operate the Timer Box: 手順 7、 3の画像 3
    • Once calibrated, the timer box will switch to operation mode.

    • The LED will hold green when the box is waiting to be triggered.

    • The Box can be triggered through the button wires, or the encoder button

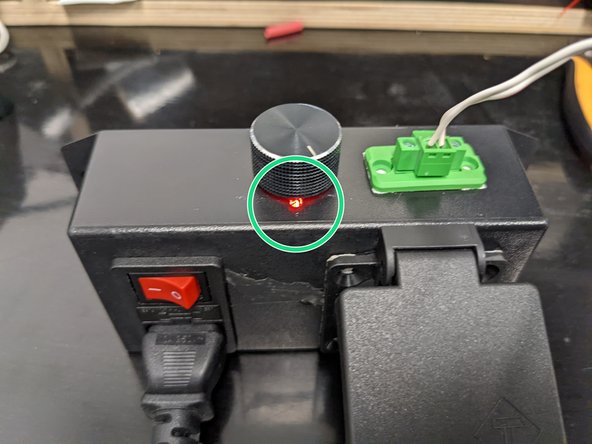
    • Once triggered, the LED will turn amber for the initial delay

    • The LED will turn RED when the equipment is being powered.

    • The LED will return to green once the system is ready to be triggered again.

    • Cycle the power, and trigger the system to ensure the calibration has been saved.

終わりに

To reassemble your device, follow these instructions in reverse order.

作成者

1人の作成者と共同作成されました。

James Schreiber

メンバー登録日: 02/10/22

230 ポイント

2のガイドは作成済み

0 件のコメント

コメントを追加

統計データ:

過去 24時間: 0

過去 7 日: 0

過去 30 日: 8

今までの合計 145