メインコンテンツにスキップ

このバージョンは誤った内容を含んでいる可能性があります。最新の承認済みスナップショットに切り替えてください。

必要な工具と部品

  1. , ケースパネル: 手順 1、 1の画像 1
    • レバーを持ち上げて、ケースをアンロックします。

  2. : 手順 2、 1の画像 1
    • Mac Proのサイドパネルを取り外します。

    • 内部コンポーネントの作業を始める前に、接地された表面上に触れて、静電気を放電してください。

  3. , ハードドライブベイを確認します。: 手順 3、 1の画像 1
    • ケースを開口したら、ハードドライブベイの位置を確認します。

    • これは通常、ケース正面に一番近いドライブです。

  4. , ハードドライブベイを取り出します: 手順 4、 3の画像 1 , ハードドライブベイを取り出します: 手順 4、 3の画像 2 , ハードドライブベイを取り出します: 手順 4、 3の画像 3
    • サイドパネル取り外しに使用したクリップが開いているか、もしくはハードドライブベイがスライドしないことを確認してください

    • 底からメタル製スレッドをつかんで、ハードドライブをまっすぐ引き出します。 最初の作業は少し難しいかもしれませんが、外れれば、取り外し作業は簡単です。

  5. , メタル製ハードドライブスレッドを外します: 手順 5、 3の画像 1 , メタル製ハードドライブスレッドを外します: 手順 5、 3の画像 2 , メタル製ハードドライブスレッドを外します: 手順 5、 3の画像 3
    • ハードドライブのスレッドもしくはサイドを摘みます。全て3つの画像にあるグリーンの回路板には触らないでください。

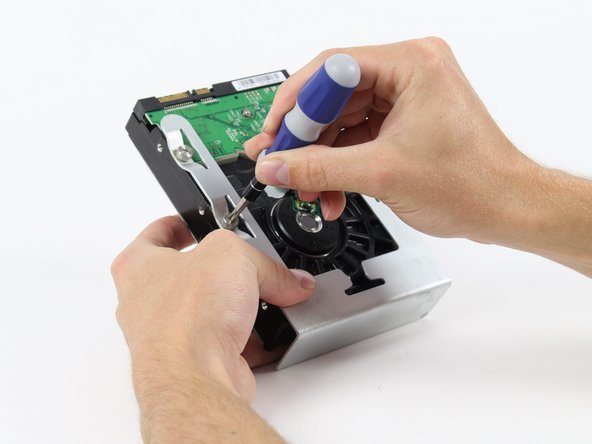
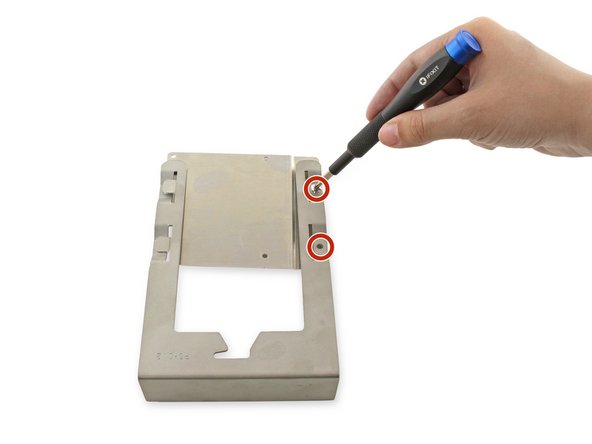
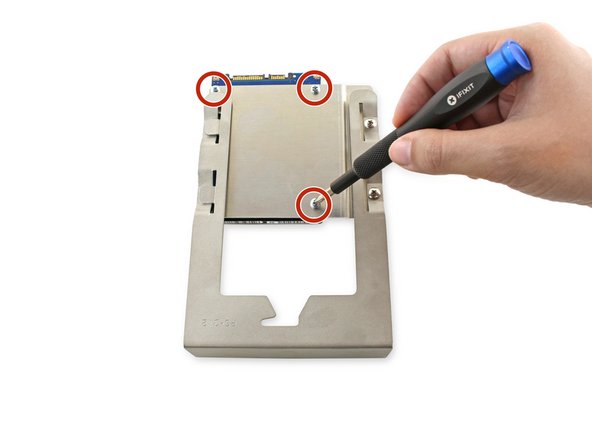
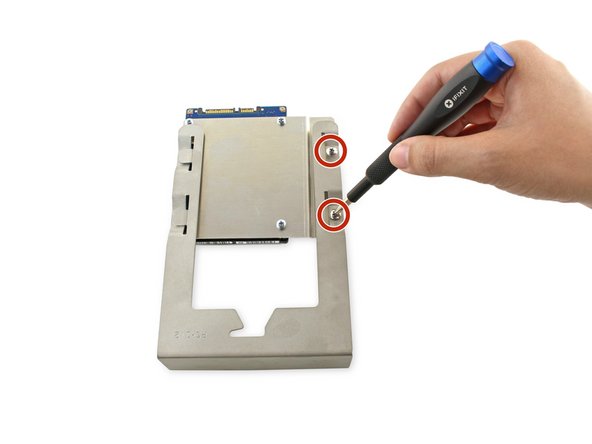
    • ハードドライブスレッド上に留められた4つの6-32タイプネジを特定します。

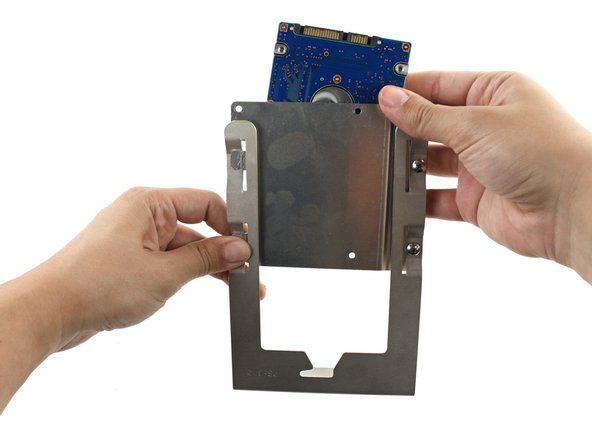
    • プラスネジドライバーを使って4本のネジを外して、メタル製スレッドをハードドライブから取り出します。
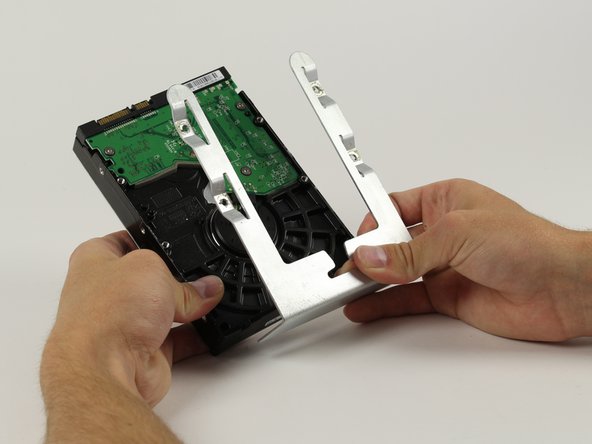
  6. この手順は未翻訳です。 翻訳を手伝う。

    : 手順 6、 3の画像 1 : 手順 6、 3の画像 2 : 手順 6、 3の画像 3
    • Insert the two tabs on the left side of the metal adapter bracket into the slots on the left side of the hard drive bay sled.

    • Align the holes on the right side.

  7. この手順は未翻訳です。 翻訳を手伝う。

    : 手順 7、 1の画像 1
    • Screw the two 7.8mm PH0 screws into the two holes on the right.

    • Leave these screws slightly loose; they will be tightened once the hard drive is attached.

  8. この手順は未翻訳です。 翻訳を手伝う。

    : 手順 8、 3の画像 1 : 手順 8、 3の画像 2 : 手順 8、 3の画像 3
    • Align the holes in the hard drive with the three holes on the bracket.

    • Screw the three 6.1mm PH0 screws into the bracket and hard drive.

    • These screws can be secured tightly.

  9. この手順は未翻訳です。 翻訳を手伝う。

    : 手順 9、 1の画像 1
    • Tighten the two 7.8mm PH0 screws on the right side of the bracket.

ゴール

5 の人々がこのガイドを完成させました。

作成者

1人の作成者と共同作成されました。

Kristen Gismondi

メンバー登録日: 11/12/14

82,822 ポイント

203のガイドは作成済み

チーム

iFixit iFixit人のメンバー

Staff

137 メンバー

17,457のガイドは作成済み

コメント 1 件

Tried installing these on MacPro5,1 today. Very disappointed. Sled does not slide into place correctly, and any attempt to nudge it into place only scratches the carrier.

Going back to OWC sled to mount SSD drives.

tjod - 返信

コメントを追加

統計データ:

過去 24時間: 2

過去 7 日: 11

過去 30 日: 46

今までの合計 5,823