メインコンテンツにスキップ

Hover-1 XLS Back Seat Light Replacement

必要な工具と部品

  1. Hover-1 XLS Back Seat Light Replacement, Back Seat Light: 手順 1、 2の画像 1 Hover-1 XLS Back Seat Light Replacement, Back Seat Light: 手順 1、 2の画像 2
    • Remove the seat by removing the six 16mm screws with a Phillips #2 screwdriver.

    • Remember that the seat is still connected by the wiring once you unscrew it. Pulling too hard can damage the connector.

  2. Hover-1 XLS Back Seat Light Replacement: 手順 2、 3の画像 1 Hover-1 XLS Back Seat Light Replacement: 手順 2、 3の画像 2 Hover-1 XLS Back Seat Light Replacement: 手順 2、 3の画像 3
    • Disconnect the wires by pushing the levers on either side of the connector and on top.

    • Remove the seat from the bike.

  3. Hover-1 XLS Back Seat Light Replacement: 手順 3、 1の画像 1
    • Use a Phillips #2 screwdriver to remove the four 10mm screws on the bottom of the back seat.

  4. Hover-1 XLS Back Seat Light Replacement: 手順 4、 2の画像 1 Hover-1 XLS Back Seat Light Replacement: 手順 4、 2の画像 2
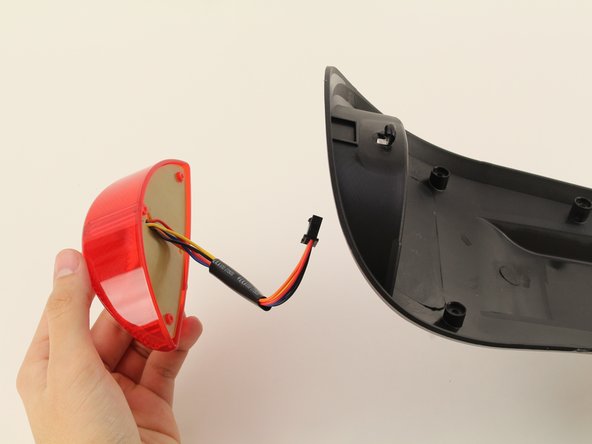
    • Pull the light from behind the bottom of the seat frame. Pull the wiring all the way through.

終わりに

To reassemble your device, follow these instructions in reverse order.

ある他の人がこのガイドを完成しました。

作成者

3人の作成者と共同で作成されました。

Christian Roberts

メンバー登録日: 01/24/19

248 ポイント

1ガイドが承認済み

チーム

Cal Poly, Team S1-G2, White Winter 2019 Cal Poly, Team S1-G2, White Winter 2019人のメンバー

CPSU-WHITE-W19S1G2

3 メンバー

6のガイドは作成済み

0 件のコメント

コメントを追加

統計データ:

過去 24時間: 2

過去 7 日: 6

過去 30 日: 9

今までの合計 342