メインコンテンツにスキップ

Hover-1 Maverick Central Bearing Replacement

必要な工具と部品

  1. Hover-1 Maverick Central Bearing Replacement, Central Bearing: 手順 1、 3の画像 1 Hover-1 Maverick Central Bearing Replacement, Central Bearing: 手順 1、 3の画像 2 Hover-1 Maverick Central Bearing Replacement, Central Bearing: 手順 1、 3の画像 3
    • Remove the twenty 15mm Phillips #1 screws from the shell of the hoverboard.

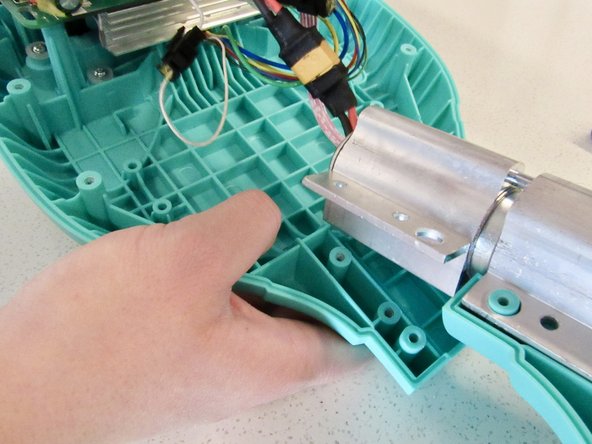
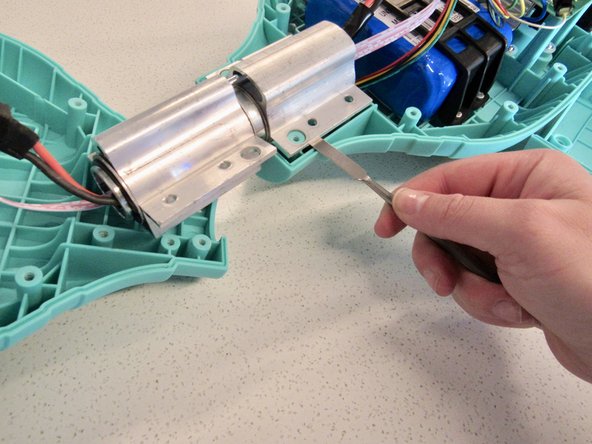
    • Remove the shell from the hoverboard. The central bearing is located in the center.

  2. Hover-1 Maverick Central Bearing Replacement: 手順 2、 1の画像 1
    • Unscrew the eight 16mm Phillips #1 screws holding the central bearing in place.

  3. Hover-1 Maverick Central Bearing Replacement: 手順 3、 2の画像 1 Hover-1 Maverick Central Bearing Replacement: 手順 3、 2の画像 2
    • Unplug the wires that run through the central bearing. There is a black and yellow one that attaches to the battery and a set of white ones that attach to the motherboard.

    • Run these wires out through the other end of the central bearing.

  4. Hover-1 Maverick Central Bearing Replacement: 手順 4、 2の画像 1 Hover-1 Maverick Central Bearing Replacement: 手順 4、 2の画像 2
    • One side of the bearing is easy to pop out with your hands.

    • The other side of the bearing has wiring for the LED light running under it, so it cannot be pulled out with your hands. To get leverage, carefully use the metal spudger to wedge out this other side.

  5. Hover-1 Maverick Central Bearing Replacement: 手順 5、 1の画像 1
    • Take the central bearing out of the board.

終わりに

To reassemble your device, follow these instructions in reverse order.

作成者

3人の作成者と共同で作成されました。

Piper Feldman

メンバー登録日: 01/23/20

409 ポイント

4のガイドは作成済み

チーム

Cal Poly, Team S2-G2, White Winter 2020 Cal Poly, Team S2-G2, White Winter 2020人のメンバー

CPSU-WHITE-W20S2G2

2 メンバー

4のガイドは作成済み

コメント 1 件

Where do I buy this central bearing of hover 1?

Sinan Sönmez - 返信

コメントを追加

統計データ:

過去 24時間: 0

過去 7 日: 4

過去 30 日: 9

今までの合計 475