メインコンテンツにスキップ

Hover-1 Liberty Gyroscope Sensor Boards Replacement

必要な工具と部品

  1. Hover-1 Liberty Gyroscope Sensor Boards Replacement, Bottom Cover: 手順 1、 2の画像 1 Hover-1 Liberty Gyroscope Sensor Boards Replacement, Bottom Cover: 手順 1、 2の画像 2
    • Flip the hoverboard over so the labels are facing upwards.

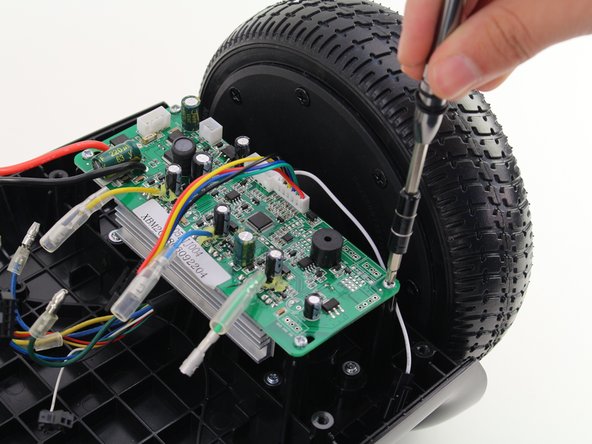
    • Remove the twenty 18mm screws using a Phillips #2 screwdriver and twisting counterclockwise.

  2. Hover-1 Liberty Gyroscope Sensor Boards Replacement: 手順 2、 2の画像 1 Hover-1 Liberty Gyroscope Sensor Boards Replacement: 手順 2、 2の画像 2
    • Remove the bottom cover by lifting it away from the hoverboard.

    • The cover on the side without the battery has two wires connecting the power button and charging port.

  3. Hover-1 Liberty Gyroscope Sensor Boards Replacement: 手順 3、 3の画像 1 Hover-1 Liberty Gyroscope Sensor Boards Replacement: 手順 3、 3の画像 2 Hover-1 Liberty Gyroscope Sensor Boards Replacement: 手順 3、 3の画像 3
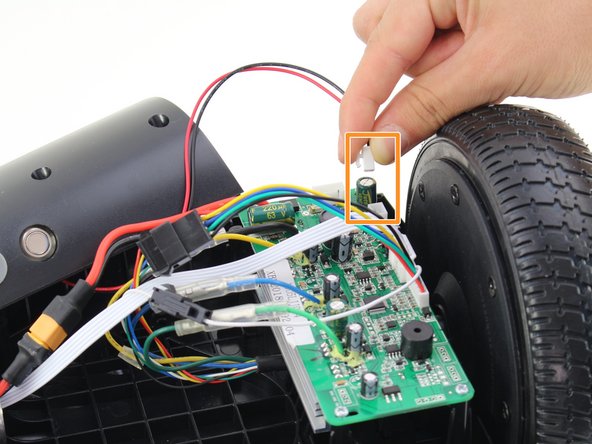
    • Remove one connector from the non-battery side circuit board.

    • Remove the next connector from the non-battery side circuit board.

    • To remove the connectors, pinch the plug and pull away from the circuit board.

  4. Hover-1 Liberty Gyroscope Sensor Boards Replacement, Gyroscope Sensor Boards: 手順 4、 1の画像 1
    • Place the hoverboard so the sensor boards face you.

    Where can you purchase the replacement boards?

    jparram - 返信

  5. Hover-1 Liberty Gyroscope Sensor Boards Replacement: 手順 5、 2の画像 1 Hover-1 Liberty Gyroscope Sensor Boards Replacement: 手順 5、 2の画像 2
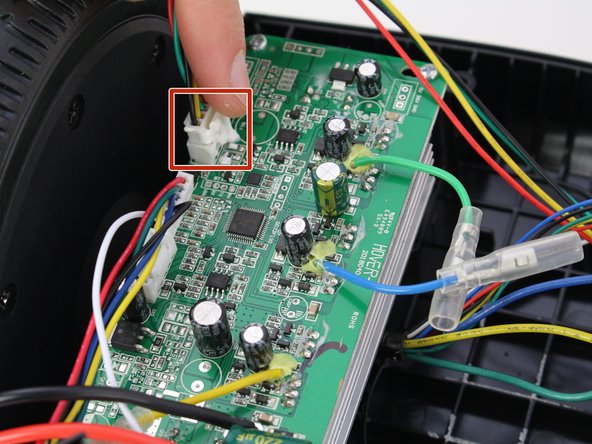
    • Remove battery connector by pulling it apart.

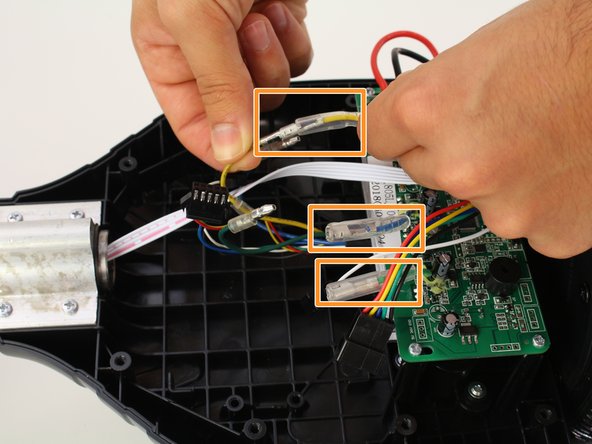
    • Slide the rubber sheaths away from the connector on the blue, green, and yellow wires.

    • Disconnect the colored wires by pulling them apart.

    • The large colored wires connecting the sensor boards to the wheels need to match for the motor to operate correctly.

    Hola buenos dias, sabes que requiero las carcasas de este mismo modelo, tendrás?

    Hugo Villaverde - 返信

  6. Hover-1 Liberty Gyroscope Sensor Boards Replacement: 手順 6、 2の画像 1 Hover-1 Liberty Gyroscope Sensor Boards Replacement: 手順 6、 2の画像 2
    • Remove the white cable from the sensor boards by disconnecting the cable on each side of the hoverboard.

    • To release the cable connector, squeeze the sides while pulling it away from the sensor board.

  7. Hover-1 Liberty Gyroscope Sensor Boards Replacement: 手順 7、 2の画像 1 Hover-1 Liberty Gyroscope Sensor Boards Replacement: 手順 7、 2の画像 2
    • Remove the four 10mm screws with a Phillips #1 screwdriver.

  8. Hover-1 Liberty Gyroscope Sensor Boards Replacement: 手順 8、 2の画像 1 Hover-1 Liberty Gyroscope Sensor Boards Replacement: 手順 8、 2の画像 2
    • Remove the sensor board by lifting it away from the hoverboard.

    • Repeat steps 4-8 to remove the sensor board from the other side.

終わりに

To reassemble your device, follow these instructions in reverse order.

6 の人々がこのガイドを完成させました。

作成者

4人の作成者と共同で作成されました。

Eduardo Miranda

メンバー登録日: 10/08/18

355 ポイント

2のガイドは作成済み

チーム

Cal Poly, Team S13-G2, White Fall 2018 Cal Poly, Team S13-G2, White Fall 2018人のメンバー

CPSU-WHITE-F18S13G2

3 メンバー

4のガイドは作成済み

9 件のコメント

Where can you purchase the replacement board for the Hover-1 liberty?

Clifton Hale - 返信

Where do you get replacement board?

Tim Sole - 返信

After riding just a few times the hover board wouldn’t move. Also it has a rattle inside

Regina - 返信

Make this site useful by telling us where we can buy a new circuit board.

tim stoinski - 返信

Where do you get circuit board from.

markrichardowen - 返信

I am looking for the Hover 1 Nova YS-SXT-V4.2a board where can I find it. davewms@santel.net

davewms - 返信

Hello Eduardo. Please can you tell me who sells specifically this version of the controller boards ?

Kevin Pieterse - 返信

Hi all, do you know where I can buy a Hover-1 Rocker Gyroscope Sensor Boards?

Thanks Peter

Peter hagen - 返信

I replaced motherboard and gyroscope still have a red light on one side green on battery side

Glenna Legg -

コメントを追加

統計データ:

過去 24時間: 2

過去 7 日: 19

過去 30 日: 77

今までの合計 8,791