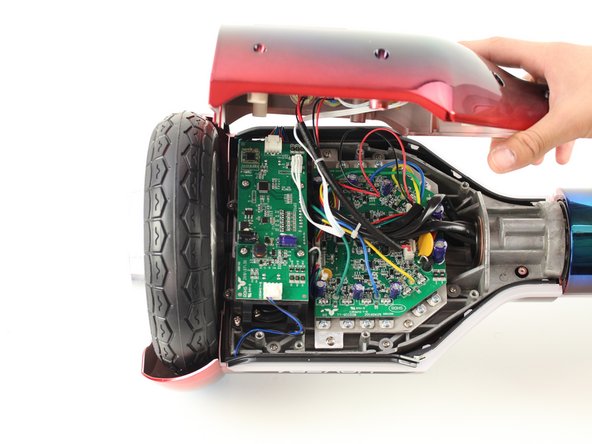
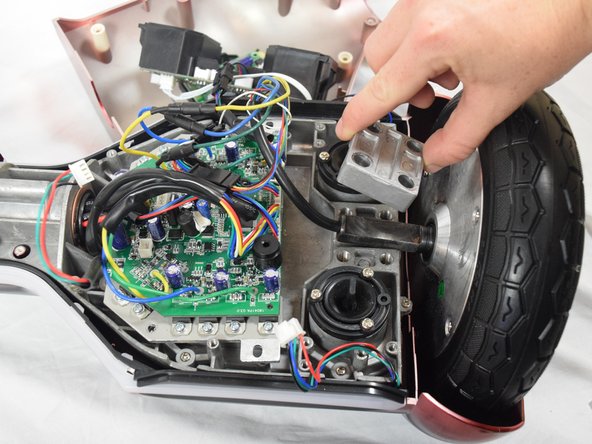
メインコンテンツにスキップ

Hover-1 Horizon Wheel Wires Replacement

必要な工具と部品

  1. Hover-1 Horizon Wheel Wires Replacement, Base Plate: 手順 1、 2の画像 1 Hover-1 Horizon Wheel Wires Replacement, Base Plate: 手順 1、 2の画像 2
    • Remove the six 12mm Phillips #2 screws holding the base plate.

  2. Hover-1 Horizon Wheel Wires Replacement: 手順 2、 2の画像 1 Hover-1 Horizon Wheel Wires Replacement: 手順 2、 2の画像 2
    • Remove the two 11mm Phillips #1 screws that hold the base plate to the body.

  3. Hover-1 Horizon Wheel Wires Replacement: 手順 3、 3の画像 1 Hover-1 Horizon Wheel Wires Replacement: 手順 3、 3の画像 2 Hover-1 Horizon Wheel Wires Replacement: 手順 3、 3の画像 3
    • Remove the base plate by lifting it up.

    • The base plate is connected to the body with wires. The wires are long enough to set the base plate to the side.

  4. Hover-1 Horizon Wheel Wires Replacement, Left Gyroscope Sensor Board: 手順 4、 3の画像 1 Hover-1 Horizon Wheel Wires Replacement, Left Gyroscope Sensor Board: 手順 4、 3の画像 2 Hover-1 Horizon Wheel Wires Replacement, Left Gyroscope Sensor Board: 手順 4、 3の画像 3
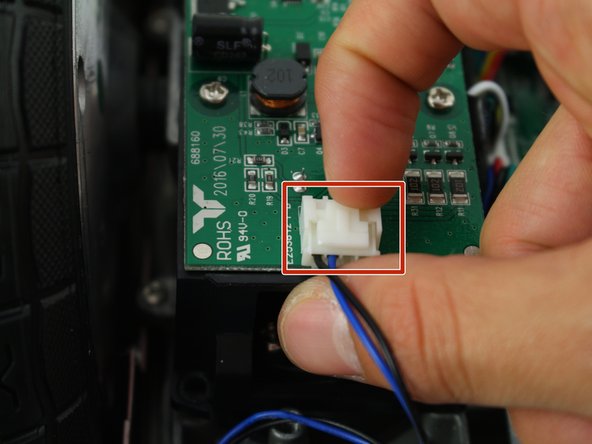
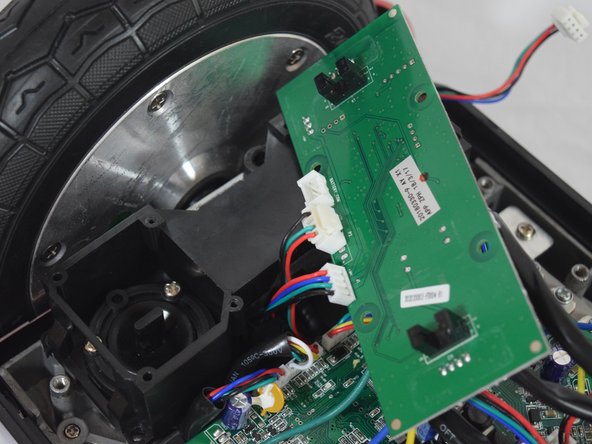
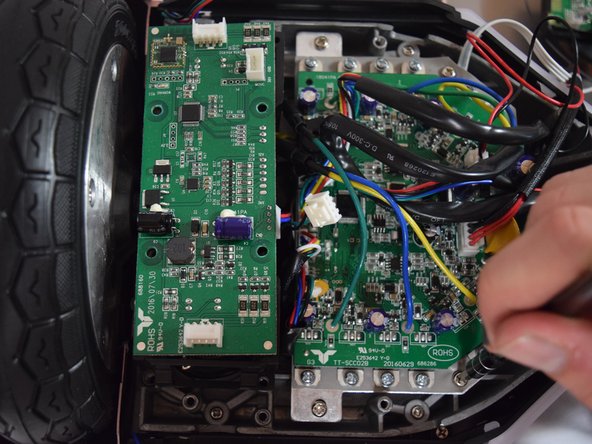
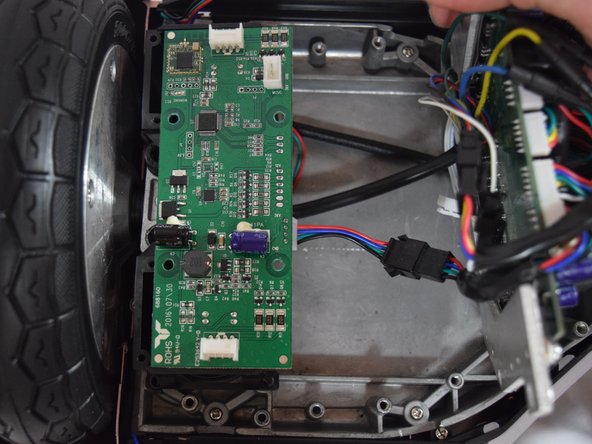
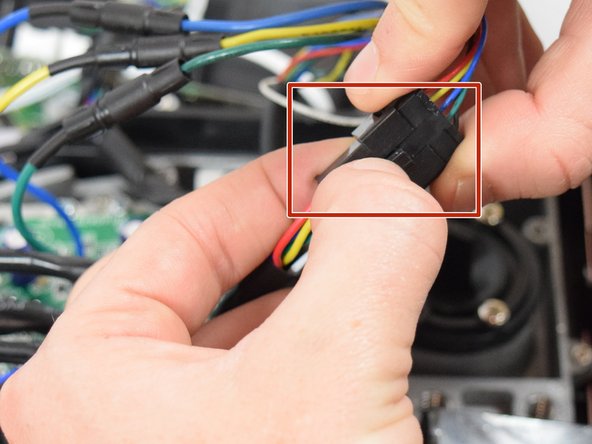
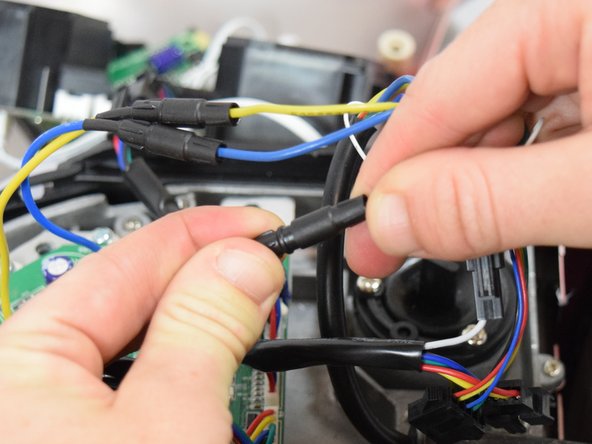
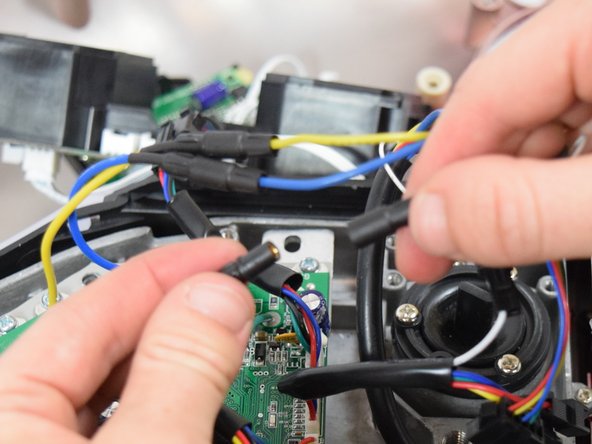
    • Remove the two connectors on either side of the board by lifting the tab and pulling out.

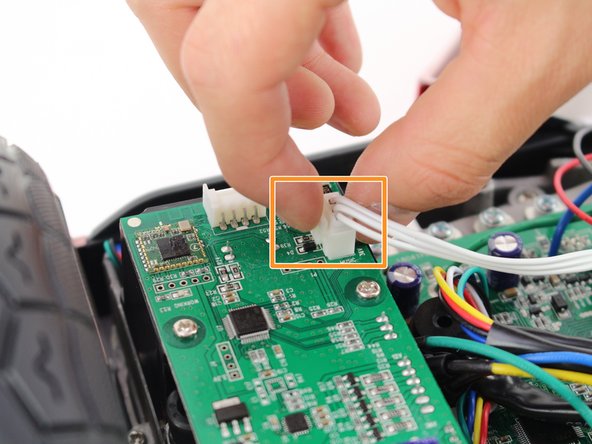
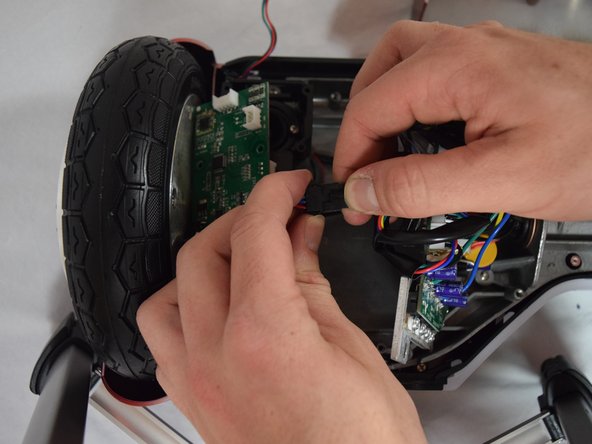
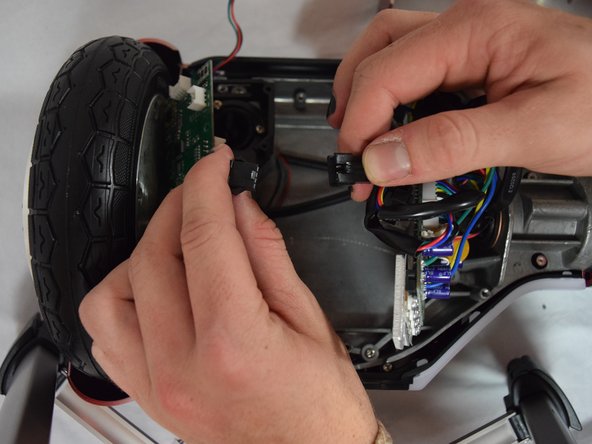
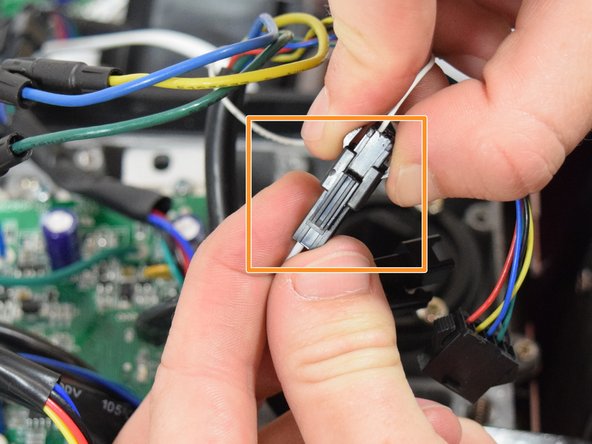
    • Remove the connector in the middle of the board by squeezing the tab and pulling up.

  5. Hover-1 Horizon Wheel Wires Replacement: 手順 5、 2の画像 1 Hover-1 Horizon Wheel Wires Replacement: 手順 5、 2の画像 2
    • Remove the four 11mm Phillips #1 screws that hold the cover on.

  6. Hover-1 Horizon Wheel Wires Replacement: 手順 6、 3の画像 1 Hover-1 Horizon Wheel Wires Replacement: 手順 6、 3の画像 2 Hover-1 Horizon Wheel Wires Replacement: 手順 6、 3の画像 3
    • Remove the four 11mm Phillips #1 screws that attach the gyroscope board to the mount.

    • Lift the board to reveal the connections on the bottom.

  7. Hover-1 Horizon Wheel Wires Replacement: 手順 7、 2の画像 1 Hover-1 Horizon Wheel Wires Replacement: 手順 7、 2の画像 2
    • Remove the middle connector by squeezing the top of the tab and pulling up.

  8. Hover-1 Horizon Wheel Wires Replacement: 手順 8、 3の画像 1 Hover-1 Horizon Wheel Wires Replacement: 手順 8、 3の画像 2 Hover-1 Horizon Wheel Wires Replacement: 手順 8、 3の画像 3
    • Remove the four 12mm Phillips #2 screws that hold the motherboard to the base.

    • Pull the motherboard away from the gyroscope by grabbing it with two hands and pulling it to the right .

  9. Hover-1 Horizon Wheel Wires Replacement: 手順 9、 3の画像 1 Hover-1 Horizon Wheel Wires Replacement: 手順 9、 3の画像 2 Hover-1 Horizon Wheel Wires Replacement: 手順 9、 3の画像 3
    • Unclip the black connector by squeezing both sides and pulling them apart.

  10. Hover-1 Horizon Wheel Wires Replacement, Wheel Wires: 手順 10、 2の画像 1 Hover-1 Horizon Wheel Wires Replacement, Wheel Wires: 手順 10、 2の画像 2
    • Remove the four 30mm Hex #6 screws.

  11. Hover-1 Horizon Wheel Wires Replacement: 手順 11、 3の画像 1 Hover-1 Horizon Wheel Wires Replacement: 手順 11、 3の画像 2 Hover-1 Horizon Wheel Wires Replacement: 手順 11、 3の画像 3
    • Remove the metal square by lifting it up and setting it to the side.

  12. Hover-1 Horizon Wheel Wires Replacement: 手順 12、 1の画像 1
    • Check that all the clips are secured properly.

  13. Hover-1 Horizon Wheel Wires Replacement: 手順 13、 3の画像 1 Hover-1 Horizon Wheel Wires Replacement: 手順 13、 3の画像 2 Hover-1 Horizon Wheel Wires Replacement: 手順 13、 3の画像 3
    • Remove the clip by squeezing the latch that holds the clips together while pulling apart.

    • Check motion of the wheel after the clip is disconnected. If the wheel is still stuck, reconnect the clip and disconnect the next one.

    • Remove the clip by squeezing the tab while pulling the clip apart.

    • Check motion of the wheel after the clip is disconnected. If the wheel is still stuck, reconnect the clip and disconnect the next one.

  14. Hover-1 Horizon Wheel Wires Replacement: 手順 14、 3の画像 1 Hover-1 Horizon Wheel Wires Replacement: 手順 14、 3の画像 2 Hover-1 Horizon Wheel Wires Replacement: 手順 14、 3の画像 3
    • Disconnect the remaining three clips by pulling them apart.

    • After each clip is disconnected, check to see if the motion of the wheel has improved. If the wheel is still stuck, reconnect the clip and unclip the next one.

終わりに

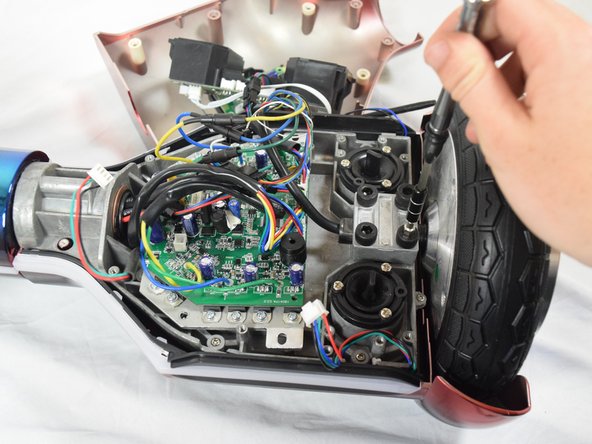
To reassemble your device, follow these instructions in reverse order.

作成者

2人の作成者と共同で作成されました。

Jenny Dyer

メンバー登録日: 10/08/18

235 ポイント

2のガイドは作成済み

チーム

Cal Poly, Team S13-G6, White Fall 2018 Cal Poly, Team S13-G6, White Fall 2018人のメンバー

CPSU-WHITE-F18S13G6

4 メンバー

6のガイドは作成済み

0 件のコメント

コメントを追加

統計データ:

過去 24時間: 1

過去 7 日: 12

過去 30 日: 31

今までの合計 882