メインコンテンツにスキップ

Hover-1 H1 LED Headlight Replacement

必要な工具と部品

  1. Hover-1 H1 LED Headlight Replacement, Bottom Shell: 手順 1、 1の画像 1
    • Remove the ten 9mm machine screws by using a long Phillips #2 screwdriver to rotate the screws counterclockwise.

    • Remove the twelve 9mm sheet metal screws by using a long Phillips #2 screwdriver to rotate the screws counterclockwise.

  2. Hover-1 H1 LED Headlight Replacement: 手順 2、 1の画像 1
    • Puncture the two black stickers by using the tip of a screwdriver.

    • Remove the two 9mm machine screws by using a long Phillips #2 screwdriver to rotate the screws counterclockwise.

  3. Hover-1 H1 LED Headlight Replacement: 手順 3、 2の画像 1 Hover-1 H1 LED Headlight Replacement: 手順 3、 2の画像 2
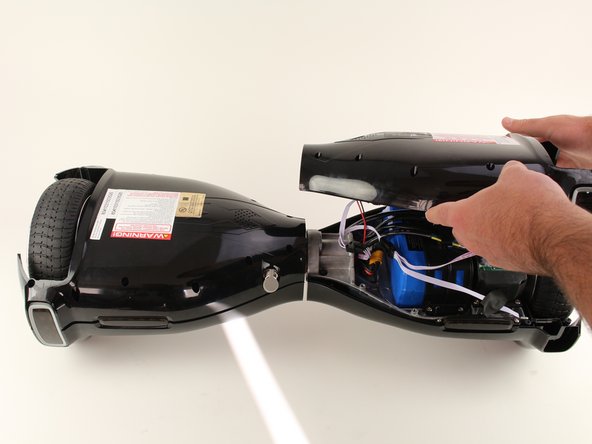
    • Lift each side of the bottom shell by pulling up.

    • When lifting the shell, take care to not tear any cables from their connectors.

  4. Hover-1 H1 LED Headlight Replacement: 手順 4、 1の画像 1
    • Unplug the battery by pulling gently on both sides of the orange connector.

  5. Hover-1 H1 LED Headlight Replacement, LED Headlights: 手順 5、 1の画像 1
    • Unplug the lights from the battery by pulling gently on both sides of the black connector attached to the white wires.

  6. Hover-1 H1 LED Headlight Replacement: 手順 6、 1の画像 1
    • Remove the vertical light from the shell by using your hands to pull it free from the surrounding shell.

  7. Hover-1 H1 LED Headlight Replacement: 手順 7、 1の画像 1
    • Remove two 8mm screws using a Phillips #0 screwdriver to rotate the screws counterclockwise.

    • Remove the horizontal light by using your fingers to pull the light up out of the shell.

終わりに

To reassemble your device, follow these instructions in reverse order.

ある他の人がこのガイドを完成しました。

作成者

3人の作成者と共同で作成されました。

Sara Passantino

メンバー登録日: 10/08/18

326 ポイント

2のガイドは作成済み

チーム

Cal Poly, Team S17-G6, White Fall 2018 Cal Poly, Team S17-G6, White Fall 2018人のメンバー

CPSU-WHITE-F18S17G6

4 メンバー

7のガイドは作成済み

0 件のコメント

コメントを追加

統計データ:

過去 24時間: 0

過去 7 日: 2

過去 30 日: 5

今までの合計 1,289