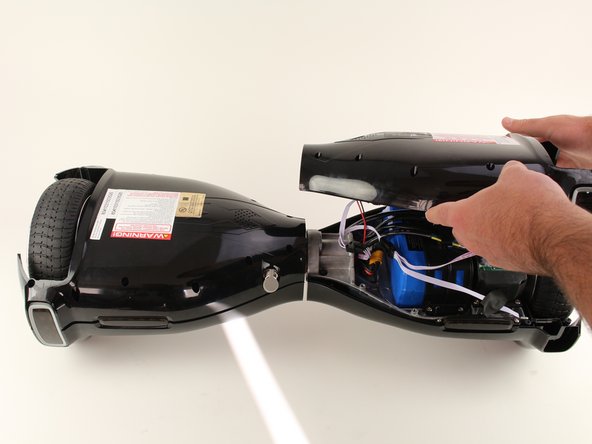
メインコンテンツにスキップ

Hover-1 H1 Bottom Shell Replacement

必要条件のみ
この修理ガイドは、他のガイドの前提条件として使用されます。それ自体は不完全で、単独で使用されることはありません。

必要な工具と部品

  1. Hover-1 H1 Bottom Shell Replacement, Bottom Shell: 手順 1、 1の画像 1
    • Remove the ten 9mm machine screws by using a long Phillips #2 screwdriver to rotate the screws counterclockwise.

    • Remove the twelve 9mm sheet metal screws by using a long Phillips #2 screwdriver to rotate the screws counterclockwise.

  2. Hover-1 H1 Bottom Shell Replacement: 手順 2、 1の画像 1
    • Puncture the two black stickers by using the tip of a screwdriver.

    • Remove the two 9mm machine screws by using a long Phillips #2 screwdriver to rotate the screws counterclockwise.

  3. Hover-1 H1 Bottom Shell Replacement: 手順 3、 2の画像 1 Hover-1 H1 Bottom Shell Replacement: 手順 3、 2の画像 2
    • Lift each side of the bottom shell by pulling up.

    • When lifting the shell, take care to not tear any cables from their connectors.

  4. Hover-1 H1 Bottom Shell Replacement: 手順 4、 1の画像 1
    • Unplug the battery by pulling gently on both sides of the orange connector.

終わりに

To reassemble your device, follow these instructions in reverse order.

作成者

3人の作成者と共同で作成されました。

Madeline David

メンバー登録日: 10/08/18

280 ポイント

2のガイドは作成済み

チーム

Cal Poly, Team S17-G6, White Fall 2018 Cal Poly, Team S17-G6, White Fall 2018人のメンバー

CPSU-WHITE-F18S17G6

4 メンバー

7のガイドは作成済み

0 件のコメント

コメントを追加

統計データ:

過去 24時間: 0

過去 7 日: 0

過去 30 日: 0

今までの合計 43