このバージョンは誤った内容を含んでいる可能性があります。最新の承認済みスナップショットに切り替えてください。
この手順は未翻訳です。 翻訳を手伝う。
Flip the Hover-1 Chrome upside down.
Use a Phillips #2 screwdriver to remove the fourteen 14 mm screws from the bottom of the Hover-1.
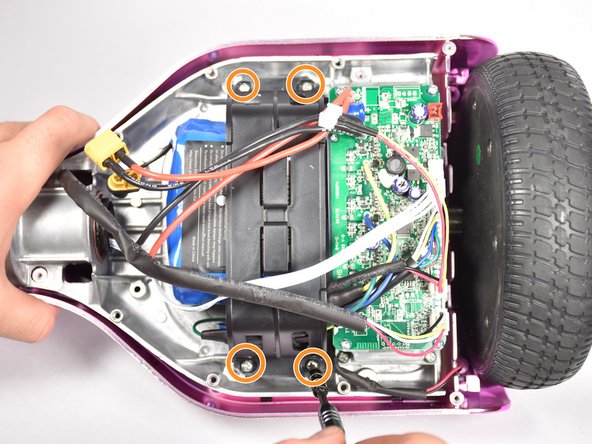
Break the two black tape circles, and remove the two 15 mm Phillips screws underneath.
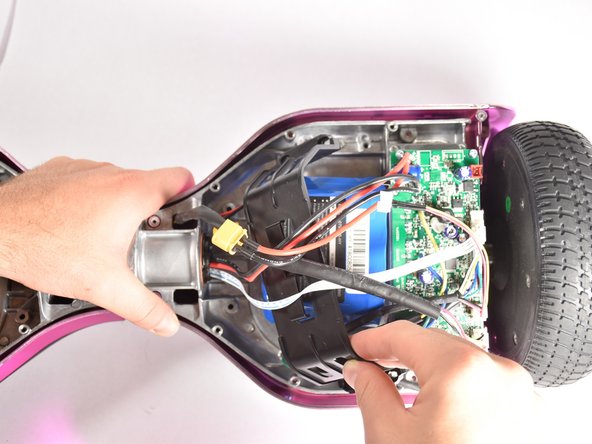
Lift the shell without the speaker grille and unplug the battery.
Lift the shell with the speaker grille.
Unplug the speaker.
Unplug the LEDs.
Unplug the power button
Unplug the charging port.
Remove the twelve 14 mm Phillips #2 screws holding the top shell on.
The other six screws are on the side without the battery.
Free the cables held atop the bracket holding the battery in place.
Remove the four 14 mm Phillips #2 screws holding the battery bracket in place.
Pull the battery bracket free.
Unplug the cords for the top LEDs.
The other side of the board is structurally symmetrical. However instead of going under the battery bracket, these cords go through a zip tie. These cables must be removed from the zip tie in order to continue.
Turn the board over and pull the top panel off.
キャンセル: このガイドを終了できませんでした。
2人の作成者と共同で作成されました。
メンバー登録日: 10/08/18
212 ポイント
1ガイドが承認済み
バッジ: 5
+2 個以上のバッジ
CPSU-WHITE-F18S4G1
4 メンバー
6のガイドは作成済み
Where can i get a replacement shell?
born4roblox - 2023年10月27日 返信
サイズを選択し、以下のコードをコピーして、このガイドを小さなウィジェットとしてサイト/フォーラムに埋め込みます。
過去 24時間: 0
過去 7 日: 1
過去 30 日: 3
今までの合計 315