メインコンテンツにスキップ

Hover-1 Charger Outer Shell Replacement

必要な工具と部品

  1. Hover-1 Charger Outer Shell Replacement, Outer Shell: 手順 1、 2の画像 1 Hover-1 Charger Outer Shell Replacement, Outer Shell: 手順 1、 2の画像 2
    • Flip the hoverboard over so that the warning label is facing up.

    • Remove the twelve 12 mm screws with a Phillips #2 screwdriver.

    • Remove the four 10 mm screws with a Phillips #2 screwdriver.

    • The screws nearest to the wheels may be hard to access. Be sure to use a long, thin screwdriver.

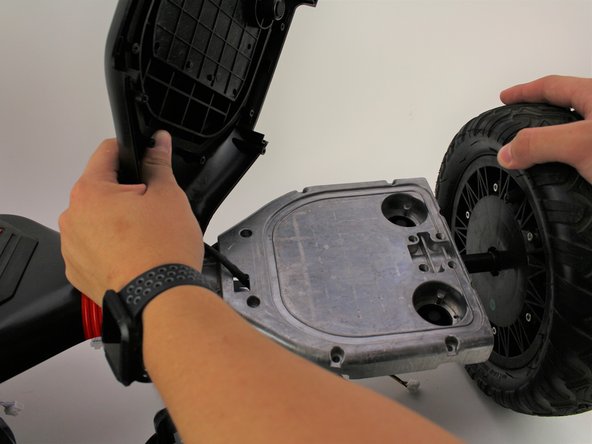
  2. Hover-1 Charger Outer Shell Replacement: 手順 2、 1の画像 1
    • Pull the right cover away from the hoverboard.

  3. Hover-1 Charger Outer Shell Replacement: 手順 3、 2の画像 1 Hover-1 Charger Outer Shell Replacement: 手順 3、 2の画像 2
    • Unscrew four 12 mm screws that hold the right foot pad with a Philips #2 screwdriver.

    • Unscrew the four 18 mm screws with a Philips #2 screwdriver.

    • Use a long, thin screwdriver to access the two 12 mm screws nearest to the wheel.

  4. Hover-1 Charger Outer Shell Replacement: 手順 4、 2の画像 1 Hover-1 Charger Outer Shell Replacement: 手順 4、 2の画像 2
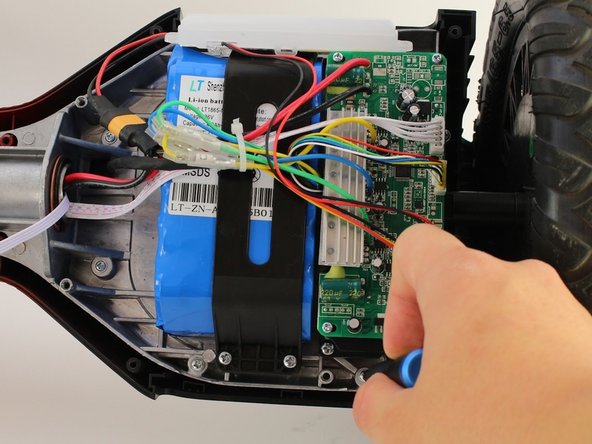
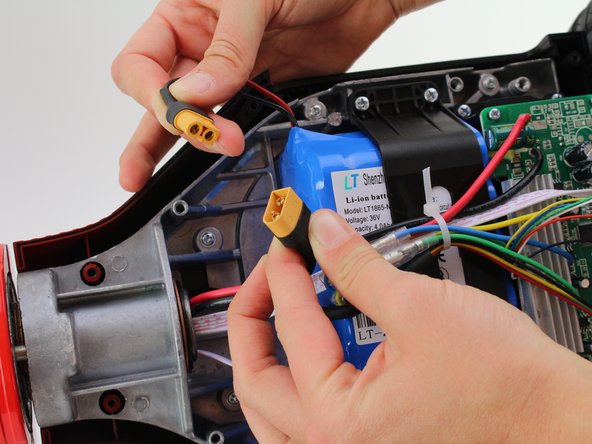
    • Unplug the battery by disconnecting the two pronged black and yellow cable.

  5. Hover-1 Charger Outer Shell Replacement: 手順 5、 3の画像 1 Hover-1 Charger Outer Shell Replacement: 手順 5、 3の画像 2 Hover-1 Charger Outer Shell Replacement: 手順 5、 3の画像 3
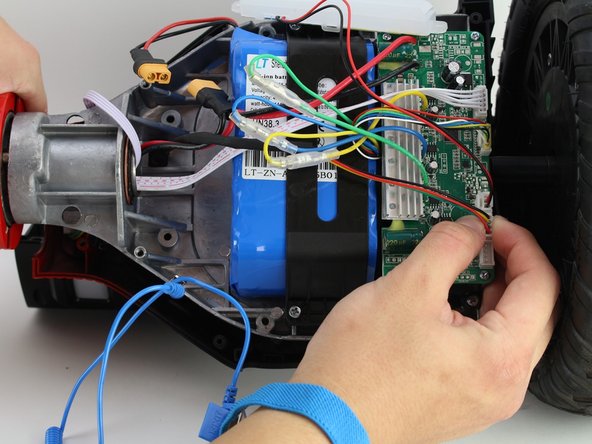
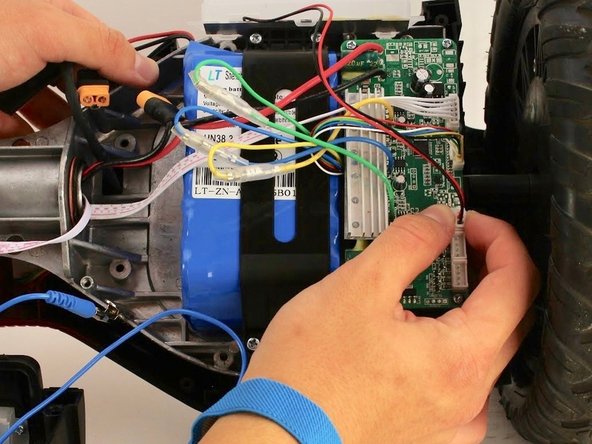
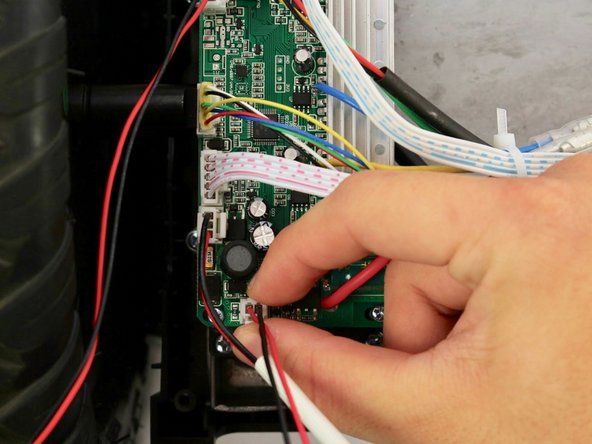
    • Unplug the black, yellow, green and red four pin connector from the circuit board.

    • Unplug the red and black two pin connector from the circuit board.

  6. Hover-1 Charger Outer Shell Replacement: 手順 6、 2の画像 1 Hover-1 Charger Outer Shell Replacement: 手順 6、 2の画像 2
    • Thread the black, yellow, green, and red four pin connector through the opening to the left of the battery.

    • Remove the right foot pad from the hoverboard.

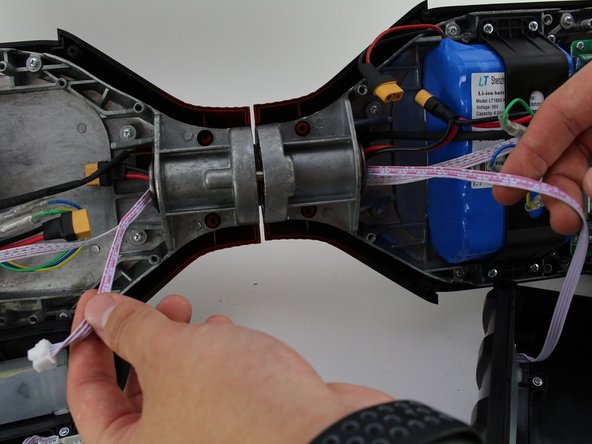
  7. Hover-1 Charger Outer Shell Replacement: 手順 7、 1の画像 1
    • Pull the left cover away from the hoverboard.

  8. Hover-1 Charger Outer Shell Replacement: 手順 8、 2の画像 1 Hover-1 Charger Outer Shell Replacement: 手順 8、 2の画像 2
    • Unplug the red and white five pin connector from the circuit board.

    • Thread this connector through the middle cylinder.

    • Remove the right cover from the hoverboard.

  9. Hover-1 Charger Outer Shell Replacement: 手順 9、 2の画像 1 Hover-1 Charger Outer Shell Replacement: 手順 9、 2の画像 2
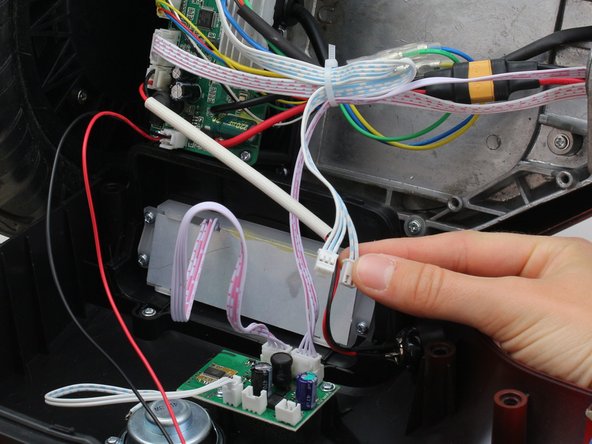
    • Unplug the red and white four pin connector from the speaker circuit board.

    • Unplug the blue and white three pin connector.

    • Unplug the blue and white two pin connector. This is photographed as an example.

  10. Hover-1 Charger Outer Shell Replacement: 手順 10、 1の画像 1
    • Remove the left cover from the hoverboard.

  11. Hover-1 Charger Outer Shell Replacement: 手順 11、 2の画像 1 Hover-1 Charger Outer Shell Replacement: 手順 11、 2の画像 2
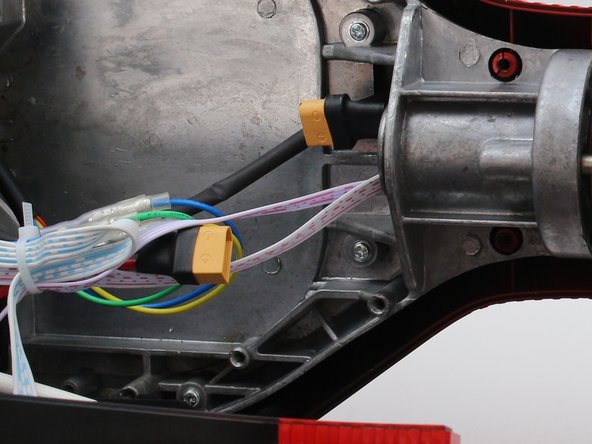
    • Disconnect the two pronged black and yellow cable.

  12. Hover-1 Charger Outer Shell Replacement: 手順 12、 3の画像 1 Hover-1 Charger Outer Shell Replacement: 手順 12、 3の画像 2 Hover-1 Charger Outer Shell Replacement: 手順 12、 3の画像 3
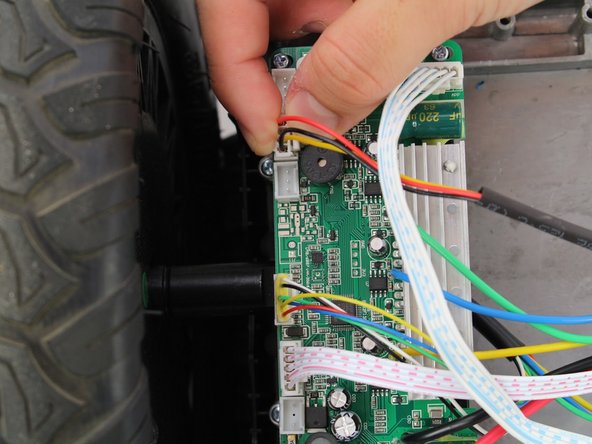
    • Remove three black and red two pin connectors from the left circuit board.

    • Remove the red, yellow, and black three pin connector.

    • Remove zip tie if present.

  13. Hover-1 Charger Outer Shell Replacement: 手順 13、 1の画像 1
    • Unscrew four 12 mm screws from the sides holding the left foot pad with a Phillips #2 screwdriver.

    • Unscrew four 18 mm screws with a Phillips #2 screwdriver.

    • Use a long, thin screwdriver to access the two 12 mm screws nearest to the wheel.

  14. Hover-1 Charger Outer Shell Replacement: 手順 14、 1の画像 1
    • Remove the left foot pad from the hoverboard.

終わりに

To reassemble your device, follow these instructions in reverse order.

作成者

3人の作成者と共同で作成されました。

Mark Rapiz

メンバー登録日: 10/10/19

229 ポイント

1ガイドが承認済み

チーム

Cal Poly, Team S12-G1, Regan Fall 2019 Cal Poly, Team S12-G1, Regan Fall 2019人のメンバー

CPSU-REGAN-F19S12G1

4 メンバー

6のガイドは作成済み

コメント 1 件

Where do I buy the shell their website doesnt have it

firestineanthony - 返信

コメントを追加

統計データ:

過去 24時間: 0

過去 7 日: 1

過去 30 日: 3

今までの合計 505