メインコンテンツにスキップ

Hover 1 Eclipse Motherboard Replacement

必要な工具と部品

  1. Hover 1 Eclipse Motherboard Replacement, Motherboard: 手順 1、 3の画像 1 Hover 1 Eclipse Motherboard Replacement, Motherboard: 手順 1、 3の画像 2 Hover 1 Eclipse Motherboard Replacement, Motherboard: 手順 1、 3の画像 3
    • Using a Phillips #1 Screwdriver, remove the eight 11mm screws that surround the edge of each shell piece.

    • Using a Phillips #1 Screwdriver, remove the eight 13mm screws that surround the edge of both shell pieces.

    • Remove the right side bottom shell piece.

  2. Hover 1 Eclipse Motherboard Replacement: 手順 2、 3の画像 1 Hover 1 Eclipse Motherboard Replacement: 手順 2、 3の画像 2 Hover 1 Eclipse Motherboard Replacement: 手順 2、 3の画像 3
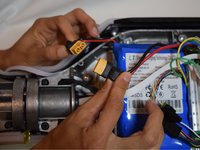
    • On the bottom, left side, shell pieces, there are some white and pink wires connecting the shell and the motherboard.

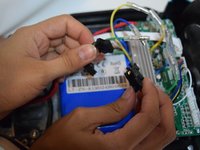
    • On the circuit board by the speaker, carefully squeeze and unplug the small white headers that connect the shell piece to the hoverboard body.

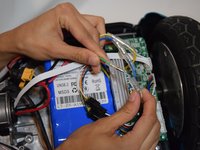
    • Follow the wires that connect the lights to the motherboard. Disconnect these wires from the motherboard by squeezing and pulling the small white headers.

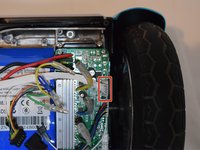
    • Now you can fully remove the bottom left shell piece.

  3. Hover 1 Eclipse Motherboard Replacement: 手順 3、 1の画像 1
    • Unplug the yellow tipped plug, Xt60, attached to the red and black cord on the non-battery side.

  4. Hover 1 Eclipse Motherboard Replacement: 手順 4、 3の画像 1 Hover 1 Eclipse Motherboard Replacement: 手順 4、 3の画像 2 Hover 1 Eclipse Motherboard Replacement: 手順 4、 3の画像 3
    • Unplug the yellow tipped plug attached to the red and black cords.

    • Unplug the black headers attached to the white, skinny cord.

    • Unplug the green, blue and yellow plugs by pressing down the silver, under the clear plastic and pulling it apart.

  5. Hover 1 Eclipse Motherboard Replacement: 手順 5、 2の画像 1 Hover 1 Eclipse Motherboard Replacement: 手順 5、 2の画像 2
    • Unplug the white header attached to the pink and white cord.

    • Using a Phillips #1 screwdriver, remove the four screws from each corner of the motherboard.

    • Repeat steps 3 and 4 on the other side.

  6. Hover 1 Eclipse Motherboard Replacement: 手順 6、 1の画像 1
    • You have now removed the motherboards from both sides.

終わりに

To reassemble your device, follow these instructions in reverse order.

作成者

3人の作成者と共同で作成されました。

Mina Dedijer

メンバー登録日: 10/10/19

545 ポイント

4のガイドは作成済み

チーム

Cal Poly, Team S12-G4, Regan Fall 2019 Cal Poly, Team S12-G4, Regan Fall 2019人のメンバー

CPSU-REGAN-F19S12G4

4 メンバー

5のガイドは作成済み

7 件のコメント

Can you please drop links to purchase the 2 motherboards?

Frank - 返信

Hi

wondering if you know the part numbers and where to obtain the boards?

Dave - 返信

We’re do you get the boards at I really need them

Ashton Mcalvain - 返信

We’re do get the boards?

Hector Ortiz - 返信

Any idea where to buy parts and the price?

william bowen - 返信

コメントを追加

統計データ:

過去 24時間: 0

過去 7 日: 0

過去 30 日: 12

今までの合計 1,977