メインコンテンツにスキップ

Hover 1 Eclipse Battery Replacement

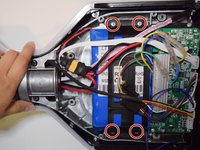
  1. Hover 1 Eclipse Battery Replacement, Battery: 手順 1、 3の画像 1 Hover 1 Eclipse Battery Replacement, Battery: 手順 1、 3の画像 2 Hover 1 Eclipse Battery Replacement, Battery: 手順 1、 3の画像 3
    • Using a Phillips #1 Screwdriver, remove the four 11mm screws that surround the edge of the plug side bottom shell piece.

    • Using a Phillips #1 Screwdriver, remove the four 13mm screws that surround the edge of the plug side bottom shell piece.

    • Remove the right side bottom shell piece.

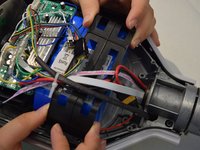
  2. Hover 1 Eclipse Battery Replacement: 手順 2、 2の画像 1 Hover 1 Eclipse Battery Replacement: 手順 2、 2の画像 2
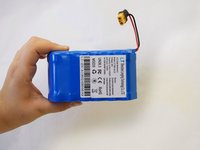
    • Locate the black and red wires connected by an yellow header, Xt60.

    • This wire connects the battery to the motherboard.

    • Carefully tug on the two sides of the yellow header to disconnect them.

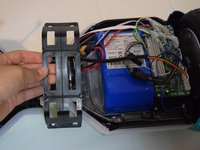
  3. Hover 1 Eclipse Battery Replacement: 手順 3、 3の画像 1 Hover 1 Eclipse Battery Replacement: 手順 3、 3の画像 2 Hover 1 Eclipse Battery Replacement: 手順 3、 3の画像 3
    • Using a Phillips #1 Screwdriver, remove the four 11mm screws that secure the black plastic keeping the battery in place.

    • Carefully remove the black plastic from the hoverboard.

    • Be mindful of the wires surrounding the battery.

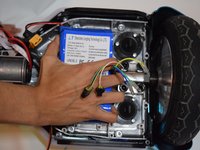
  4. Hover 1 Eclipse Battery Replacement: 手順 4、 2の画像 1 Hover 1 Eclipse Battery Replacement: 手順 4、 2の画像 2
    • Be careful with the wires surrounding the battery when executing this step.

    • The battery is attached to the metal with an adhesive.

    • Firmly grasp the battery and tug on it until it is free from the metal.

終わりに

To reassemble your device, follow these instructions in reverse order.

作成者

3人の作成者と共同で作成されました。

Mina Dedijer

メンバー登録日: 10/10/19

545 ポイント

4のガイドは作成済み

チーム

Cal Poly, Team S12-G4, Regan Fall 2019 Cal Poly, Team S12-G4, Regan Fall 2019人のメンバー

CPSU-REGAN-F19S12G4

4 メンバー

5のガイドは作成済み

0 件のコメント

コメントを追加

統計データ:

過去 24時間: 0

過去 7 日: 10

過去 30 日: 33

今までの合計 2,180