メインコンテンツにスキップ

Hoover Windtunnel U6485900 Belt Replacement

必要な工具と部品

  1. Hoover Windtunnel U6485900 Belt Replacement, Belt: 手順 1、 2の画像 1 Hoover Windtunnel U6485900 Belt Replacement, Belt: 手順 1、 2の画像 2
    • Turn off and unplug the vacuum, if necessary.

    • Lay the vacuum on its side, so you can see the bottom plate of the vacuum.

  2. Hoover Windtunnel U6485900 Belt Replacement: 手順 2、 3の画像 1 Hoover Windtunnel U6485900 Belt Replacement: 手順 2、 3の画像 2 Hoover Windtunnel U6485900 Belt Replacement: 手順 2、 3の画像 3
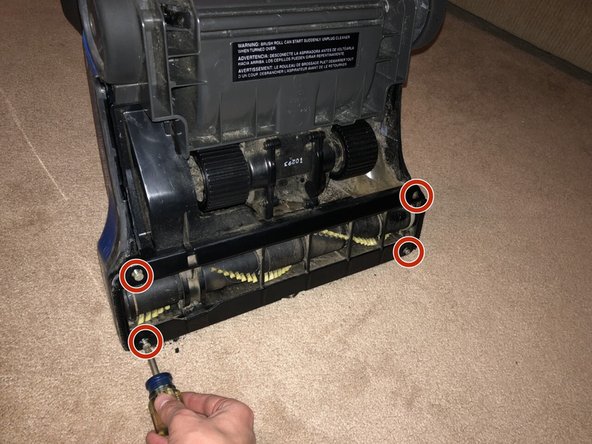
    • Using your Phillips #2 screwdriver, remove all four 42 mm long screws from the bottom plate of the vacuum.

  3. Hoover Windtunnel U6485900 Belt Replacement: 手順 3、 2の画像 1 Hoover Windtunnel U6485900 Belt Replacement: 手順 3、 2の画像 2
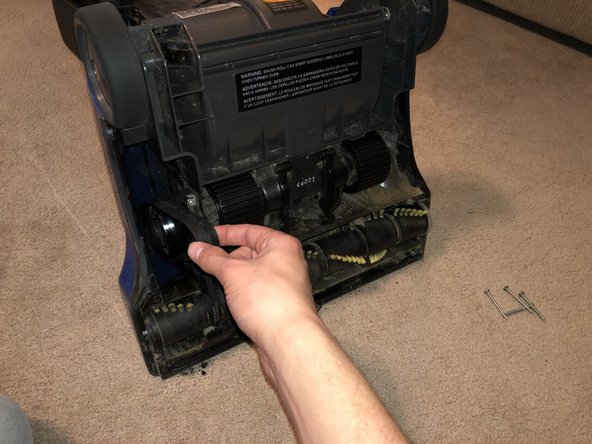
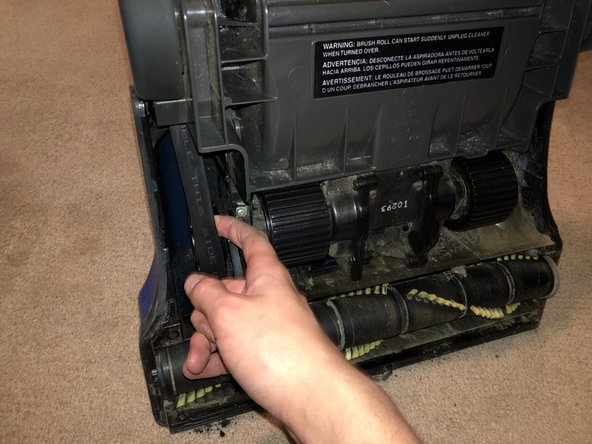
    • Remove the old vacuum belt by sliding the belt off the brush roller (the bottom roller), and then remove the belt from the motor shaft (the thin metal tube above the brush roller where the belt is attached to).

  4. Hoover Windtunnel U6485900 Belt Replacement: 手順 4、 3の画像 1 Hoover Windtunnel U6485900 Belt Replacement: 手順 4、 3の画像 2 Hoover Windtunnel U6485900 Belt Replacement: 手順 4、 3の画像 3
    • Install the new vacuum belt by placing it on the brush roller, and stretching it up to place it on the motor shaft.

    • Pulling the belt up to the motor shaft can require some force. It may help to turn the motor shaft while placing the belt on it to reduce the amount of force needed.

  5. Hoover Windtunnel U6485900 Belt Replacement: 手順 5、 3の画像 1 Hoover Windtunnel U6485900 Belt Replacement: 手順 5、 3の画像 2 Hoover Windtunnel U6485900 Belt Replacement: 手順 5、 3の画像 3
    • Place the bottom plate back on the vacuum by screwing in the four 42 mm screws with the Phillips #2 screwdriver.

  6. Hoover Windtunnel U6485900 Belt Replacement: 手順 6、 1の画像 1
    • Plug in the vacuum and turn it on. If it is abnormally loud or the brush roller is not spinning, turn the vacuum back off and check the belt to see if it is loose.

    • If the belt is loose, adjust the belt's position until it is firmly on both the brush roller and the motor shaft.

終わりに

The reattachment of the bottom plate of the vacuum is included in this guide.

作成者

1人の作成者と共同作成されました。

Jerry Jenkins

メンバー登録日: 02/28/21

133 ポイント

1ガイドが承認済み

チーム

University of Memphis, Team S52-G64, Kim Spring 2021 University of Memphis, Team S52-G64, Kim Spring 2021人のメンバー

UM-KIM-S21S52G64

1 メンバー

1のガイドは作成済み

0 件のコメント

コメントを追加

統計データ:

過去 24時間: 4

過去 7 日: 24

過去 30 日: 111

今までの合計 2,642