メインコンテンツにスキップ

Hoover T-Series WindTunnel Pet UH30310 Motor Replacement

必要な工具と部品

  1. Hoover T-Series WindTunnel Pet UH30310 Motor Replacement, Motor: 手順 1、 1の画像 1
    • Depress the hose-release tab.

  2. Hoover T-Series WindTunnel Pet UH30310 Motor Replacement: 手順 2、 1の画像 1
    • Next, remove the hose from the connector, near the top of the vacuum's rear. This can be achieved by twisting and then pulling down.

  3. Hoover T-Series WindTunnel Pet UH30310 Motor Replacement: 手順 3、 1の画像 1
    • Use a Phillips #1 screwdriver to remove the two screws on the part holding the hose to the back of the vacuum.

  4. Hoover T-Series WindTunnel Pet UH30310 Motor Replacement: 手順 4、 1の画像 1
    • Use a Phillips #1 screwdriver to remove the two screws that secure the hose-release tab.

  5. Hoover T-Series WindTunnel Pet UH30310 Motor Replacement: 手順 5、 1の画像 1
    • Use a Phillips #1 screwdriver to remove the two screws on the top of the vacuum holding the tab on the left of the vacuum.

  6. Hoover T-Series WindTunnel Pet UH30310 Motor Replacement: 手順 6、 2の画像 1 Hoover T-Series WindTunnel Pet UH30310 Motor Replacement: 手順 6、 2の画像 2
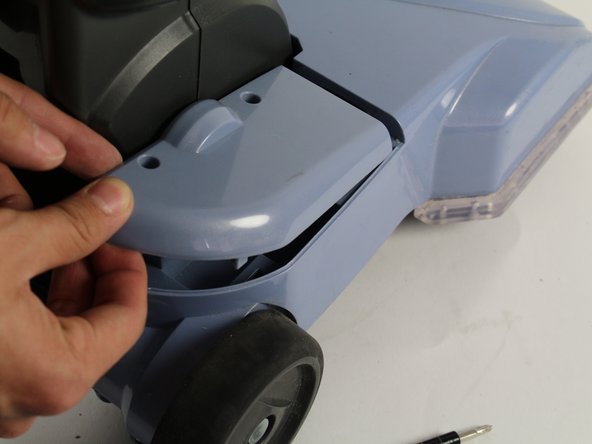
    • Use a Phillips #1 screwdriver to remove the two screws on the top of the vacuum head holding down the tab on the right.

    • To remove the tab, slide backwards and then pull up. There is a tab holding the piece down so use force if necessary.

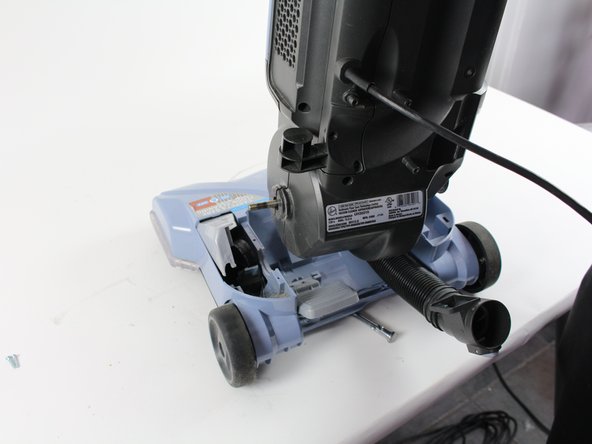
  7. Hoover T-Series WindTunnel Pet UH30310 Motor Replacement: 手順 7、 2の画像 1 Hoover T-Series WindTunnel Pet UH30310 Motor Replacement: 手順 7、 2の画像 2
    • Slide the belt off of the metal rod on the left of the vacuum shaft. Pull the vacuum up and it should easily separate into two pieces.

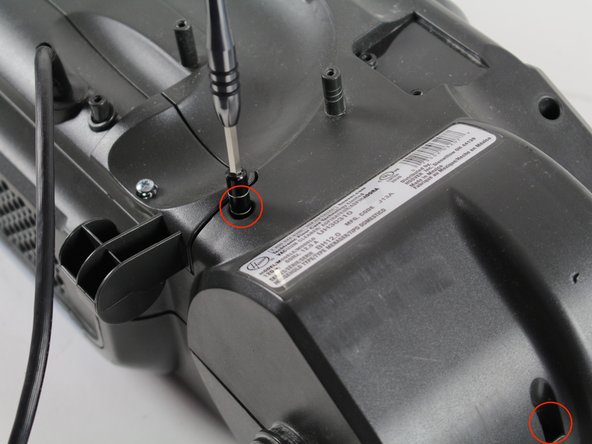
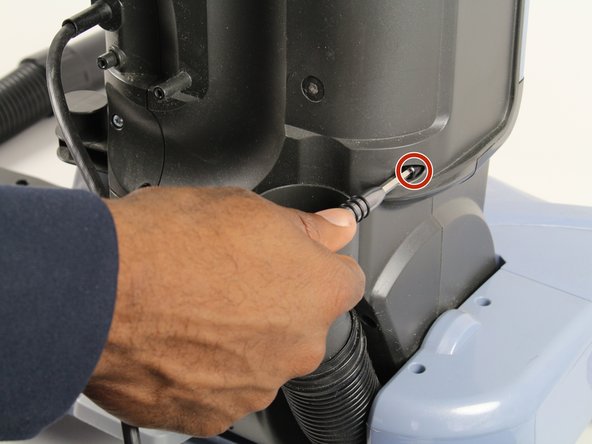
  8. Hoover T-Series WindTunnel Pet UH30310 Motor Replacement: 手順 8、 3の画像 1 Hoover T-Series WindTunnel Pet UH30310 Motor Replacement: 手順 8、 3の画像 2 Hoover T-Series WindTunnel Pet UH30310 Motor Replacement: 手順 8、 3の画像 3
    • Use a Phillips #1 screwdriver to remove the 6 screws on the back and bottom of the vacuum shaft.

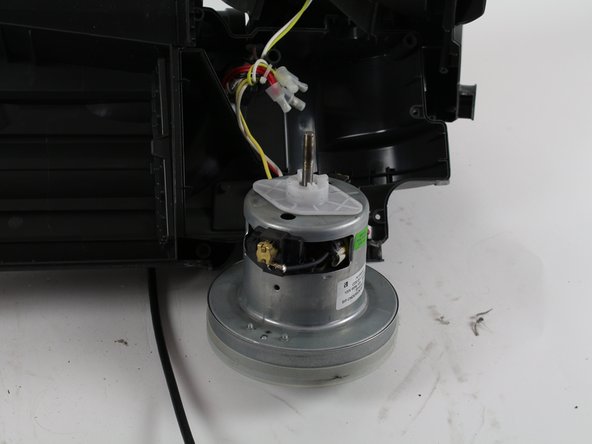
  9. Hoover T-Series WindTunnel Pet UH30310 Motor Replacement: 手順 9、 1の画像 1
    • The top of the motor casing should then fold open, revealing the motor.

  10. Hoover T-Series WindTunnel Pet UH30310 Motor Replacement: 手順 10、 2の画像 1 Hoover T-Series WindTunnel Pet UH30310 Motor Replacement: 手順 10、 2の画像 2
    • The motor can now be accessed for replacement or repair

終わりに

To reassemble your device, follow these instructions in reverse order.

2 の人々がこのガイドを完成させました。

作成者

2人の作成者と共同で作成されました。

Anthony Garcia

メンバー登録日: 01/18/18

223 ポイント

1ガイドが承認済み

チーム

Cal Poly, Team S12-G4, Banghart Winter 2018 Cal Poly, Team S12-G4, Banghart Winter 2018人のメンバー

CPSU-BANGHART-W18S12G4

5 メンバー

9のガイドは作成済み

0 件のコメント

コメントを追加

統計データ:

過去 24時間: 1

過去 7 日: 5

過去 30 日: 12

今までの合計 899