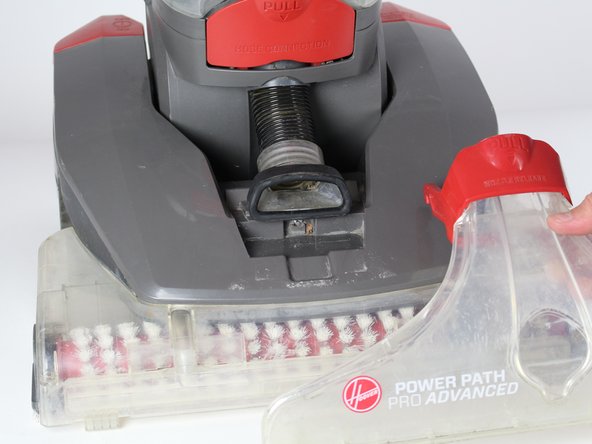
メインコンテンツにスキップ

Hoover Power Path Pro Advanced Belt Replacement

必要な工具と部品

  1. Hoover Power Path Pro Advanced Belt Replacement, Brush Roller: 手順 1、 2の画像 1 Hoover Power Path Pro Advanced Belt Replacement, Brush Roller: 手順 1、 2の画像 2
    • Unplug the vacuum cleaner from the wall outlet before starting. Make sure the water tanks are empty.

    • Lay the cleaner down horizontally with its wheels closest to the floor.

  2. Hoover Power Path Pro Advanced Belt Replacement: 手順 2、 2の画像 1 Hoover Power Path Pro Advanced Belt Replacement: 手順 2、 2の画像 2
    • Hold the lower brush roll with both hands and pull outwards until it is detached.

  3. Hoover Power Path Pro Advanced Belt Replacement: 手順 3、 1の画像 1
    • Unscrew the 6 marked screws using a Phillips #2 head screwdriver.

    • Remove the brush roller.

  4. Hoover Power Path Pro Advanced Belt Replacement, Belt: 手順 4、 1の画像 1
    • Use a long #2 Philips head screwdriver to remove the 8 numbered screws on the bottom of the cleaner.

  5. Hoover Power Path Pro Advanced Belt Replacement: 手順 5、 2の画像 1 Hoover Power Path Pro Advanced Belt Replacement: 手順 5、 2の画像 2
    • Pull the red handle shown to remove the front suction unit from the cleaner.

  6. Hoover Power Path Pro Advanced Belt Replacement: 手順 6、 1の画像 1
    • Unscrew the Phillips #2 screw at the bottom of the hose.

  7. Hoover Power Path Pro Advanced Belt Replacement: 手順 7、 2の画像 1 Hoover Power Path Pro Advanced Belt Replacement: 手順 7、 2の画像 2
    • Push down on the handle release button. Pull and disconnect the edge of the top cover on the side of the handle release button.

    • Repeat the above step for the "On/Off" button.

    • When pulling the handle release button, make sure the top of the cleaner does not fall.

  8. Hoover Power Path Pro Advanced Belt Replacement: 手順 8、 1の画像 1
    • Gently grab the belt and pry it off from the rollers.

終わりに

To reassemble your device, follow these instructions in reverse order.

6 の人々がこのガイドを完成させました。

作成者

4人の作成者と共同で作成されました。

Jose Andres Gonzalez Valdes

メンバー登録日: 01/22/18

682 ポイント

5のガイドは作成済み

チーム

Cal Poly, Team S16-G5, Banghart Winter 2018 Cal Poly, Team S16-G5, Banghart Winter 2018人のメンバー

CPSU-BANGHART-W18S16G5

5 メンバー

15のガイドは作成済み

5 件のコメント

Who the heck made this so hard,

Roy Merlino - 返信

Day 5 and 4 people, I still can’t lift the top off to be able to replace belts. Is there a video

Roy Merlino - 返信

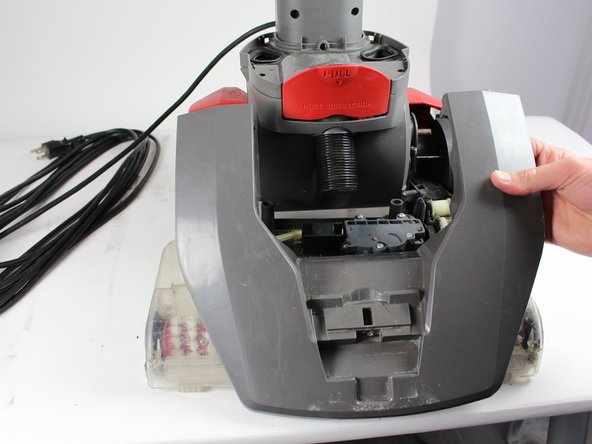
Just understand there are more screws to remove then what is described in these 8 steps. Once you removed ALL the screws then the plastic lid comes right off.

Neil Sullivan - 返信

How the back do you put the too belts on and seeing how the bag came with two and both were wide what size is the one that goes around the roller the other one control the circle brushes this is one of the most difficult belt change I've bad and I'm counting on car to

Loretta Staley - 返信

There is only 8 screws you need to remove. The diagram makes it hard to know but there are two top ones Directly under the brush ! Once you get them out then comes off no problem at all.

Chris Harnish - 返信

コメントを追加

統計データ:

過去 24時間: 2

過去 7 日: 6

過去 30 日: 52

今までの合計 10,810