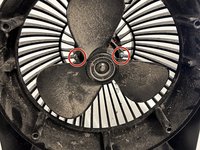
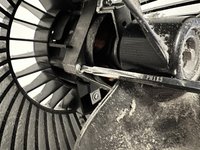
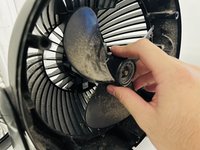
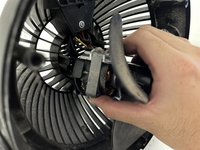
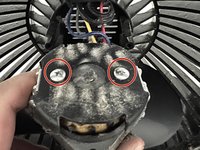
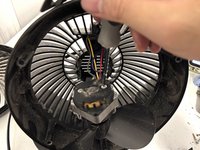
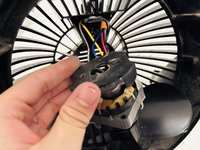
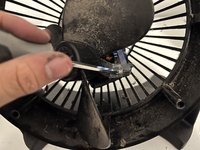
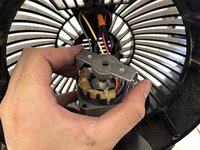
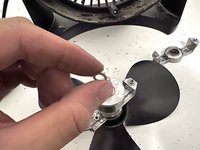
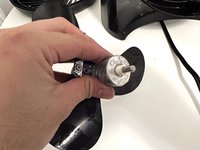
メインコンテンツにスキップ

Honeywell HT900C Motor Replacement

必要な工具と部品

  1. Honeywell HT900C Motor Replacement, Motor: 手順 1、 3の画像 1 Honeywell HT900C Motor Replacement, Motor: 手順 1、 3の画像 2 Honeywell HT900C Motor Replacement, Motor: 手順 1、 3の画像 3
    • Remove the six 15 mm screws securing the fan's frame to its outer ring on the back using a Phillips #1 screwdriver.

    • Due to the small size of the screw holes, a long and thin screwdriver may be necessary.

  2. Honeywell HT900C Motor Replacement: 手順 2、 3の画像 1 Honeywell HT900C Motor Replacement: 手順 2、 3の画像 2 Honeywell HT900C Motor Replacement: 手順 2、 3の画像 3
    • To gain access to the fan's inner workings, gently pull the blade cover away from the main body.

  3. Honeywell HT900C Motor Replacement: 手順 3、 2の画像 1 Honeywell HT900C Motor Replacement: 手順 3、 2の画像 2
    • Remove the two 36 mm screws from the metal plate located behind the blades using a Phillips #1 screwdriver.

    • The screws can be hard to remove so you may need to twist the screwdriver harder and screws can be removed easily.

  4. Honeywell HT900C Motor Replacement: 手順 4、 3の画像 1 Honeywell HT900C Motor Replacement: 手順 4、 3の画像 2 Honeywell HT900C Motor Replacement: 手順 4、 3の画像 3
    • Carefully pull the motor it out of its resting position and tilt it forward to access the back of the motor.

  5. Honeywell HT900C Motor Replacement: 手順 5、 3の画像 1 Honeywell HT900C Motor Replacement: 手順 5、 3の画像 2 Honeywell HT900C Motor Replacement: 手順 5、 3の画像 3
    • Remove two 10 mm screws from the motor's back using a Phillips #1 screwdriver.

  6. Honeywell HT900C Motor Replacement: 手順 6、 2の画像 1 Honeywell HT900C Motor Replacement: 手順 6、 2の画像 2
    • Remove the 20 mm screws beside the fan blade using a Phillips #1 screwdriver.

    • The screws are attached to two parts of the motor so it can easily fall off after removing the screws.

  7. Honeywell HT900C Motor Replacement: 手順 7、 1の画像 1
    • Carefully remove the circular motor from the square holder.

    • The circular motor is still connected to the fan blades.

  8. Honeywell HT900C Motor Replacement: 手順 8、 2の画像 1 Honeywell HT900C Motor Replacement: 手順 8、 2の画像 2
    • Remove the metal washer from the axle.

  9. Honeywell HT900C Motor Replacement: 手順 9、 1の画像 1
    • Replace the old motor with a new one, and you're done!

    • Using the lubricant to easily put the new motor back.

    • Always double-check that the screws are securely in place.

終わりに

To reassemble your device, follow these instructions in reverse order.

ある他の人がこのガイドを完成しました。

作成者

1人の作成者と共同作成されました。

Duy Anh Nguyen

メンバー登録日: 09/17/22

169 ポイント

1ガイドが承認済み

チーム

York University, Team B-10, Allen Fall 2022 York University, Team B-10, Allen Fall 2022人のメンバー

YORK-ALLEN-F22SBG10

3 メンバー

1のガイドは作成済み

0 件のコメント

コメントを追加

統計データ:

過去 24時間: 1

過去 7 日: 9

過去 30 日: 34

今までの合計 511