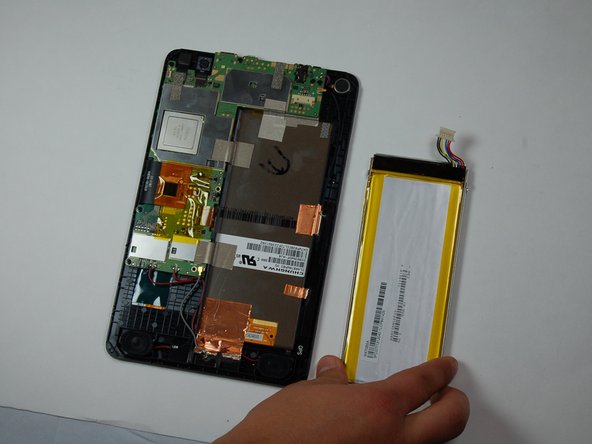
メインコンテンツにスキップ

Hisense Sero 7 Pro Speakers Replacement

必要な工具と部品

  1. Hisense Sero 7 Pro Speakers Replacement, Battery: 手順 1、 2の画像 1 Hisense Sero 7 Pro Speakers Replacement, Battery: 手順 1、 2の画像 2
    • Turn tablet off before dissembling it.

    • Use caution when handling device if screen is cracked.

    • Using a plastic opening tool, pry open the back cover from the tablet.

    • An extra set of hands may be required.

  2. Hisense Sero 7 Pro Speakers Replacement: 手順 2、 2の画像 1 Hisense Sero 7 Pro Speakers Replacement: 手順 2、 2の画像 2
    • Use a spudger to disconnect the battery from the motherboard.

  3. Hisense Sero 7 Pro Speakers Replacement: 手順 3、 2の画像 1 Hisense Sero 7 Pro Speakers Replacement: 手順 3、 2の画像 2
    • Using a plastic opening tool, carefully place under one corner of the battery.

    • Move around edges of the battery to lift it off of the tablet.

    • Remove battery from tablet.

  4. Hisense Sero 7 Pro Speakers Replacement, Speakers: 手順 4、 3の画像 1 Hisense Sero 7 Pro Speakers Replacement, Speakers: 手順 4、 3の画像 2 Hisense Sero 7 Pro Speakers Replacement, Speakers: 手順 4、 3の画像 3
    • Peel back the film holding the speaker wire in place

    • Detach both wire connectors

  5. Hisense Sero 7 Pro Speakers Replacement: 手順 5、 1の画像 1
    • Using a plastic opening tool, carefully place under one corner of each speaker

    • Remove both speakers

終わりに

To reassemble your device, follow these instructions in reverse order.

作成者

2人の作成者と共同で作成されました。

Logan Phillips

メンバー登録日: 05/09/17

101 ポイント

1ガイドが承認済み

チーム

IUPUI, Team S4-G1, Harley Spring 2017 IUPUI, Team S4-G1, Harley Spring 2017人のメンバー

IUPUI-HARLEY-S17S4G1

4 メンバー

4のガイドは作成済み

0 件のコメント

コメントを追加

統計データ:

過去 24時間: 0

過去 7 日: 0

過去 30 日: 2

今までの合計 145