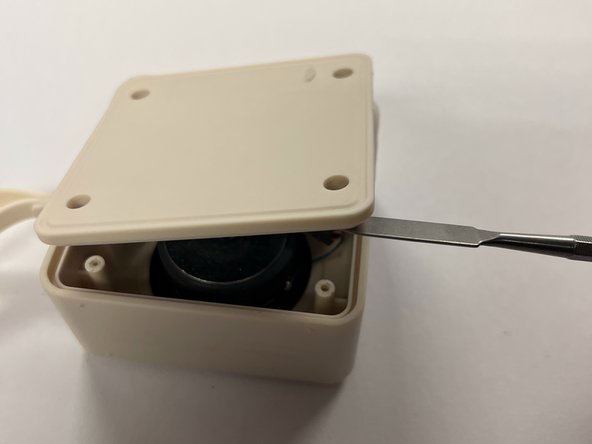
メインコンテンツにスキップ

Heyday Wireless Bluetooth Speaker 9979 Battery Replacement

必要な工具と部品

  1. Heyday Wireless Bluetooth Speaker 9979 Battery Replacement, Heyday Wireless Bluetooth Speaker 9979 Battery Replacement: 手順 1、 1の画像 1
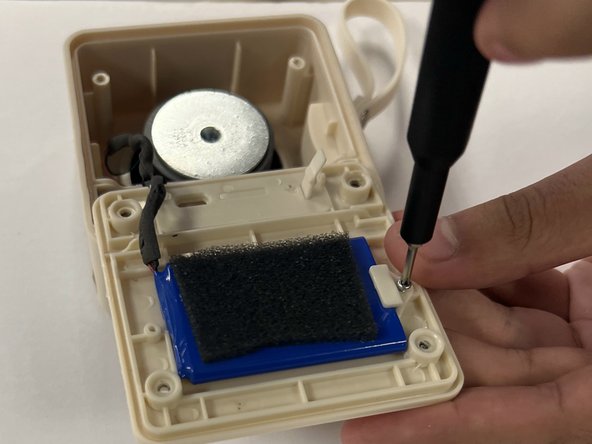
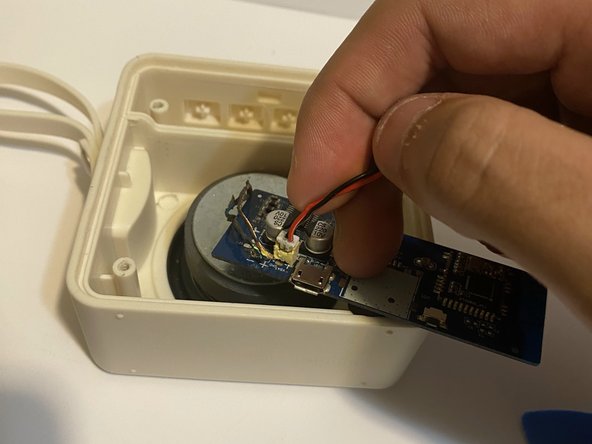
    • Remove the four bezels from the speaker's back cover.

    • Try to get under the bezel by using force, and pull it out little by little.

  2. Heyday Wireless Bluetooth Speaker 9979 Battery Replacement: 手順 2、 1の画像 1
    • Use a Phillips #1 screwdriver to remove the four 1.6 mm screws. Rotate the driver counterclockwise to remove the screws.

  3. Heyday Wireless Bluetooth Speaker 9979 Battery Replacement: 手順 3、 2の画像 1 Heyday Wireless Bluetooth Speaker 9979 Battery Replacement: 手順 3、 2の画像 2
    • Remove the cover of the wireless speaker using the metal spudger. Don't use much force to remove it.

  4. Heyday Wireless Bluetooth Speaker 9979 Battery Replacement: 手順 4、 2の画像 1 Heyday Wireless Bluetooth Speaker 9979 Battery Replacement: 手順 4、 2の画像 2
    • Once you have pulled the cover to the side, remove the two screws with a Philips #000 screwdriver. Turn counterclockwise.

  5. Heyday Wireless Bluetooth Speaker 9979 Battery Replacement: 手順 5、 2の画像 1 Heyday Wireless Bluetooth Speaker 9979 Battery Replacement: 手順 5、 2の画像 2
    • The battery might be glued down so use the black nylon spundger to take it out completely.

  6. Heyday Wireless Bluetooth Speaker 9979 Battery Replacement: 手順 6、 3の画像 1 Heyday Wireless Bluetooth Speaker 9979 Battery Replacement: 手順 6、 3の画像 2 Heyday Wireless Bluetooth Speaker 9979 Battery Replacement: 手順 6、 3の画像 3
    この手順で使用する道具:
    Tweezers
    $4.99
    購入する
    • Using the nylon tipped tweezers, remove the motherboard carefully. It is recommended to grab the motherboard in the middle as there are no big buttons on it.

  7. Heyday Wireless Bluetooth Speaker 9979 Battery Replacement: 手順 7、 3の画像 1 Heyday Wireless Bluetooth Speaker 9979 Battery Replacement: 手順 7、 3の画像 2 Heyday Wireless Bluetooth Speaker 9979 Battery Replacement: 手順 7、 3の画像 3
    • You want to remove the white power cable connector from the motherboard. Start by using the fixit opening pick to pull it up. Once it is almost out, use you're fingers to just simply disconnect it.

終わりに

To reassemble your device, follow these instructions in reverse order.

作成者

3人の作成者と共同で作成されました。

Thanh Duong

メンバー登録日: 09/26/22

195 ポイント

1ガイドが承認済み

チーム

CSU Los Angeles, Team 5-4, Adachi Fall 2022 CSU Los Angeles, Team 5-4, Adachi Fall 2022人のメンバー

CSULA-ADACHI-F22S5G4

5 メンバー

2のガイドは作成済み

4 件のコメント

The grammar could be improved by simplifying the steps (not using too many words or try separating into multiple bullet points) and avoiding the use of ambiguous pronouns (it).

Jadealyn Paulino - 返信

Will do, thanks!

Chris Yepez -

There are a lot of images and some are the same.

Cindy Munoz - 返信

The description of each tool needed was a very useful touch.

Cindy Munoz - 返信

コメントを追加

統計データ:

過去 24時間: 0

過去 7 日: 2

過去 30 日: 13

今までの合計 472