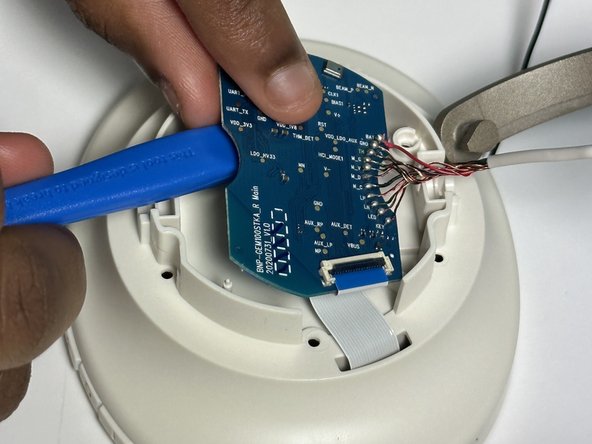
メインコンテンツにスキップ

Heyday Active Noise-Canceling Wireless Headphones 0398 Motherboard Replacement

必要な工具と部品

  1. Heyday Active Noise-Canceling Wireless Headphones 0398 Motherboard Replacement, Ear-pad Cushion: 手順 1、 2の画像 1 Heyday Active Noise-Canceling Wireless Headphones 0398 Motherboard Replacement, Ear-pad Cushion: 手順 1、 2の画像 2
    • Position the headphones so that you can see the opening for the cushion as you take out your blue iFixIt opening tool. In between the earpad cushion and the headset, place the iFixit opening tool.

  2. Heyday Active Noise-Canceling Wireless Headphones 0398 Motherboard Replacement: 手順 2、 1の画像 1
    • The connectors that the cushion snaps into place are used to attach the cushion to the headset. The connectors could be damaged by applying too much force, which would prevent the cushion from returning to its original position.

  3. Heyday Active Noise-Canceling Wireless Headphones 0398 Motherboard Replacement: 手順 3、 1の画像 1
    • After the earpad cushion has been disconnected from the connectors you can take your new earpad cushion and install it.

  4. Heyday Active Noise-Canceling Wireless Headphones 0398 Motherboard Replacement, Motherboard: 手順 4、 2の画像 1 Heyday Active Noise-Canceling Wireless Headphones 0398 Motherboard Replacement, Motherboard: 手順 4、 2の画像 2
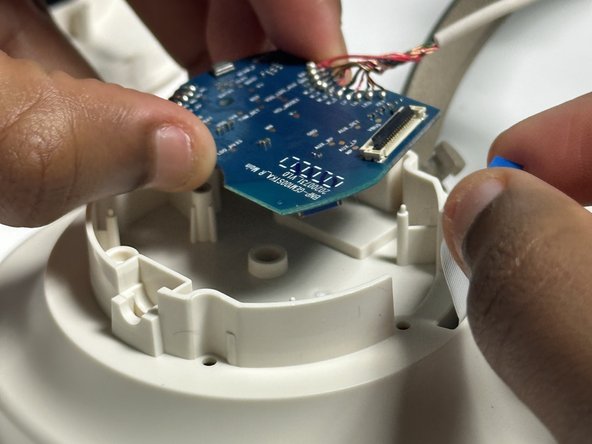
    • After removing the ear pad cushion, unscrew the four 2.4 mm black screws. on the inside.

  5. Heyday Active Noise-Canceling Wireless Headphones 0398 Motherboard Replacement: 手順 5、 1の画像 1
    • You can see the mother board as it is in the picture if you pull back the stiff white casing. To prevent the tabs from breaking, watch your pressure.

  6. Heyday Active Noise-Canceling Wireless Headphones 0398 Motherboard Replacement: 手順 6、 2の画像 1 Heyday Active Noise-Canceling Wireless Headphones 0398 Motherboard Replacement: 手順 6、 2の画像 2
    • To release the hold on the tab that is attached to the chip, use your ifixit opening tool. To unplug power from the headphones and motherboard, remove the tab away from the chip.

  7. Heyday Active Noise-Canceling Wireless Headphones 0398 Motherboard Replacement: 手順 7、 2の画像 1 Heyday Active Noise-Canceling Wireless Headphones 0398 Motherboard Replacement: 手順 7、 2の画像 2
    • Use the Phillips #00 screwdriver to remove the single 2.4mm black screw from the motherboard.

    • After removal, you can ready to solder the motherboard by using the opening tool to lift it up.

  8. Heyday Active Noise-Canceling Wireless Headphones 0398 Motherboard Replacement: 手順 8、 3の画像 1 Heyday Active Noise-Canceling Wireless Headphones 0398 Motherboard Replacement: 手順 8、 3の画像 2 Heyday Active Noise-Canceling Wireless Headphones 0398 Motherboard Replacement: 手順 8、 3の画像 3
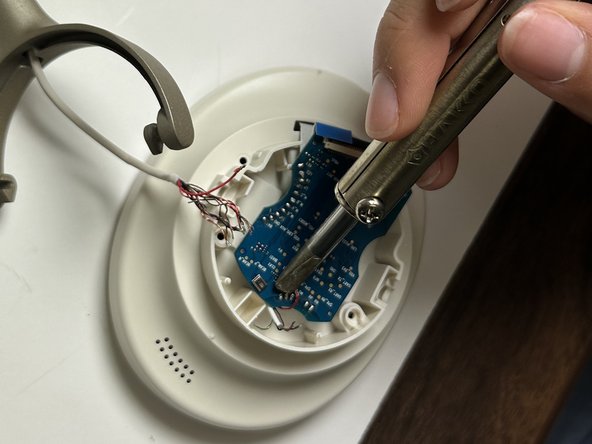
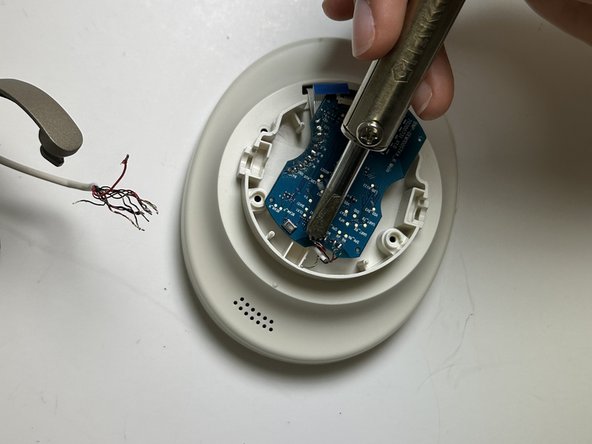
    • You must wait for your soldering tool to heat up after plugging it into a nearby outlet. Using a soldering tool requires burning the metal circular components connected to the motherboard's circuits. The wiring that was originally attached to the motherboard and the tool will burn when they get hot enough. Burn them away securely.

終わりに

To reassemble your device, follow these instructions in reverse order.

作成者

1人の作成者と共同作成されました。

Christopher Puperi

メンバー登録日: 09/13/23

493 ポイント

5のガイドは作成済み

チーム

Austin Community College, Team 8-3, Watkins Fall 2023 Austin Community College, Team 8-3, Watkins Fall 2023人のメンバー

AUSTINCC-WATKINS-F23S8G3

4 メンバー

5のガイドは作成済み

0 件のコメント

コメントを追加

統計データ:

過去 24時間: 0

過去 7 日: 0

過去 30 日: 5

今までの合計 66