メインコンテンツにスキップ

Hamilton Beach 70740 Power Cord Replacement

必要な工具と部品

  1. Hamilton Beach 70740 Power Cord Replacement, Bowl and Lid: 手順 1、 2の画像 1 Hamilton Beach 70740 Power Cord Replacement, Bowl and Lid: 手順 1、 2の画像 2
    • Turn the bowl counterclockwise and lift.

  2. Hamilton Beach 70740 Power Cord Replacement, Base: 手順 2、 2の画像 1 Hamilton Beach 70740 Power Cord Replacement, Base: 手順 2、 2の画像 2
    • Using a #2 Phillips head screwdriver, remove the two 11 mm screws from the base.

    • Pull suction cups straight out.

  3. Hamilton Beach 70740 Power Cord Replacement: 手順 3、 3の画像 1 Hamilton Beach 70740 Power Cord Replacement: 手順 3、 3の画像 2 Hamilton Beach 70740 Power Cord Replacement: 手順 3、 3の画像 3
    • Remove rubber caps using the heavy duty spudger.

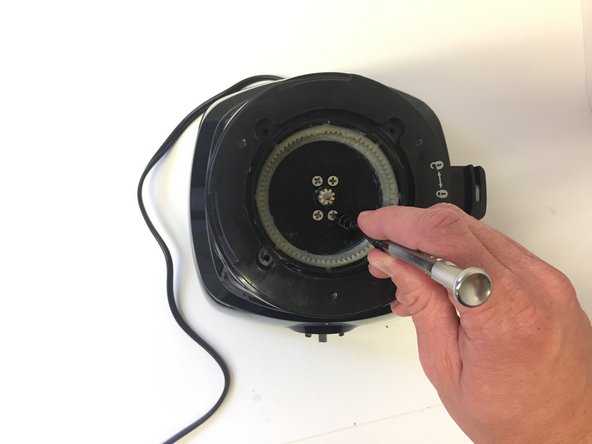
    • Remove the four 11 mm screws using the #2 Phillips head screwdriver.

    • Pull base straight out.

  4. Hamilton Beach 70740 Power Cord Replacement, Power Cord: 手順 4、 3の画像 1 Hamilton Beach 70740 Power Cord Replacement, Power Cord: 手順 4、 3の画像 2 Hamilton Beach 70740 Power Cord Replacement, Power Cord: 手順 4、 3の画像 3
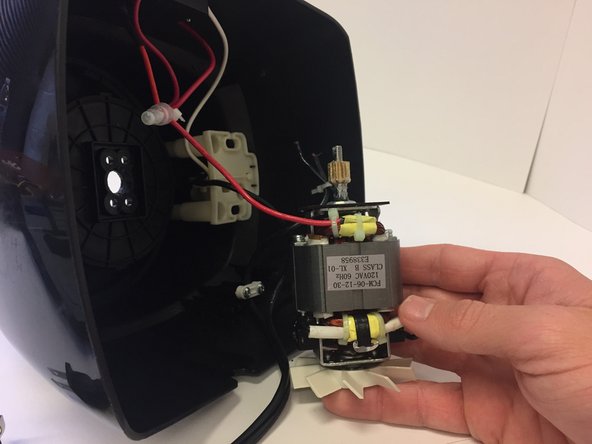
    • Using a #2 Phillips head screwdriver, remove the four 9 mm screws.

    • From the open base pull the motor straight out.

  5. Hamilton Beach 70740 Power Cord Replacement: 手順 5、 1の画像 1
    • Using the wire stripper crimping tool cut the black wire connection from the power cord to the motor and then rewire the new power cord to the motor.

  6. Hamilton Beach 70740 Power Cord Replacement: 手順 6、 2の画像 1 Hamilton Beach 70740 Power Cord Replacement: 手順 6、 2の画像 2
    • Remove the two 12 mm screws using the #2 Phillips head screwdriver.

    • Remove plastic piece.

  7. Hamilton Beach 70740 Power Cord Replacement: 手順 7、 2の画像 1 Hamilton Beach 70740 Power Cord Replacement: 手順 7、 2の画像 2
    • Remove the three 12 mm screws using the #2 Phillips head screwdriver.

    • Remove the plastic piece by pulling straight up.

  8. Hamilton Beach 70740 Power Cord Replacement: 手順 8、 2の画像 1 Hamilton Beach 70740 Power Cord Replacement: 手順 8、 2の画像 2
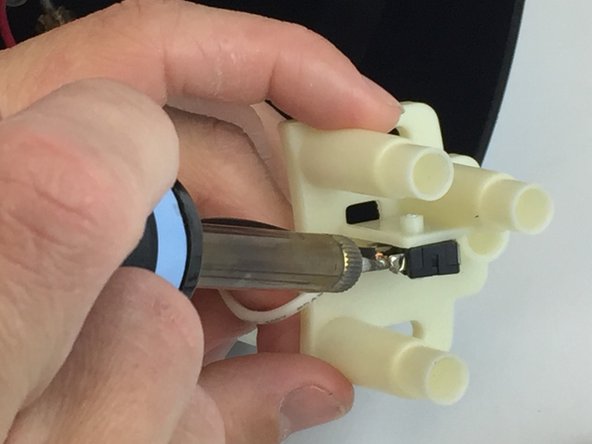
    • Remove the power cord from the ground by removing the solder with the soldering tool.

    • Solder the new ground from the new power cord.

終わりに

To reassemble your device, follow these instructions in reverse order.

ある他の人がこのガイドを完成しました。

作成者

1人の作成者と共同作成されました。

Travis Williams

メンバー登録日: 02/02/17

552 ポイント

5のガイドは作成済み

チーム

USF Tampa, Team 17-4, Blackwell Spring 2017 USF Tampa, Team 17-4, Blackwell Spring 2017人のメンバー

USFT-BLACKWELL-S17S17G4

3 メンバー

7のガイドは作成済み

0 件のコメント

コメントを追加

統計データ:

過去 24時間: 2

過去 7 日: 3

過去 30 日: 6

今までの合計 815