メインコンテンツにスキップ

Hamilton Beach 70740 Motor Replacement

アーカイブされたガイド
このガイドは将来的な使用のためにのみ保存されてます。ご自身の修理作業には更新バージョンをご利用ください。

必要な工具と部品

  1. 注意: 手順 1-5 は、作業進行中としてマークされている ガイド から引用されています。

    Hamilton Beach 70740 Motor Replacement, Base Removal: 手順 1、 3の画像 1 Hamilton Beach 70740 Motor Replacement, Base Removal: 手順 1、 3の画像 2 Hamilton Beach 70740 Motor Replacement, Base Removal: 手順 1、 3の画像 3
    • Hold the food processor upside down and remove the two screws indicated with a screwdriver. Once unscrewed, remove the two rubber suction pads.

  2. Hamilton Beach 70740 Motor Replacement: 手順 2、 2の画像 1 Hamilton Beach 70740 Motor Replacement: 手順 2、 2の画像 2
    • Use a spudger to remove the 4 rubber base pads located at the corners of the device.

  3. Hamilton Beach 70740 Motor Replacement: 手順 3、 1の画像 1
    • Unscrew all 4 screws that are located beneath the pads with a screwdriver and remove the plastic grey base.

  4. Hamilton Beach 70740 Motor Replacement: 手順 4、 1の画像 1
    • Remove the screws indicated with a screw driver.

  5. Hamilton Beach 70740 Motor Replacement: 手順 5、 1の画像 1
    • Remove the two screws behind the knob with a screwdriver.

  6. Hamilton Beach 70740 Motor Replacement, Motor/Cord: 手順 6、 1の画像 1
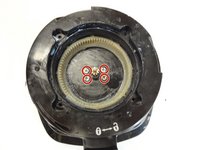
    • Use a regular nylon spudger to remove the plastic caps at these locations with moderate pressure.

    • When working with electronics, it's important to choose a tool that's ESD-safe to avoid accidental damage to the device. The regular black nylon spudger or a plastic opening tool should be used whenever possible.

    • Apply pressure at the edge of the plastic cap circles. Apply stress elsewhere may damage the device.

    • Note that the plastic caps are glued

  7. Hamilton Beach 70740 Motor Replacement: 手順 7、 1の画像 1
    • Remove the 4 screws located under the plastic caps with a screw driver.

  8. Hamilton Beach 70740 Motor Replacement: 手順 8、 2の画像 1 Hamilton Beach 70740 Motor Replacement: 手順 8、 2の画像 2
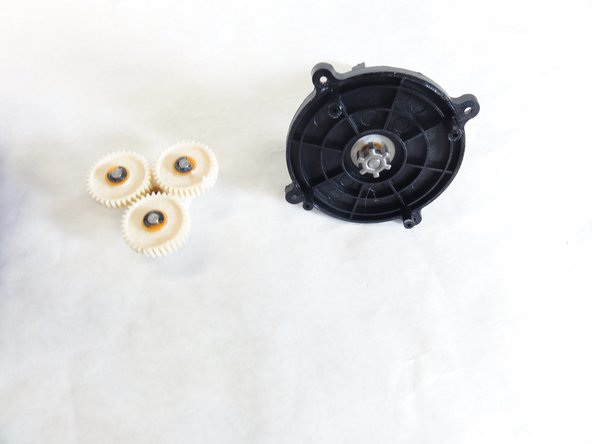
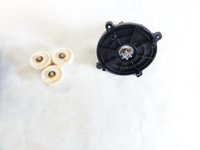
    • Lift and remove the plastic gears at the center of the device.

    • Remove any grease residue underneath the plastic gears.

  9. Hamilton Beach 70740 Motor Replacement: 手順 9、 2の画像 1 Hamilton Beach 70740 Motor Replacement: 手順 9、 2の画像 2
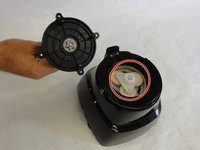
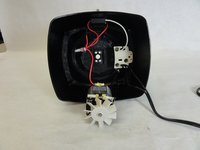
    • Remove the remaining screws to unhinge the motor located at the center of the device using a screw driver.

  10. Hamilton Beach 70740 Motor Replacement, Motor: 手順 10、 1の画像 1
    • Remove to electrical cap to the positive terminal(black terminal), and undo the wiring.

  11. Hamilton Beach 70740 Motor Replacement: 手順 11、 1の画像 1
    • Remove the electrical cap to the negative end(red wire), and undo the wiring. Once this is complete reconstruct the wiring with the new motor.

終わりに

To reassemble your device, follow these instructions in reverse order.

2 の人々がこのガイドを完成させました。

作成者

5人の作成者と共同で作成されました。

David Gedeon

メンバー登録日: 09/17/15

806 ポイント

6のガイドは作成済み

チーム

IUPUI, Team 1-1, Baechle Fall 2015 IUPUI, Team 1-1, Baechle Fall 2015人のメンバー

IUPUI-BAECHLE-F15S1G1

4 メンバー

8のガイドは作成済み

0 件のコメント

コメントを追加

統計データ:

過去 24時間: 0

過去 7 日: 0

過去 30 日: 1

今までの合計 656