メインコンテンツにスキップ

Hamilton Beach 51101BA Power Button Replacement

必要な工具と部品

  1. Hamilton Beach 51101BA Power Button Replacement, Power Button: 手順 1、 3の画像 1 Hamilton Beach 51101BA Power Button Replacement, Power Button: 手順 1、 3の画像 2 Hamilton Beach 51101BA Power Button Replacement, Power Button: 手順 1、 3の画像 3
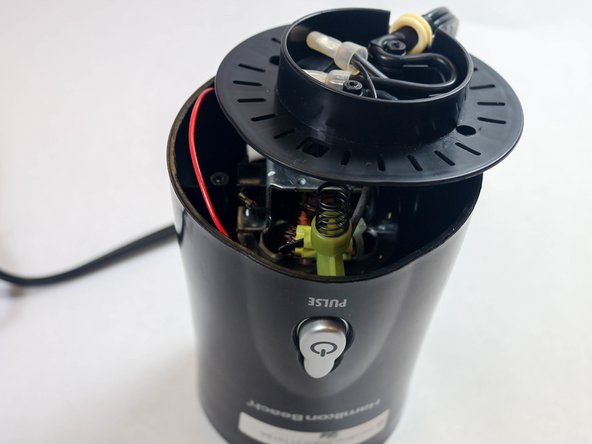
    • Remove the container from the base.

    • Hold the blender and the container, then twist the container in a clockwise motion.

    • Make sure to follow the lock and unlock markings on the container.

  2. Hamilton Beach 51101BA Power Button Replacement: 手順 2、 1の画像 1
    • Turn the blender so the bottom is facing you.

    • Using a Phillips #2 screwdriver, remove the two 5 mm Phillips screws from the base.

  3. Hamilton Beach 51101BA Power Button Replacement: 手順 3、 1の画像 1
    • Using a Phillips #2 screwdriver, remove the two 5 mm Phillips screws from the motor platform.

  4. Hamilton Beach 51101BA Power Button Replacement: 手順 4、 2の画像 1 Hamilton Beach 51101BA Power Button Replacement: 手順 4、 2の画像 2
    • Unhinge the motor platform from the blender.

    • You may need a plastic spudger to unhinge the plastic bottom piece from the base of the blender.

    • You do not need to completely remove this piece from the base.

  5. Hamilton Beach 51101BA Power Button Replacement: 手順 5、 1の画像 1
    • Pull out the rectangular green piece.

    • This is the actual power button.

  6. Hamilton Beach 51101BA Power Button Replacement: 手順 6、 1の画像 1
    • Some experience in soldering is required!

    • On the back of the power button, desolder the red and grey wires that are connected to the piece.

終わりに

To reassemble your device, follow these instructions in reverse order.

2 の人々がこのガイドを完成させました。

作成者

4人の作成者と共同で作成されました。

Brandon Nunez

メンバー登録日: 08/28/15

283 ポイント

2のガイドは作成済み

チーム

USF Tampa, Team 2-5, Sullivan Fall 2015 USF Tampa, Team 2-5, Sullivan Fall 2015人のメンバー

USFT-SULLIVAN-F15S2G5

4 メンバー

5のガイドは作成済み

0 件のコメント

コメントを追加

統計データ:

過去 24時間: 0

過去 7 日: 4

過去 30 日: 25

今までの合計 3,256