はじめに
This guide requires you to solder. If you are unfamiliar with soldering and de-soldering, make sure to check out iFixit's Soldering Skills page before attempting this replacement!
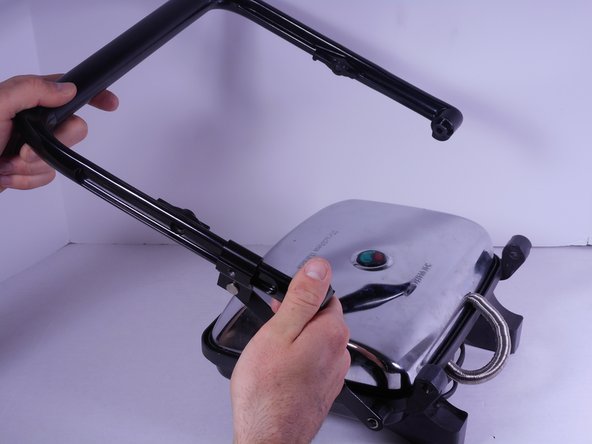
The handle must be removed to allow access to the top heating element housing, which will allow you access to the solder.
必要な工具と部品
-
-
On the back of the press, remove the locking washer by prying upwards with the nylon or metal spudger tool.
-
Repeat for the other washer across from the first one.
-
-
-
-
Gently separate the heating element housing from the cooking surface by pulling up on the housing and pushing down on the surface.
-
-
-
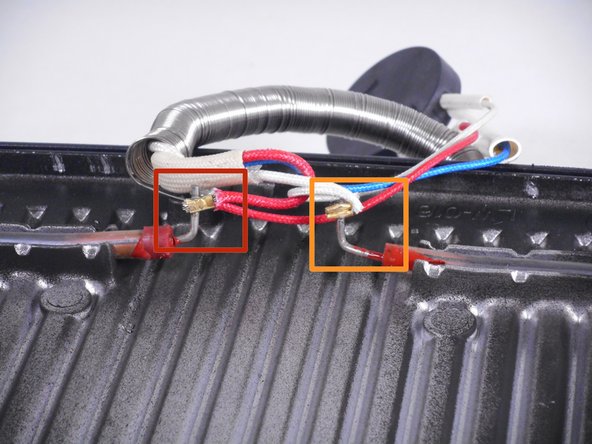
The left lead needs to be connected to the two red wires.
-
The right lead needs to be connected to the two white wires.
-
One or both of the leads can have damaged solder, resulting in poor connections between the lead and the wire ends.
-
De-solder the existing solder joints on the lead(s).
-
Solder the wire ends back to their corresponding leads.
-


To reassemble your device, follow these instructions in reverse order.
To reassemble your device, follow these instructions in reverse order.

チーム

Cal Poly, Team 6-27, Amido Winter 2015 Cal Poly, Team 6-27, Amido Winter 2015人のメンバー
CPSU-AMIDO-W15S6G27
4 メンバー
6のガイドは作成済み