メインコンテンツにスキップ

HTC Warhawk Buttons Replacement

必要な工具と部品

  1. HTC Warhawk Buttons Replacement, Buttons: 手順 1、 1の画像 1
    • Take the back cover off the phone and take the battery out.

  2. HTC Warhawk Buttons Replacement: 手順 2、 1の画像 1
    • Take a SL#2.5 screwdriver and pop the black piece off shown here

  3. HTC Warhawk Buttons Replacement: 手順 3、 1の画像 1
    • Take a T5 screwdriver and unscrew the two screws seen here

  4. HTC Warhawk Buttons Replacement: 手順 4、 1の画像 1
    • Unscrew the two screws on the back of the phone with a T5 screwdriver

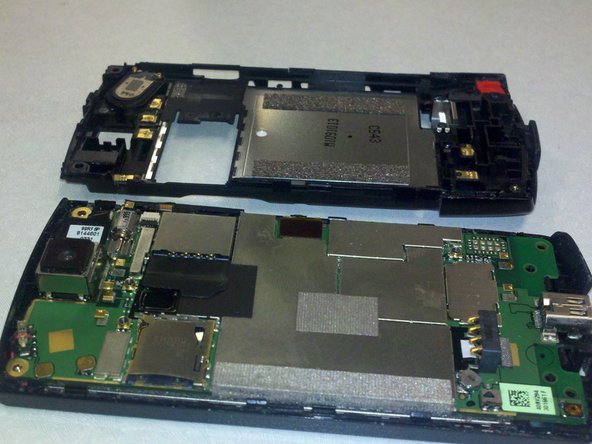
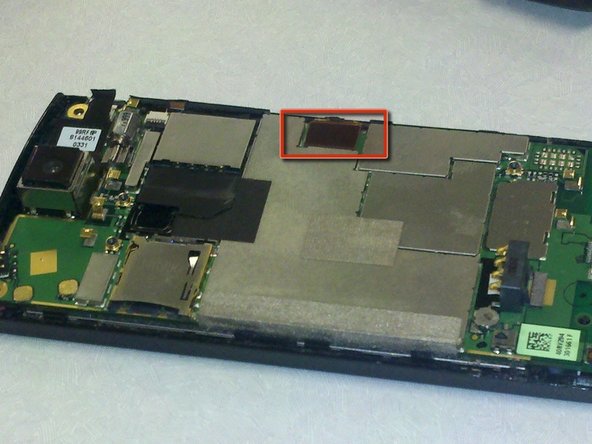
  5. HTC Warhawk Buttons Replacement: 手順 5、 2の画像 1 HTC Warhawk Buttons Replacement: 手順 5、 2の画像 2
    • Take the SL#2.5 screwdriver and pry off the back cover

    • The phone should now look like the second picture

  6. HTC Warhawk Buttons Replacement: 手順 6、 1の画像 1
    • Take the SL#2.5 screwdriver and lift up the white connector at the top right corner of the phone on the side with the circuit board

  7. HTC Warhawk Buttons Replacement: 手順 7、 2の画像 1 HTC Warhawk Buttons Replacement: 手順 7、 2の画像 2
    • Next lift up the camera lens from the board.

    • It should now look like the second picture

    • Then lift up the circuit circled in red on the second picture

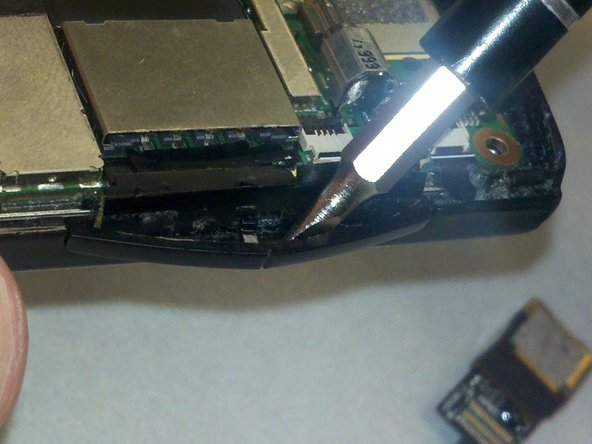
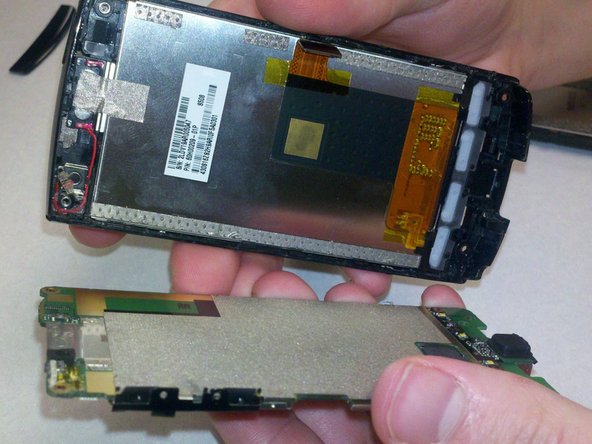
  8. HTC Warhawk Buttons Replacement: 手順 8、 2の画像 1 HTC Warhawk Buttons Replacement: 手順 8、 2の画像 2
    • Take the SL#2.5 screwdriver and pry off the volume buttons on the side of the phone

    • The circuit board should now be detached from the LCD part of the phone

  9. HTC Warhawk Buttons Replacement: 手順 9、 1の画像 1
    • Next take the SL#2.5 screwdriver and pry the buttons off the phone and replace with the new ones

終わりに

To reassemble your device, follow these instructions in reverse order.

作成者

5人の作成者と共同で作成されました。

Caitlin Bruce

メンバー登録日: 10/04/11

23 ポイント

1ガイドが承認済み

チーム

UW Stout, Team 5-3, Zhou Fall 2011 UW Stout, Team 5-3, Zhou Fall 2011人のメンバー

UWSTOUT-ZHOU-F11S5G3

4 メンバー

6のガイドは作成済み

0 件のコメント

コメントを追加

統計データ:

過去 24時間: 1

過去 7 日: 1

過去 30 日: 4

今までの合計 769