メインコンテンツにスキップ

HTC One V Vibrator Replacement

必要な工具と部品

  1. HTC One V Vibrator Replacement, Disassembling HTC ONE V Bottom Assembly: 手順 1、 3の画像 1 HTC One V Vibrator Replacement, Disassembling HTC ONE V Bottom Assembly: 手順 1、 3の画像 2 HTC One V Vibrator Replacement, Disassembling HTC ONE V Bottom Assembly: 手順 1、 3の画像 3
    • Power off your device.

    • Remove the bottom cover by sliding it off.

  2. HTC One V Vibrator Replacement: 手順 2、 1の画像 1
    • Remove the SIM card.

    • Remove the four screws securing the bottom casing.

    • Two 3.0 mm Phillips #0 screws in the top left and right corners.

    • Two 2.0 mm Phillips #0 screws in the bottom left and right corners.

  3. HTC One V Vibrator Replacement: 手順 3、 2の画像 1 HTC One V Vibrator Replacement: 手順 3、 2の画像 2
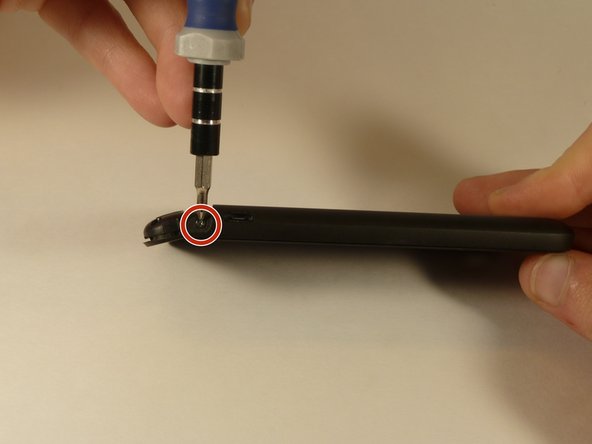
    • Remove the 2.0 mm Phillips #0 screws on either side of the phone.

  4. HTC One V Vibrator Replacement: 手順 4、 3の画像 1 HTC One V Vibrator Replacement: 手順 4、 3の画像 2 HTC One V Vibrator Replacement: 手順 4、 3の画像 3
    • Use a plastic opening tool to pry open the bottom casing.

    • Remove the bottom casing by pulling it towards you.

  5. HTC One V Vibrator Replacement, Disassembling HTC One V Back Case: 手順 5、 3の画像 1 HTC One V Vibrator Replacement, Disassembling HTC One V Back Case: 手順 5、 3の画像 2 HTC One V Vibrator Replacement, Disassembling HTC One V Back Case: 手順 5、 3の画像 3
    • Use the plastic opening tool to pry open the rear camera panel.

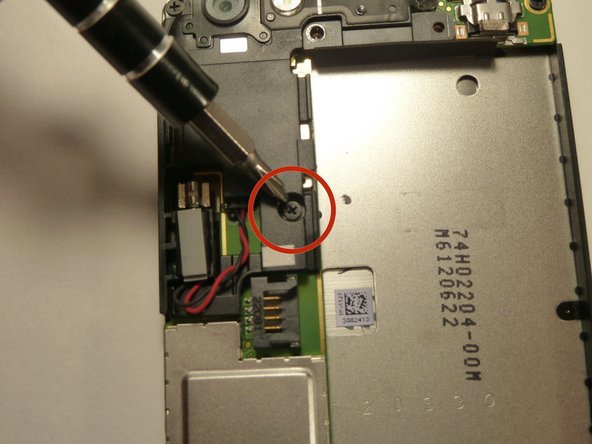
    • Remove both screws that are securing the back case.

    • One 4.0 mm Phillips #0 screw.

    • One 3.0 mm Phillips #0 screw.

  6. HTC One V Vibrator Replacement: 手順 6、 3の画像 1 HTC One V Vibrator Replacement: 手順 6、 3の画像 2 HTC One V Vibrator Replacement: 手順 6、 3の画像 3
    • Use a Jimmy to pry up the OEM SIM and SD card reader contact.

    • Pry from right to left to avoid potential damages to the ribbon.

  7. HTC One V Vibrator Replacement: 手順 7、 3の画像 1 HTC One V Vibrator Replacement: 手順 7、 3の画像 2 HTC One V Vibrator Replacement: 手順 7、 3の画像 3
    • Using both thumbs, gently push on the two bottom rear corners of the motherboard.

    • Gently and slowly pull the screen out from the front of the phone, while feeding the OEM reader contact through the opening.

  8. HTC One V Vibrator Replacement, Battery: 手順 8、 1の画像 1
    • Pry up the battery with the flat end of the spudger.

  9. HTC One V Vibrator Replacement: 手順 9、 3の画像 1 HTC One V Vibrator Replacement: 手順 9、 3の画像 2 HTC One V Vibrator Replacement: 手順 9、 3の画像 3
    • Gently lift up the battery away from the edge of its housing.

    • Use the point end of the spudger to push the connection out of its housing.

  10. HTC One V Vibrator Replacement, Camera Lens: 手順 10、 3の画像 1 HTC One V Vibrator Replacement, Camera Lens: 手順 10、 3の画像 2 HTC One V Vibrator Replacement, Camera Lens: 手順 10、 3の画像 3
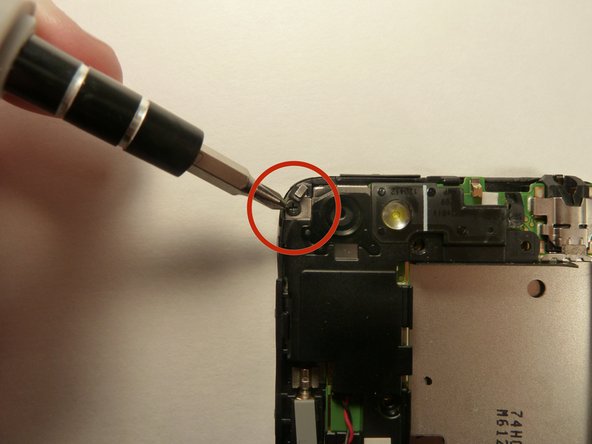
    • Remove the two 3.0 mm Phillips #0 screws, that are securing the camera lens.

  11. HTC One V Vibrator Replacement: 手順 11、 1の画像 1
    • Pry off the camera lens using a plastic opening tool.

  12. HTC One V Vibrator Replacement, Vibrator: 手順 12、 2の画像 1 HTC One V Vibrator Replacement, Vibrator: 手順 12、 2の画像 2
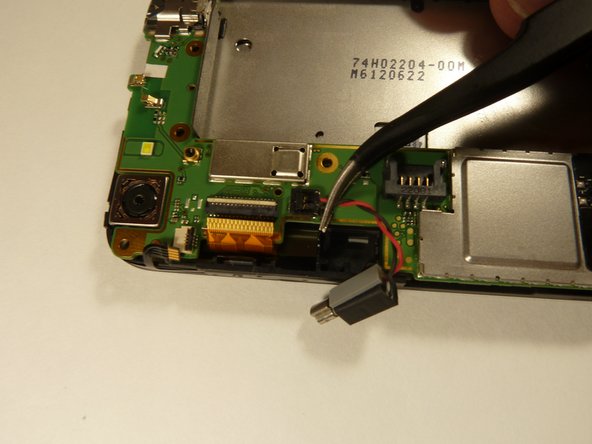
    • Pry the vibrator out of the housing with a spudger.

    • Using the tweezers, pull up on the connecting wires detaching the vibrator from the motherboard.

終わりに

To reassemble your device, follow these instructions in reverse order.

作成者

3人の作成者と共同で作成されました。

Michael Lucido

メンバー登録日: 01/20/15

852 ポイント

6のガイドは作成済み

チーム

USF Tampa, Team 1-3, Blackwell Winter 2015 USF Tampa, Team 1-3, Blackwell Winter 2015人のメンバー

USFT-BLACKWELL-W15S1G3

4 メンバー

16のガイドは作成済み

0 件のコメント

コメントを追加

統計データ:

過去 24時間: 0

過去 7 日: 2

過去 30 日: 4

今までの合計 321