メインコンテンツにスキップ

HTC One Mini Rear Facing Camera Replacement

必要な工具と部品

  1. HTC One Mini Rear Facing Camera Replacement, iOpener Heating: 手順 1、 1の画像 1
    • Use an iOpener or hair dryer to apply heat to the lower speaker grille, in order to soften the adhesive underneath.

  2. HTC One Mini Rear Facing Camera Replacement, Remove Speaker Grills: 手順 2、 1の画像 1
    • Slide a thin pry tool underneath the lower speaker cover and slide it across to separate the adhesive underneath.

    • Remove the lower speaker cover.

  3. HTC One Mini Rear Facing Camera Replacement, Remove Screw: 手順 3、 3の画像 1 HTC One Mini Rear Facing Camera Replacement, Remove Screw: 手順 3、 3の画像 2 HTC One Mini Rear Facing Camera Replacement, Remove Screw: 手順 3、 3の画像 3
    • Remove the screw under the speaker cover using a T6 Torx screwdriver.

  4. HTC One Mini Rear Facing Camera Replacement: 手順 4、 3の画像 1 HTC One Mini Rear Facing Camera Replacement: 手順 4、 3の画像 2 HTC One Mini Rear Facing Camera Replacement: 手順 4、 3の画像 3
    • Slide a thin guitar pick or pry tool between the edge of the display and the rear case, near the bottom of the phone.

    • Carefully work your way up each side of the display and separate the rear case. There are three clips on each side.

  5. HTC One Mini Rear Facing Camera Replacement, Separate Rear Case: 手順 5、 2の画像 1 HTC One Mini Rear Facing Camera Replacement, Separate Rear Case: 手順 5、 2の画像 2
    • Remove the rear case from the phone.

  6. HTC One Mini Rear Facing Camera Replacement, Remove Screws: 手順 6、 3の画像 1 HTC One Mini Rear Facing Camera Replacement, Remove Screws: 手順 6、 3の画像 2 HTC One Mini Rear Facing Camera Replacement, Remove Screws: 手順 6、 3の画像 3
    • Remove the two Phillips screws securing the battery connector.

  7. HTC One Mini Rear Facing Camera Replacement: 手順 7、 2の画像 1 HTC One Mini Rear Facing Camera Replacement: 手順 7、 2の画像 2
    • Disconnect the battery by prying the metal cover straight up.

  8. HTC One Mini Rear Facing Camera Replacement, Remove screws: 手順 8、 3の画像 1 HTC One Mini Rear Facing Camera Replacement, Remove screws: 手順 8、 3の画像 2 HTC One Mini Rear Facing Camera Replacement, Remove screws: 手順 8、 3の画像 3
    • Remove two Phillips screws.

    • The screw on the upper right corner secures a tiny golden washer. Remove this washer.

  9. HTC One Mini Rear Facing Camera Replacement, Remove Screws: 手順 9、 3の画像 1 HTC One Mini Rear Facing Camera Replacement, Remove Screws: 手順 9、 3の画像 2 HTC One Mini Rear Facing Camera Replacement, Remove Screws: 手順 9、 3の画像 3
    • Remove the two small black Phillips screws.

  10. HTC One Mini Rear Facing Camera Replacement, Remove Screws: 手順 10、 3の画像 1 HTC One Mini Rear Facing Camera Replacement, Remove Screws: 手順 10、 3の画像 2 HTC One Mini Rear Facing Camera Replacement, Remove Screws: 手順 10、 3の画像 3
    • Remove two more Phillips screws.

  11. HTC One Mini Rear Facing Camera Replacement, Remove protective foil.: 手順 11、 3の画像 1 HTC One Mini Rear Facing Camera Replacement, Remove protective foil.: 手順 11、 3の画像 2 HTC One Mini Rear Facing Camera Replacement, Remove protective foil.: 手順 11、 3の画像 3
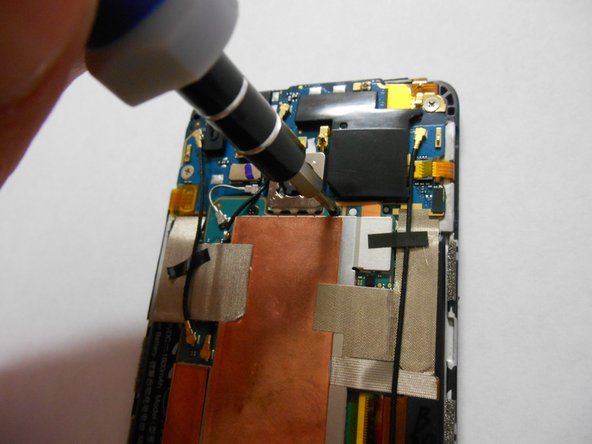
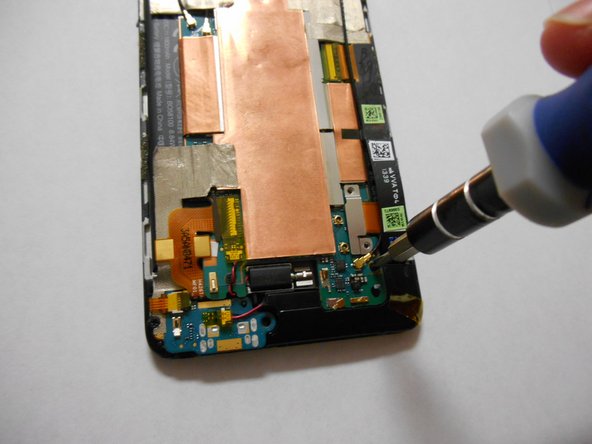
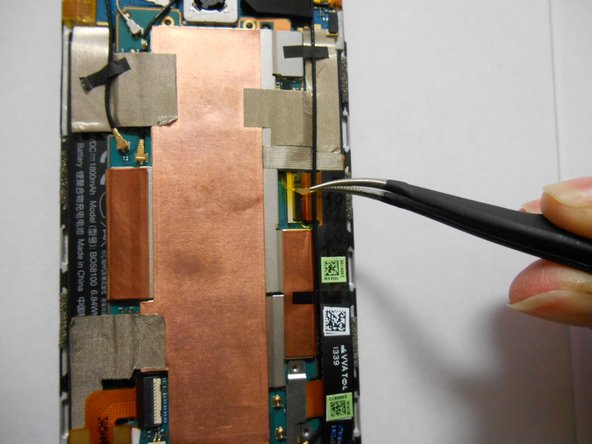
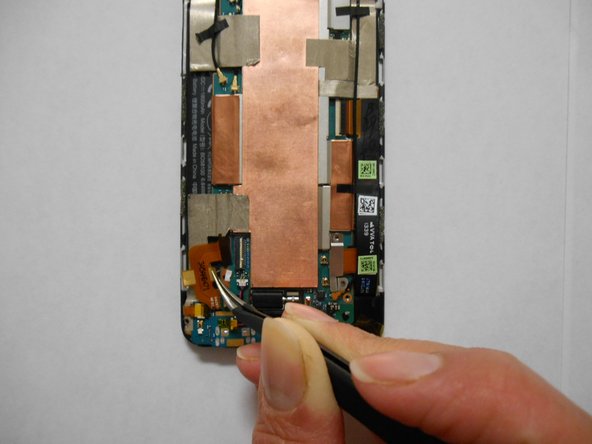
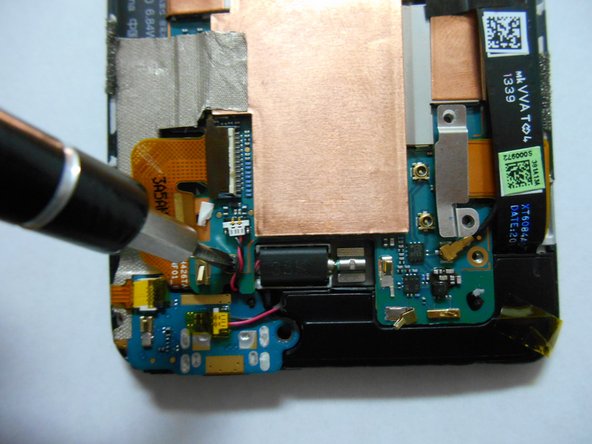
    • Use tweezers to remove the yellow tape covering the flex cable connectors (total of five).

  12. HTC One Mini Rear Facing Camera Replacement: 手順 12、 2の画像 1 HTC One Mini Rear Facing Camera Replacement: 手順 12、 2の画像 2
    • Carefully disconnect the flex cables at the points where you removed the yellow tape in the previous steps.

    • To disconnect, flip up the small latch on each connector, opposite its cable, and then gently pull the cable free.

  13. HTC One Mini Rear Facing Camera Replacement: 手順 13、 3の画像 1 HTC One Mini Rear Facing Camera Replacement: 手順 13、 3の画像 2 HTC One Mini Rear Facing Camera Replacement: 手順 13、 3の画像 3
    • Peel off the silver strip with your tweezers.

    • Using your hands, detach the black strip from the board without removing it.

  14. HTC One Mini Rear Facing Camera Replacement: 手順 14、 2の画像 1 HTC One Mini Rear Facing Camera Replacement: 手順 14、 2の画像 2
    • Detach carefully with your tweezers the volume buttons.

    • Detach the power button with your tweezers.

  15. HTC One Mini Rear Facing Camera Replacement: 手順 15、 3の画像 1 HTC One Mini Rear Facing Camera Replacement: 手順 15、 3の画像 2 HTC One Mini Rear Facing Camera Replacement: 手順 15、 3の画像 3
    • Identify the screw behind the cable.

    • Remove the screw using a Phillips screwdriver.

  16. HTC One Mini Rear Facing Camera Replacement: 手順 16、 2の画像 1 HTC One Mini Rear Facing Camera Replacement: 手順 16、 2の画像 2
    • Lift the motherboard, but don't try to remove it completely yet.

    • Handle the board only by the edges.

  17. HTC One Mini Rear Facing Camera Replacement: 手順 17、 3の画像 1 HTC One Mini Rear Facing Camera Replacement: 手順 17、 3の画像 2 HTC One Mini Rear Facing Camera Replacement: 手順 17、 3の画像 3
    • Using your tweezers, remove the black square located in the power button.

    • Remove the motherboard completely.

  18. HTC One Mini Rear Facing Camera Replacement, Rear Facing Camera: 手順 18、 1の画像 1
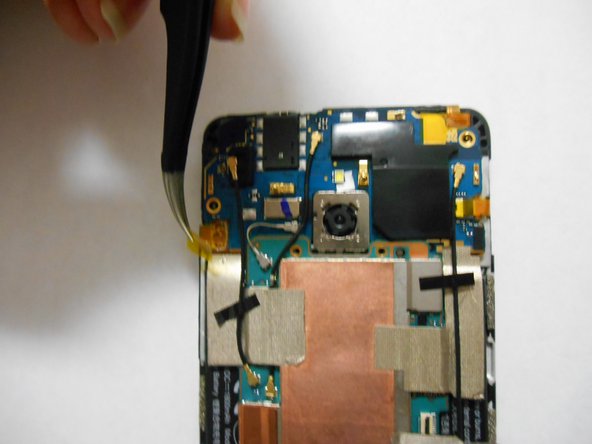
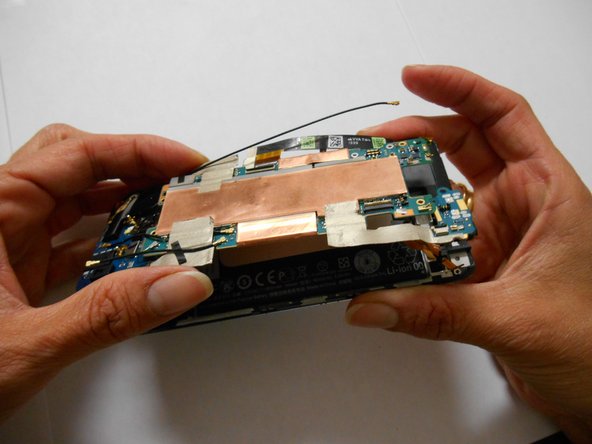
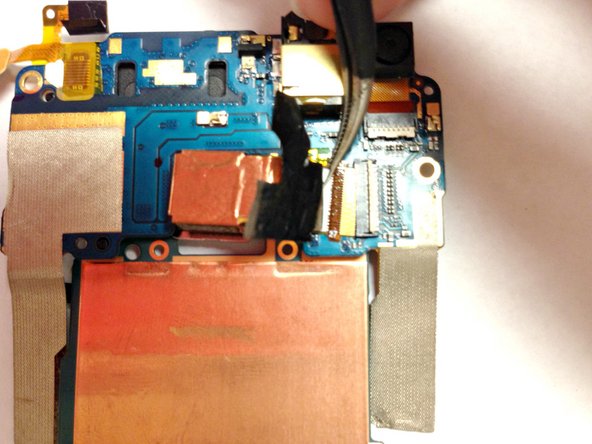
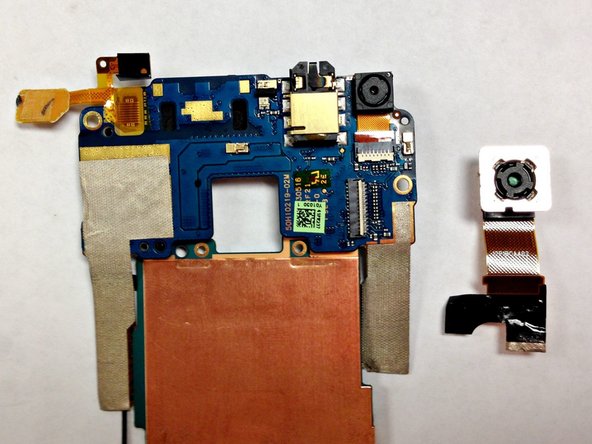
    • Remove the motherboard and place it so that the rear camera is face down.

  19. HTC One Mini Rear Facing Camera Replacement: 手順 19、 1の画像 1
    • Use the tweezers to carefully peel back the copper tape attached to your rear camera.

  20. HTC One Mini Rear Facing Camera Replacement: 手順 20、 3の画像 1 HTC One Mini Rear Facing Camera Replacement: 手順 20、 3の画像 2 HTC One Mini Rear Facing Camera Replacement: 手順 20、 3の画像 3
    • Use the tweezers to lift the hatch and remove the part of the rear camera that is inserted.

終わりに

To reassemble your device, follow these instructions in reverse order.

2 の人々がこのガイドを完成させました。

作成者

3人の作成者と共同で作成されました。

Marina Sanchez

メンバー登録日: 09/22/14

190 ポイント

1ガイドが承認済み

チーム

USF Tampa, Team 3-4, Brown Fall 2014 USF Tampa, Team 3-4, Brown Fall 2014人のメンバー

USFT-BROWN-F14S3G4

3 メンバー

10のガイドは作成済み

2 件のコメント

What glue does one use when putting back the speaker grill?

Ratfink - 返信

where can I get the rear camera? what is te number part. tks

Sinuhe Less - 返信

コメントを追加

統計データ:

過去 24時間: 0

過去 7 日: 0

過去 30 日: 0

今までの合計 3,032