メインコンテンツにスキップ

HTC One Max Battery Replacement

必要な工具と部品

  1. HTC One Max Battery Replacement, Back Case: 手順 1、 1の画像 1
    • Lift back cover while pressing highlighted release switch towards the center of the phone.

  2. HTC One Max Battery Replacement: 手順 2、 2の画像 1 HTC One Max Battery Replacement: 手順 2、 2の画像 2
    • Remove the four white stickers in each corner that cover the Tri-Wing screws.

    • Remove the white sticker near the buttons that control the volume.

    • Remove the white sticker near the SIM card.

    • Remove the big white sticker with the bar-code in the center of the phone.

  3. HTC One Max Battery Replacement: 手順 3、 1の画像 1
    • Remove the thirteen Tri-Wing Y00 screws (Upper & Lower screws are 5 mm length, middle screws are 3.8 mm length) from the back case.

    • Disconnect the cable near the volume buttons.

  4. HTC One Max Battery Replacement: 手順 4、 2の画像 1 HTC One Max Battery Replacement: 手順 4、 2の画像 2
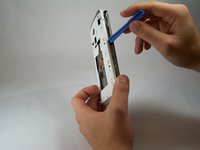
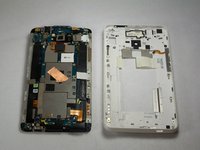
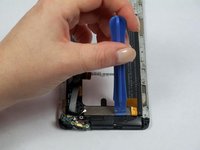
    • Use the small plastic opening tool to pry between the screen and the rear case.

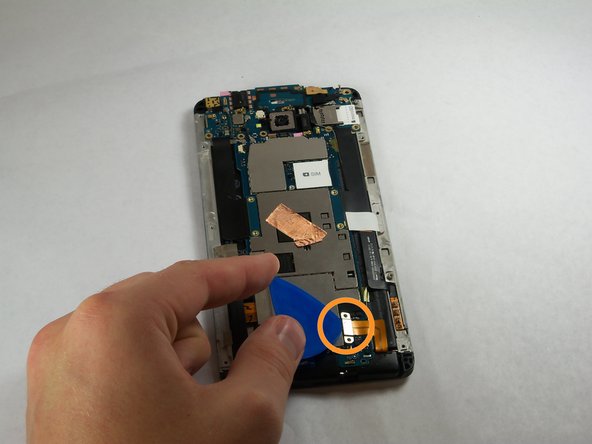
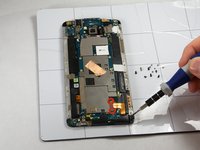
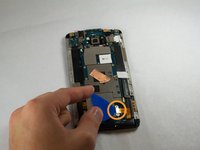
  5. HTC One Max Battery Replacement, Fingerprint Sensor: 手順 5、 2の画像 1 HTC One Max Battery Replacement, Fingerprint Sensor: 手順 5、 2の画像 2
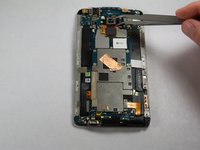
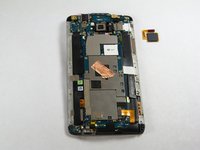
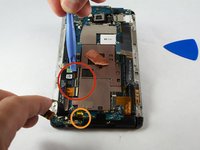
    • Use Tweezers to disconnect the ribbon cable connecting the fingerprint sensor to the motherboard.

    • When replacing the fingerprint sensor, make sure the ribbon cable snaps into the port on the motherboard.

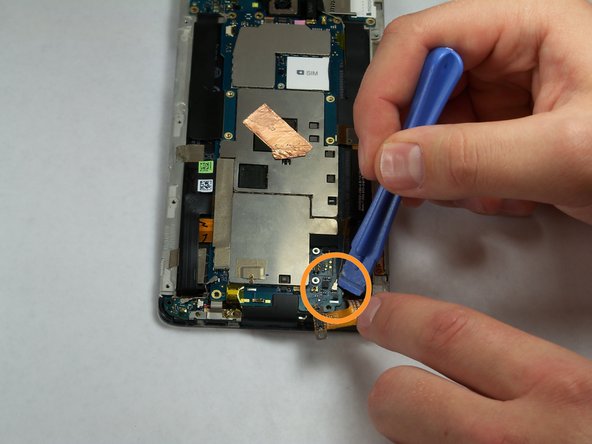
  6. HTC One Max Battery Replacement, Motherboard: 手順 6、 2の画像 1 HTC One Max Battery Replacement, Motherboard: 手順 6、 2の画像 2
    • Remove the two 2.2 mm Phillips #000 screws holding the battery cable.

    • Use a plastic tool to remove the ribbon cable.

  7. HTC One Max Battery Replacement: 手順 7、 2の画像 1 HTC One Max Battery Replacement: 手順 7、 2の画像 2
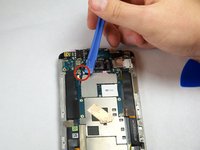
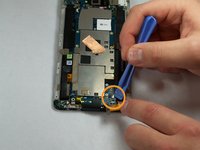
    • Use the plastic opening tool to disconnect the two antenna wires at the top of the phone.

    • Use the plastic opening tool to disconnect a third antenna wire at the bottom of the phone.

  8. HTC One Max Battery Replacement: 手順 8、 1の画像 1
    • Remove the seven 3 mm Phillips #000 screws from the motherboard.

  9. HTC One Max Battery Replacement: 手順 9、 3の画像 1 HTC One Max Battery Replacement: 手順 9、 3の画像 2 HTC One Max Battery Replacement: 手順 9、 3の画像 3
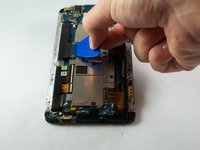
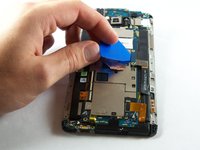
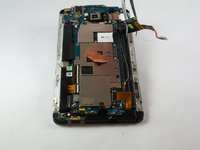
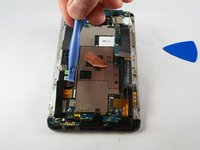
    • Use a plastic tool to pry up and disconnect the large ribbon cables on each side of the motherboard.

    • Use caution prying the ribbon cable on the right side because other ribbon cables run under it.

  10. HTC One Max Battery Replacement: 手順 10、 3の画像 1 HTC One Max Battery Replacement: 手順 10、 3の画像 2 HTC One Max Battery Replacement: 手順 10、 3の画像 3
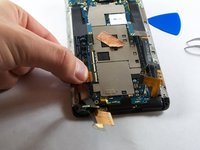
    • Remove the tape covering three flex cable gate connectors on the bottom left side of the phone.

    • Use small plastic opening tool to pry open the latch on each of these gate connectors to disconnect the three cables.

    • Use small plastic opening tool to pry open the latch on each of these gate connectors to disconnect the three cables.

  11. HTC One Max Battery Replacement: 手順 11、 2の画像 1 HTC One Max Battery Replacement: 手順 11、 2の画像 2
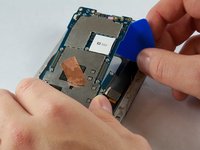
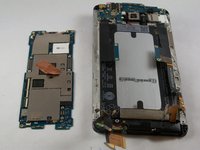
    • Use a plastic tool to lift and remove the motherboard.

    • Use a heat gun to loosen adhesive at bottom if needed.

  12. HTC One Max Battery Replacement, IR Blaster: 手順 12、 1の画像 1
    • Remove the three 3 mm Phillips #000 screws from the secondary board at the top.

  13. HTC One Max Battery Replacement: 手順 13、 1の画像 1
    • Pick up and set aside vibrator, do not disconnect.

  14. HTC One Max Battery Replacement: 手順 14、 1の画像 1
    • Pull out ribbon cable.

    • Peel back infrared sensor.

  15. HTC One Max Battery Replacement, Camera Board: 手順 15、 2の画像 1 HTC One Max Battery Replacement, Camera Board: 手順 15、 2の画像 2
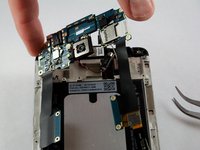
    • Pull out the secondary board with the camera attached.

    • Be advised of the adhesive on the back.

  16. HTC One Max Battery Replacement, Remove Bottom Screws: 手順 16、 1の画像 1
    • Remove two screws from the bottom.

    • Set aside metal retaining plate.

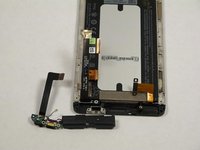
  17. HTC One Max Battery Replacement, Speaker Assembly: 手順 17、 2の画像 1 HTC One Max Battery Replacement, Speaker Assembly: 手順 17、 2の画像 2
    • Pry back the speaker and microphone assembly from the bottom.

    • Be careful to not poke the speaker.

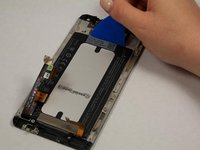
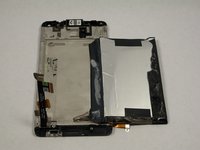
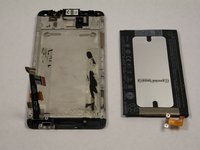
  18. HTC One Max Battery Replacement, Remove Battery: 手順 18、 3の画像 1 HTC One Max Battery Replacement, Remove Battery: 手順 18、 3の画像 2 HTC One Max Battery Replacement, Remove Battery: 手順 18、 3の画像 3
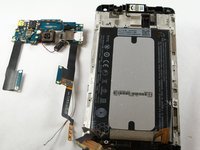
    • Pry the battery away from the back of the screen with a plastic tool.

    • We recommend using a heat gun to loosen the adhesive holding the battery in place.

終わりに

To reassemble your device, follow these instructions in reverse order.

15 の人々がこのガイドを完成させました。

作成者

4人の作成者と共同で作成されました。
Andrey Sklyar

メンバー登録日: 09/23/14

452 ポイント

2のガイドは作成済み

チーム

USF Tampa, Team 11-3, Blackwell Fall 2014 USF Tampa, Team 11-3, Blackwell Fall 2014人のメンバー

USFT-BLACKWELL-F14S11G3

4 メンバー

7のガイドは作成済み

4 件のコメント

Microphone in the article, battery in the title.

AaronAndrusko - 返信

How to change LCD screen for this model?

Jembalang Tanah - 返信

What the &&^& man i prefer to buy another phone %#*@ it

Russel - 返信

What the &&^& man i prefer to buy a new phone

Russel - 返信

コメントを追加

統計データ:

過去 24時間: 1

過去 7 日: 1

過去 30 日: 5

今までの合計 15,457