メインコンテンツにスキップ

HTC MyTouch 4G Mother Board Replacement

必要な工具と部品

  1. HTC MyTouch 4G Mother Board Replacement, Flip Phone Over: 手順 1、 1の画像 1
    • Flip your phone over and hold the phone with the back facing you.

  2. HTC MyTouch 4G Mother Board Replacement, Remove the back case.: 手順 2、 1の画像 1
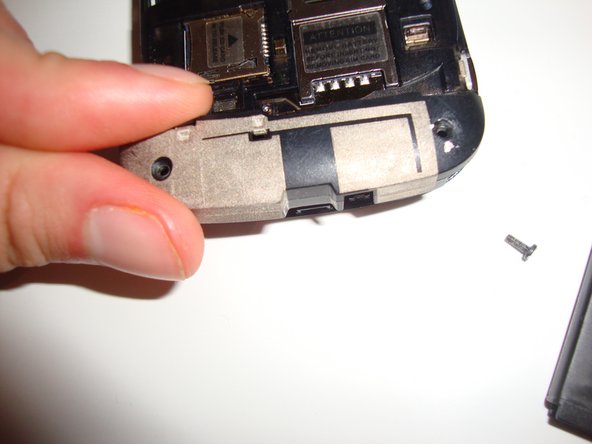
    • Place the prying tool into the notch at the bottom of the case and pull up to remove.

  3. HTC MyTouch 4G Mother Board Replacement, Remove the battery: 手順 3、 2の画像 1 HTC MyTouch 4G Mother Board Replacement, Remove the battery: 手順 3、 2の画像 2
    • Use the plastic prying tool in the upper left-hand corner notch of the battery to remove.

  4. HTC MyTouch 4G Mother Board Replacement, Removing Screws: 手順 4、 1の画像 1
    • Remove the two T5x5mm Screws with the T5 Torx Screw driver.

    • Remove the one Phillips screw with the Phillips #00 Screwdriver.

  5. HTC MyTouch 4G Mother Board Replacement, Removing back case.: 手順 5、 3の画像 1 HTC MyTouch 4G Mother Board Replacement, Removing back case.: 手順 5、 3の画像 2 HTC MyTouch 4G Mother Board Replacement, Removing back case.: 手順 5、 3の画像 3
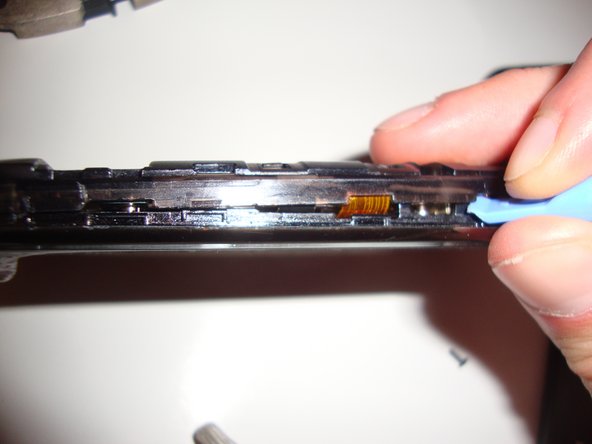
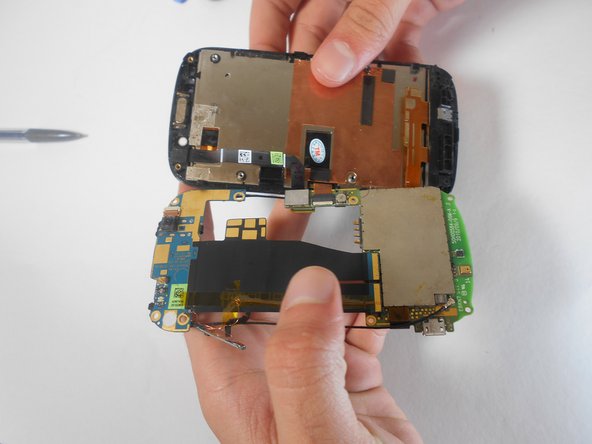
    • Use the plastic opening tools to remove the back case.

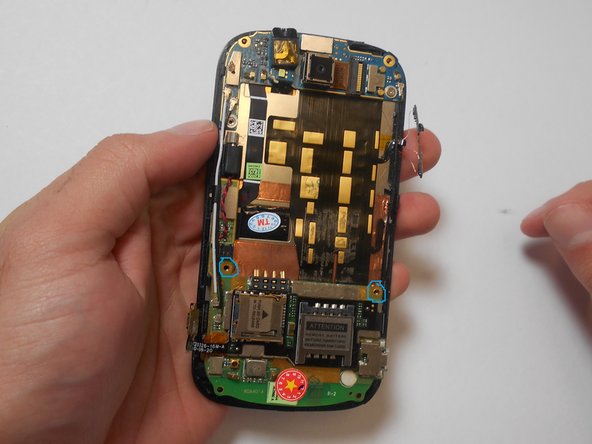
    • There are four T5x5mm screws. Use the T5 Torx Screwdriver to remove them.

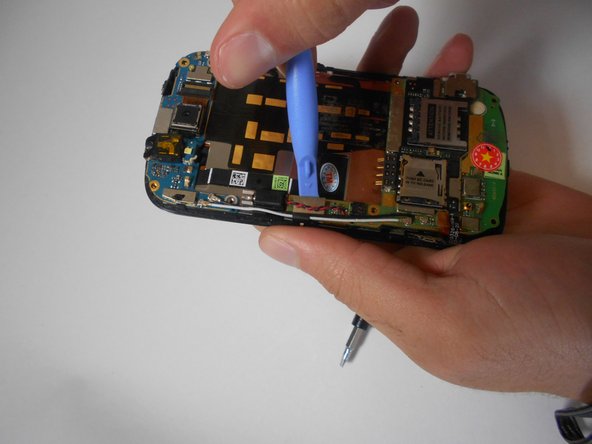
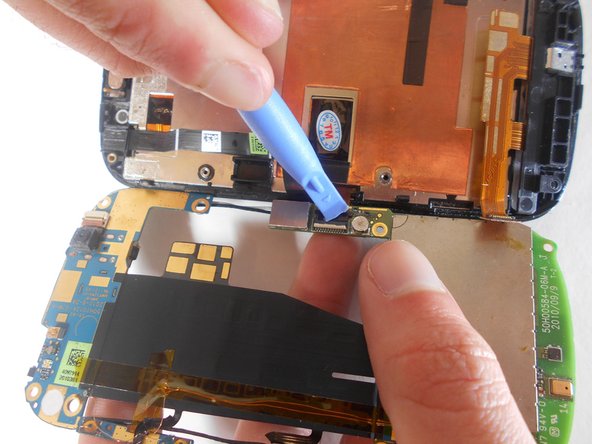
    • Using the plastic opening tools, remove the Wifi antenna.

  6. HTC MyTouch 4G Mother Board Replacement, Removing four T5 Screws: 手順 6、 2の画像 1 HTC MyTouch 4G Mother Board Replacement, Removing four T5 Screws: 手順 6、 2の画像 2
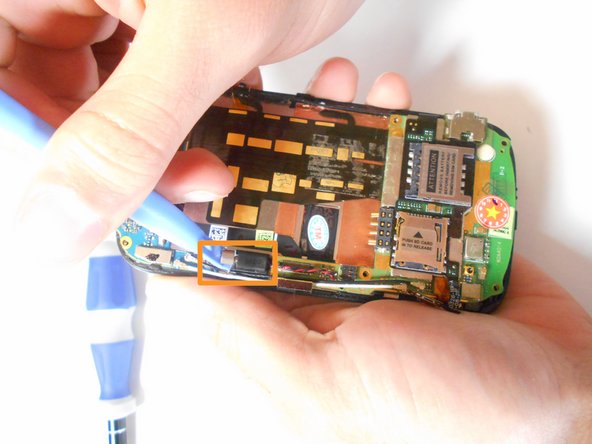
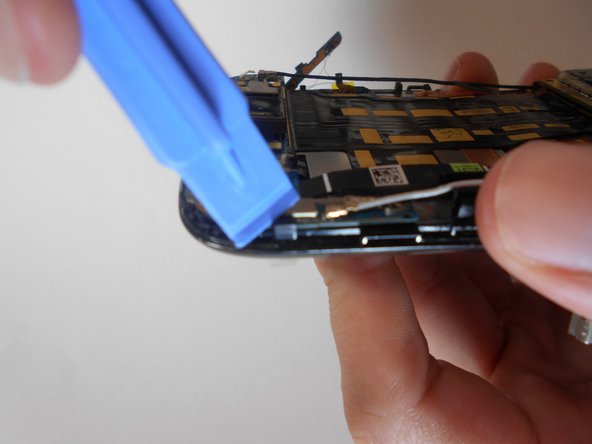
    • There are three button ribbons on the phone that need to be pulled down off of the case.

    • With the plastic opening tools, pull the button ribbons down away from the frame without completely removing them.

  7. HTC MyTouch 4G Mother Board Replacement: 手順 7、 3の画像 1 HTC MyTouch 4G Mother Board Replacement: 手順 7、 3の画像 2 HTC MyTouch 4G Mother Board Replacement: 手順 7、 3の画像 3
    • After making sure the button ribbons are away from the frame, insert the plastic opening tool into the frame and remove it.

    • Remove two Philips screws holding the Motherboard in place.

  8. HTC MyTouch 4G Mother Board Replacement: 手順 8、 2の画像 1 HTC MyTouch 4G Mother Board Replacement: 手順 8、 2の画像 2
    • Three ribbon cables and the vibration motor need to be disconnected from the Motherboard.

    • Using the plastic opening tools, pull up on the power button ribbon to gently detach it.

    • Remove the vibration motor by gently pulling it off of the Motherboard.

  9. HTC MyTouch 4G Mother Board Replacement: 手順 9、 3の画像 1 HTC MyTouch 4G Mother Board Replacement: 手順 9、 3の画像 2 HTC MyTouch 4G Mother Board Replacement: 手順 9、 3の画像 3
    • Remove the digitizer ribbon cable with the plastic opening tools.

    • Remove the LCD ribon cable from its connector.

    • It is now safe to release the Motherboard from the clips holding it in place. Start at the top clip of the phone and move your way around gently releasing each clip.

  10. HTC MyTouch 4G Mother Board Replacement: 手順 10、 3の画像 1 HTC MyTouch 4G Mother Board Replacement: 手順 10、 3の画像 2 HTC MyTouch 4G Mother Board Replacement: 手順 10、 3の画像 3
    • Do not lift the Motherboard off the phone. The LCD Ribbon is still connected to it.

    • Lift the Motherboard towards the left to expose the LCD clamp connector.

    • Open the clamp connector of the LCD ribbon by carefully pulling it up with the plastic opening tools.

  11. HTC MyTouch 4G Mother Board Replacement: 手順 11、 1の画像 1
    • The Motherboard is now removed.

終わりに

To reassemble your device, follow these instructions in reverse order.

2 の人々がこのガイドを完成させました。

作成者

2人の作成者と共同で作成されました。

Braden

メンバー登録日: 01/30/15

425 ポイント

2のガイドは作成済み

チーム

USF Tampa, Team 16-5, Watkins Spring 2014 USF Tampa, Team 16-5, Watkins Spring 2014人のメンバー

USFT-WATKINS-S14S16G5

2 メンバー

10のガイドは作成済み

0 件のコメント

コメントを追加

統計データ:

過去 24時間: 0

過去 7 日: 0

過去 30 日: 1

今までの合計 739