メインコンテンツにスキップ

このバージョンは誤った内容を含んでいる可能性があります。最新の承認済みスナップショットに切り替えてください。

必要な工具と部品

  1. : 手順 1、 2の画像 1 : 手順 1、 2の画像 2
    • バッテリーの背面カバーを上部にスライドさせて取り外します。

    • タッチペンをはじめに取り外す必要があるかもしれません。

  2. : 手順 2、 2の画像 1 : 手順 2、 2の画像 2
    • スマートフォンの背面からバッテリーを引き離して取り出します。

  3. この手順は未翻訳です。 翻訳を手伝う。

    : 手順 3、 2の画像 1 : 手順 3、 2の画像 2
    • Remove the top 2 screws on the back of the phone with the T4 Screwdriver.

  4. この手順は未翻訳です。 翻訳を手伝う。

    : 手順 4、 3の画像 1 : 手順 4、 3の画像 2 : 手順 4、 3の画像 3
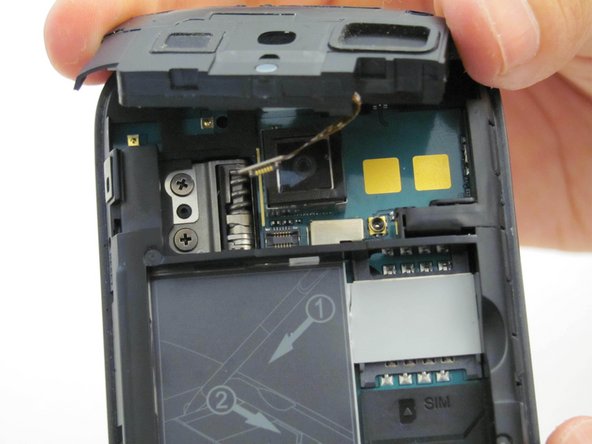
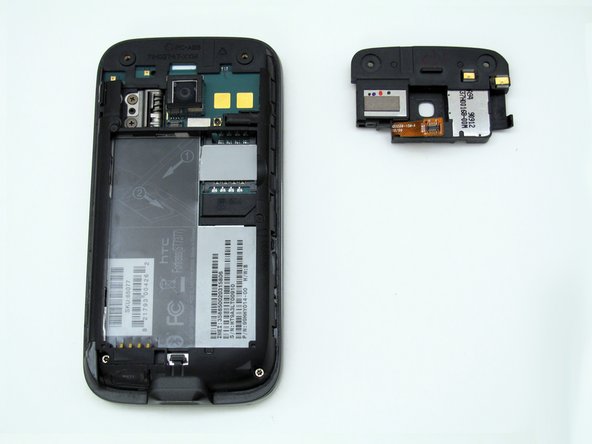
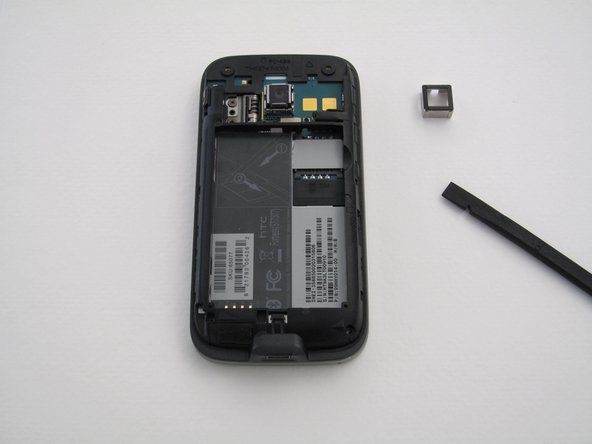
    • Remove the camera panel by hand (black cover above the battery slot).

    • Be careful; there is a cable attached underneath the case. It does detach, just pull on it carefully.

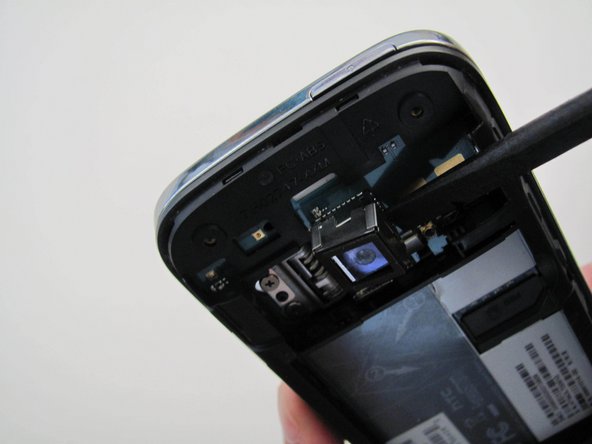
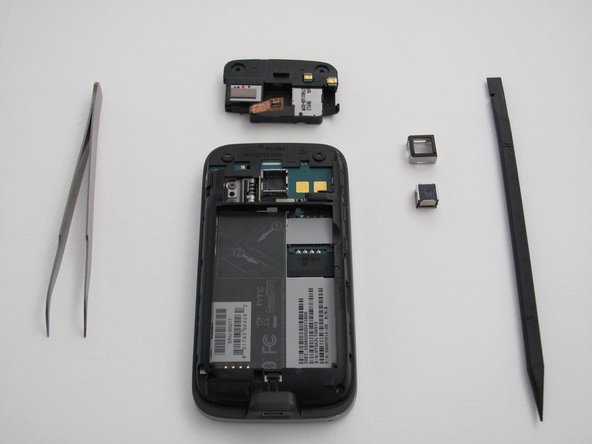
    • During reassembly, put the cable back in by holding the black piece slightly above its slot and using the spudger to gently press the end of the cable back into its fitting. Then, insert the black piece so it is flush with the black panel again.

  5. この手順は未翻訳です。 翻訳を手伝う。

    : 手順 5、 3の画像 1 : 手順 5、 3の画像 2 : 手順 5、 3の画像 3
    • Work the metal camera casing off by slowly prying up the sides using the spudger.

  6. この手順は未翻訳です。 翻訳を手伝う。

    : 手順 6、 2の画像 1 : 手順 6、 2の画像 2
    • Use the tweezers to pull the camera straight out of the phone.

ゴール

ある他の人がこのガイドを完成しました。

作成者

4人の作成者と共同で作成されました。

Lucas David

メンバー登録日: 04/19/13

540 ポイント

9のガイドは作成済み

チーム

Cal Poly, Team 4-13, Maness Spring 2013 Cal Poly, Team 4-13, Maness Spring 2013人のメンバー

CPSU-MANESS-S13S4G13

4 メンバー

18のガイドは作成済み

0 件のコメント

コメントを追加

統計データ:

過去 24時間: 4

過去 7 日: 9

過去 30 日: 10

今までの合計 381