メインコンテンツにスキップ

HTC Flyer Back Cover Replacement

必要な工具と部品

  1. HTC Flyer Back Cover Replacement, Back Cover: 手順 1、 3の画像 1 HTC Flyer Back Cover Replacement, Back Cover: 手順 1、 3の画像 2 HTC Flyer Back Cover Replacement, Back Cover: 手順 1、 3の画像 3
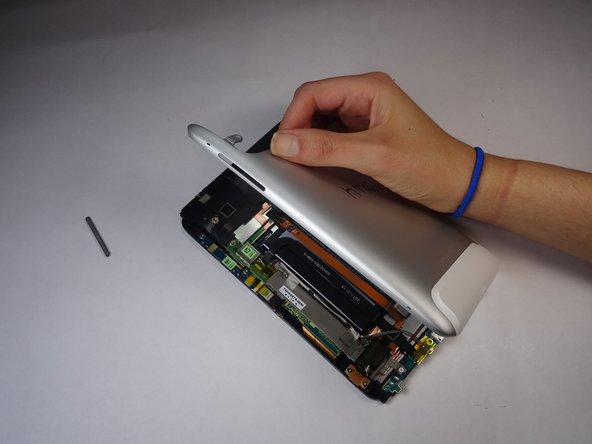
    • Apply pressure along the bottom of the white panel containing the camera and push upwards.

    • It may take some effort, but it will smoothly slide off.

  2. HTC Flyer Back Cover Replacement: 手順 2、 3の画像 1 HTC Flyer Back Cover Replacement: 手順 2、 3の画像 2 HTC Flyer Back Cover Replacement: 手順 2、 3の画像 3
    • Unscrew the four of 3.5mm Torx T5 screws that run along the sides of the exposed innards.

    • All screws in the device will use the Torx T5 screwdriver, so keep it handy.

  3. HTC Flyer Back Cover Replacement: 手順 3、 3の画像 1 HTC Flyer Back Cover Replacement: 手順 3、 3の画像 2 HTC Flyer Back Cover Replacement: 手順 3、 3の画像 3
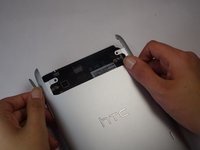
    • Remove the black protective piece of plastic by sliding it upwards.

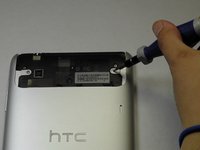
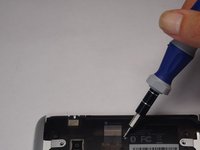
    • Remove the two 3.5mm Torx #5 screws holding the protective plastic down on along the sides.

    • A center 3.5mm Torx screw will be covered by "VOID" sticker.

    • Either remove the sticker or jam the screwdriver into the screw, and remove the screw.

    • Remove the protective panel by sliding it upwards.

  4. HTC Flyer Back Cover Replacement: 手順 4、 2の画像 1 HTC Flyer Back Cover Replacement: 手順 4、 2の画像 2
    • Before removing the back cover, apply some scotch tape to the volume buttons to prevent them from falling out of the back panel.

    • Use a plastic opening tool to lever up the top half of the cover.

    • Lift the back panel up and remove it from the device.

終わりに

To reassemble your device, follow these instructions in reverse order.

2 の人々がこのガイドを完成させました。

作成者

5人の作成者と共同で作成されました。

Justin Funk

メンバー登録日: 10/07/14

473 ポイント

3のガイドは作成済み

チーム

USF Tampa, Team 8-5, Leahy Fall 2014 USF Tampa, Team 8-5, Leahy Fall 2014人のメンバー

USFT-LEAHY-F14S8G5

3 メンバー

12のガイドは作成済み

0 件のコメント

コメントを追加

統計データ:

過去 24時間: 0

過去 7 日: 0

過去 30 日: 1

今までの合計 390