メインコンテンツにスキップ

HTC Desire 610 Daughterboard Replacement

必要な工具と部品

  1. HTC Desire 610 Daughterboard Replacement, Daughterboard: 手順 1、 1の画像 1
    • Open the SD card slot.

  2. HTC Desire 610 Daughterboard Replacement: 手順 2、 3の画像 1 HTC Desire 610 Daughterboard Replacement: 手順 2、 3の画像 2 HTC Desire 610 Daughterboard Replacement: 手順 2、 3の画像 3
    • Using plastic opening tool, take off the back cover of the phone.

  3. HTC Desire 610 Daughterboard Replacement: 手順 3、 1の画像 1
    • Using Phillips #000 Screwdriver, remove the two 2.5mm phillips head screws.

  4. HTC Desire 610 Daughterboard Replacement: 手順 4、 1の画像 1
    • Using Torx T5 Screwdriver, remove the four 5mm silver torx head screws.

  5. HTC Desire 610 Daughterboard Replacement: 手順 5、 1の画像 1
    • Using Torx T5 Screwdriver, remove the four 4mm black torx screws

  6. HTC Desire 610 Daughterboard Replacement: 手順 6、 2の画像 1 HTC Desire 610 Daughterboard Replacement: 手順 6、 2の画像 2
    • Using plastic opening tool, remove the black plastic circuit cover.

  7. HTC Desire 610 Daughterboard Replacement: 手順 7、 1の画像 1
    • Using Torx T5 Screwdriver, remove the 4mm black torx screw.

  8. HTC Desire 610 Daughterboard Replacement: 手順 8、 2の画像 1 HTC Desire 610 Daughterboard Replacement: 手順 8、 2の画像 2
    この手順で使用する道具:
    Tweezers
    $4.99
    購入する
    • Using Tweezers, disconnect antenna wire.

  9. HTC Desire 610 Daughterboard Replacement: 手順 9、 3の画像 1 HTC Desire 610 Daughterboard Replacement: 手順 9、 3の画像 2 HTC Desire 610 Daughterboard Replacement: 手順 9、 3の画像 3
    • Using Tweezers, remove loud speaker that is being held by small adhesive.

    • When putting loud speaker back on, the prongs sticking up should be on the side closer to the top of the phone.

  10. HTC Desire 610 Daughterboard Replacement: 手順 10、 2の画像 1 HTC Desire 610 Daughterboard Replacement: 手順 10、 2の画像 2
    • Using Tweezers, peel back gray adhesive.

  11. HTC Desire 610 Daughterboard Replacement: 手順 11、 2の画像 1 HTC Desire 610 Daughterboard Replacement: 手順 11、 2の画像 2
    • Using Tweezers, flip the white strip upward so it sits 90°.

  12. HTC Desire 610 Daughterboard Replacement: 手順 12、 3の画像 1 HTC Desire 610 Daughterboard Replacement: 手順 12、 3の画像 2 HTC Desire 610 Daughterboard Replacement: 手順 12、 3の画像 3
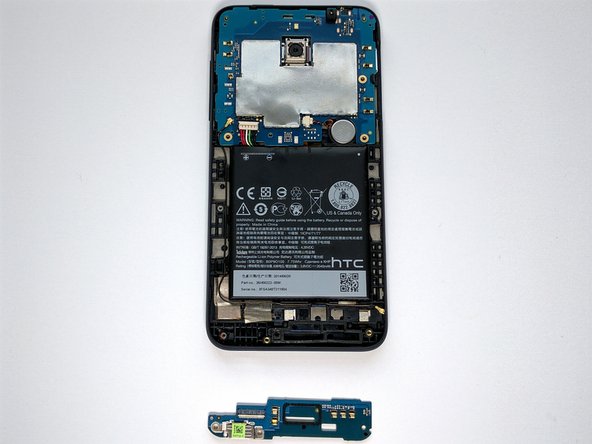
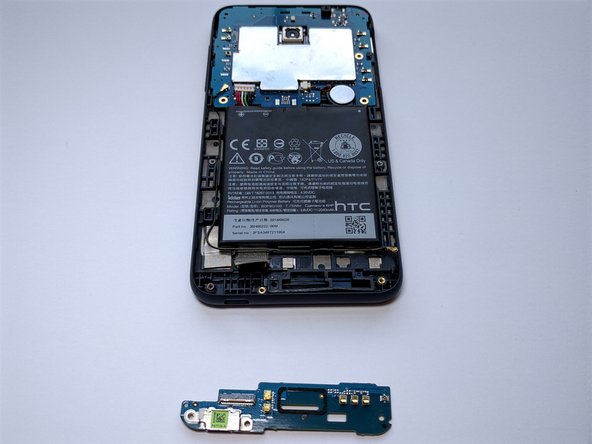
    • Using plastic opening tool, pry up green plate and pull outward.

    • Daughterboard is off. Get new daughterboard and reverse steps.

終わりに

To reassemble your device, follow these instructions in reverse order.

2 の人々がこのガイドを完成させました。

作成者

3人の作成者と共同で作成されました。

Austin Phelps

メンバー登録日: 01/31/16

194 ポイント

1ガイドが承認済み

チーム

University of Alabama, Team 1-2, Sydow campbell Spring 2016 University of Alabama, Team 1-2, Sydow campbell Spring 2016人のメンバー

UA-SYDOW CAMPBELL-S16S1G2

4 メンバー

6のガイドは作成済み

0 件のコメント

コメントを追加

統計データ:

過去 24時間: 0

過去 7 日: 0

過去 30 日: 5

今までの合計 1,651