メインコンテンツにスキップ
リペアコミュニティに参加 - アカウントの作成

HP iPAQ h4155 button panel replacement

必要な工具と部品

    1. HP iPAQ h4155 button panel replacement, Battery: 手順 1、 1の画像 1
      • While sliding the silver release tab up, simultaneously lift the cover up from the left side.

      FixBotに聞いてみる

      コメントを追加

    2. HP iPAQ h4155 button panel replacement: 手順 2、 1の画像 1
      • Push the tab left to right to remove the cover.

      FixBotに聞いてみる

      コメントを追加

    3. HP iPAQ h4155 button panel replacement: 手順 3、 1の画像 1
      • Now, lift the battery up and away from the device to remove it.

      FixBotに聞いてみる

      コメントを追加

    1. HP iPAQ h4155 button panel replacement, Back Case: 手順 4、 1の画像 1
      • Remove the four silver screws using the T5 Torx Screwdriver (T5 x .25 in).

      FixBotに聞いてみる

      コメントを追加

    2. HP iPAQ h4155 button panel replacement: 手順 5、 1の画像 1
      • Remove the single black screw that is located beneath the HP sticker with the T5 Torx Screwdriver.

      FixBotに聞いてみる

      コメントを追加

    3. HP iPAQ h4155 button panel replacement: 手順 6、 2の画像 1 HP iPAQ h4155 button panel replacement: 手順 6、 2の画像 2
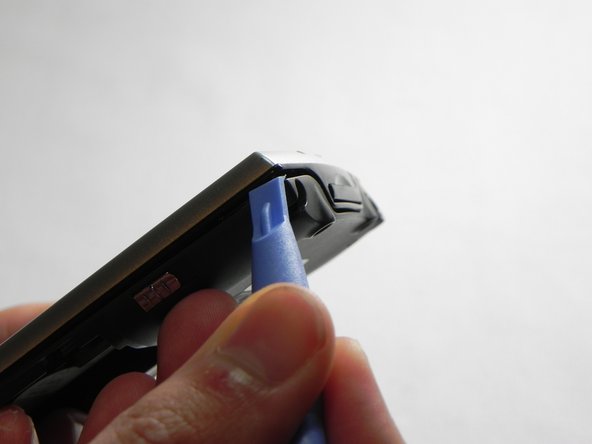
      • Next, use your plastic removal tool to separate the gray back from the black center piece.

      • For better results, start the separation at the corner piece.

      FixBotに聞いてみる

      コメントを追加

    4. HP iPAQ h4155 button panel replacement: 手順 7、 1の画像 1
      • Remove the back case.

      FixBotに聞いてみる

      コメントを追加

    1. HP iPAQ h4155 button panel replacement, Face Plate: 手順 8、 1の画像 1
      • Now that the back cover is removed, use the #00 Philips x .17 screwdriver to remove the small screw to the left of the SD card slot.

      FixBotに聞いてみる

      コメントを追加

    2. HP iPAQ h4155 button panel replacement: 手順 9、 2の画像 1 HP iPAQ h4155 button panel replacement: 手順 9、 2の画像 2
      この手順で使用する道具:
      Tweezers
      $4.99
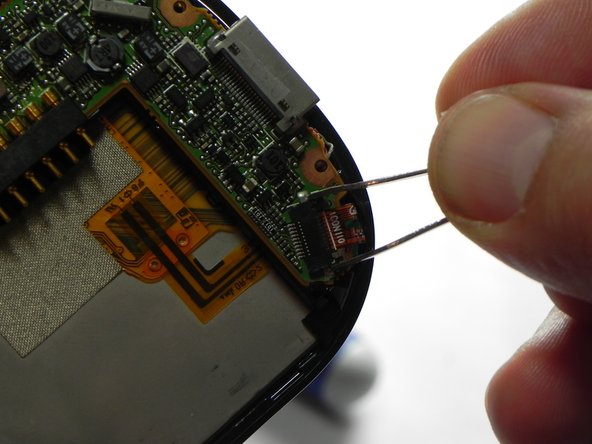
      • Next, unlock and remove the ribbon cable.

      • Using metal tweezers, carefully pull back on both sides of the brown bar unlocking the cable and slipping it out of the connector.

      • The bar, the connector, and the cable are fragile components that are easily broken.

      FixBotに聞いてみる

      コメントを追加

    3. HP iPAQ h4155 button panel replacement: 手順 10、 2の画像 1 HP iPAQ h4155 button panel replacement: 手順 10、 2の画像 2
      • Next, remove the wire from the bottom of the mother board.

      • The easiest method is to use metal tweezers and grip the plug closest to the connector.

      • Make sure all the connections are properly disconnected before separation from the motherboard.

      FixBotに聞いてみる

      コメントを追加

    4. HP iPAQ h4155 button panel replacement: 手順 11、 1の画像 1
      • Next, use a plastic removal tool and separate the silver front case from the black frame.

      FixBotに聞いてみる

      コメントを追加

    1. HP iPAQ h4155 button panel replacement, JoyPad buttons: 手順 12、 1の画像 1
      • Remove the 4 screws along the bottom of the faceplate

      • They are #00 Philips head screws

      FixBotに聞いてみる

      コメントを追加

    2. HP iPAQ h4155 button panel replacement: 手順 13、 2の画像 1 HP iPAQ h4155 button panel replacement: 手順 13、 2の画像 2
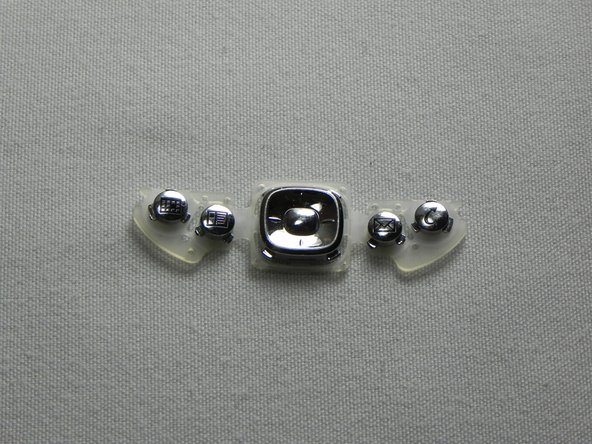
      • Once removed you can easily separate the keys from the body.

      FixBotに聞いてみる

      コメントを追加

終わりに

To reassemble your device, follow these instructions in reverse order.

キャンセル: このガイドを終了できませんでした。

ある他の人がこのガイドを完成しました。

作成者

3人の作成者と共同で作成されました。

John Pagliero

メンバー登録日: 01/27/11

957 ポイント

7のガイドは作成済み

0件のガイドコメント

コメントを追加

統計データ:

過去 24時間: 3

過去 7 日: 7

過去 30 日: 27

今までの合計 835