メインコンテンツにスキップ

HP iPAQ HW6515 Keyboard Replacement

必要な工具と部品

  1. HP iPAQ HW6515 Keyboard Replacement, Battery: 手順 1、 3の画像 1 HP iPAQ HW6515 Keyboard Replacement, Battery: 手順 1、 3の画像 2 HP iPAQ HW6515 Keyboard Replacement, Battery: 手順 1、 3の画像 3
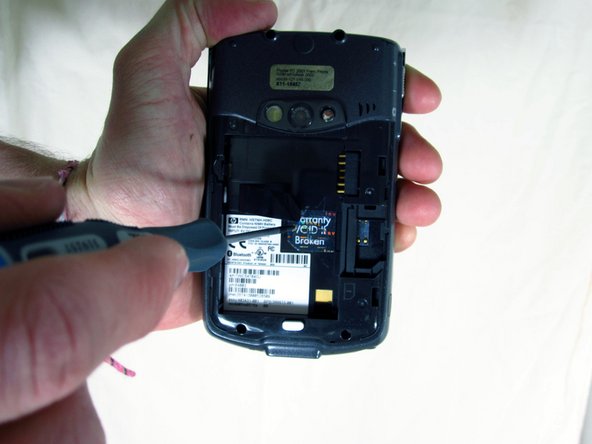
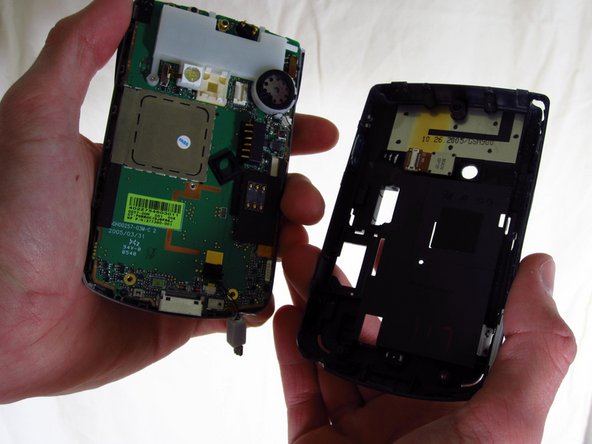
    • Flip the HP iPAQ HW6515 over with the screen facing down.

    • Take the back cover off by pressing on the small silver button while pulling back then up on the case.

    • Place the back of the case aside for now.

  2. HP iPAQ HW6515 Keyboard Replacement: 手順 2、 1の画像 1
    • Remove the battery by pulling up on the black tab.

  3. HP iPAQ HW6515 Keyboard Replacement, Motherboard: 手順 3、 3の画像 1 HP iPAQ HW6515 Keyboard Replacement, Motherboard: 手順 3、 3の画像 2 HP iPAQ HW6515 Keyboard Replacement, Motherboard: 手順 3、 3の画像 3
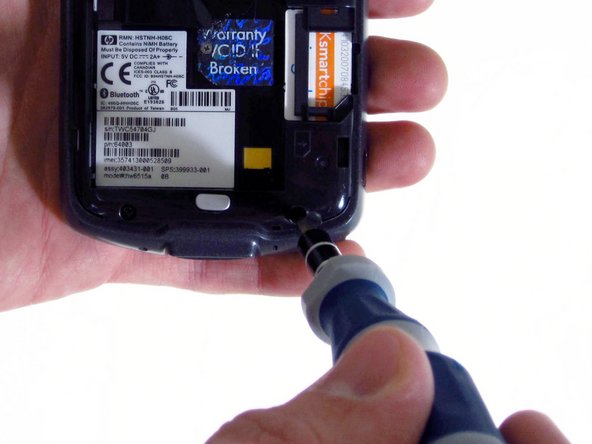
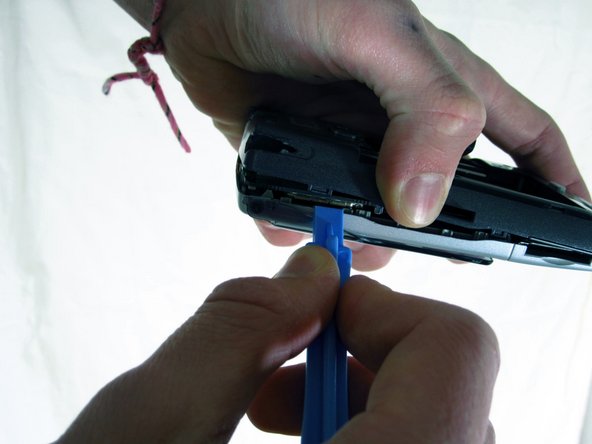
    • Unscrew the four outside screws using the T6 hexagonal star screwdriver.

    • Unscrew the inside middle screw using a Phillips 00 screwdriver.

    • "Warranty VOID if broken" sticker might be covering the middle screw, if this is the case, peel it off to reveal the screw.

  4. HP iPAQ HW6515 Keyboard Replacement: 手順 4、 3の画像 1 HP iPAQ HW6515 Keyboard Replacement: 手順 4、 3の画像 2 HP iPAQ HW6515 Keyboard Replacement: 手順 4、 3の画像 3
    • Use the plastic opening tool to pry apart the covers along the bottom of the phone.

    • Slide the plastic opening tool along the seam until the two halves of the case separate.

  5. HP iPAQ HW6515 Keyboard Replacement: 手順 5、 3の画像 1 HP iPAQ HW6515 Keyboard Replacement: 手順 5、 3の画像 2 HP iPAQ HW6515 Keyboard Replacement: 手順 5、 3の画像 3
    • Unplug the sensor wire that connects the two halves of the case before pulling the two halves apart. Not doing so will damage the sensor wire.

  6. HP iPAQ HW6515 Keyboard Replacement: 手順 6、 1の画像 1
    • Use a 00 Phillips screwdriver to remove the three small screws holding down the motherboard.

  7. HP iPAQ HW6515 Keyboard Replacement: 手順 7、 1の画像 1
    • Peel back the black tape that covers the connector.

    • It is fine if one of the left connectors comes off along with the tape.

  8. HP iPAQ HW6515 Keyboard Replacement: 手順 8、 3の画像 1 HP iPAQ HW6515 Keyboard Replacement: 手順 8、 3の画像 2 HP iPAQ HW6515 Keyboard Replacement: 手順 8、 3の画像 3
    • Lift the black tab to a 45 degree angle.

    • Use a screwdriver to get under the tape and disconnect the tape from the black tab.

  9. HP iPAQ HW6515 Keyboard Replacement: 手順 9、 2の画像 1 HP iPAQ HW6515 Keyboard Replacement: 手順 9、 2の画像 2
    • Gently pry the motherboard out of the front casing, bottom first.

    • Disconnect the wire connecting the motherboard to the front casing. Using too much force will damage this wire.

  10. HP iPAQ HW6515 Keyboard Replacement, Keyboard: 手順 10、 1の画像 1
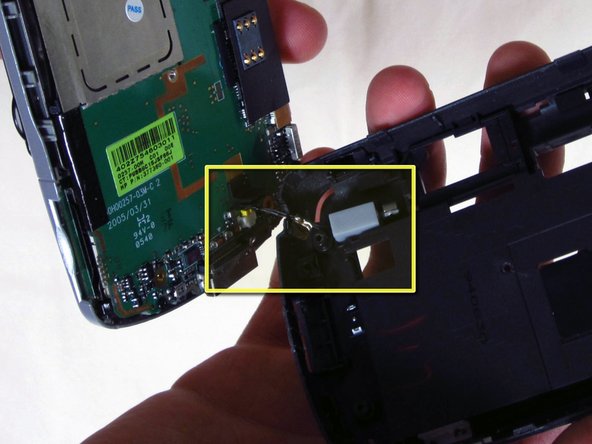
    • Unscrew the four small screws holding the keyboard in place using a 00 Phillips screwdriver.

  11. HP iPAQ HW6515 Keyboard Replacement: 手順 11、 1の画像 1
    • Holding the phone in the same orientation as the photo, gently pull off the backing of the keyboard and place it aside. Removing this backing grants you access to the keyboard.

  12. HP iPAQ HW6515 Keyboard Replacement: 手順 12、 1の画像 1
    • Carefully pop the keyboard out by bending the phone casing to free the keyboard from the casing.

終わりに

To reassemble your device, follow these instructions in reverse order.

ある他の人がこのガイドを完成しました。

作成者

6人の作成者と共同で作成されました。

Tim

メンバー登録日: 04/03/12

88 ポイント

2のガイドは作成済み

チーム

Cal Poly, Team 15-17, Forte Spring 2012 Cal Poly, Team 15-17, Forte Spring 2012人のメンバー

CPSU-FORTE-S12S15G17

4 メンバー

5のガイドは作成済み

0 件のコメント

コメントを追加

統計データ:

過去 24時間: 0

過去 7 日: 2

過去 30 日: 3

今までの合計 770