メインコンテンツにスキップ

HP iPAQ H3850 Buttons Replacement

必要な工具と部品

  1. HP iPAQ H3850 Buttons Replacement, Buttons: 手順 1、 1の画像 1
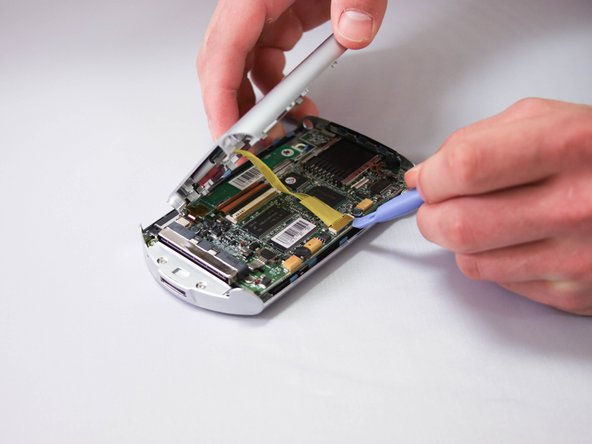
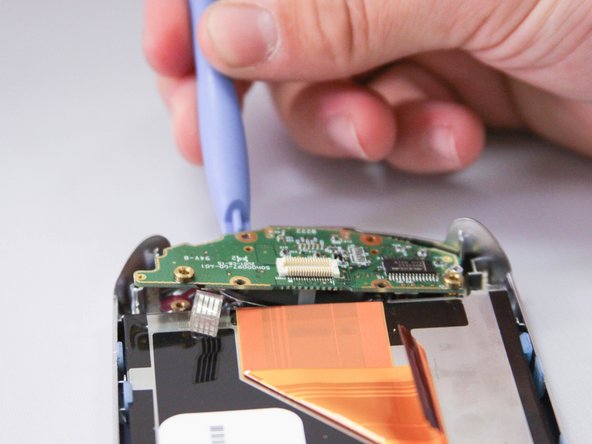
    • To begin the disassembly of the device, place it on a flat surface with the screen facing down.

  2. HP iPAQ H3850 Buttons Replacement: 手順 2、 1の画像 1
    • Remove the four screws found on the back cover of the device.

  3. HP iPAQ H3850 Buttons Replacement: 手順 3、 2の画像 1 HP iPAQ H3850 Buttons Replacement: 手順 3、 2の画像 2
    • Carefully remove the back cover using the plastic opening tool against the grooves along the sides of the iPAQ.

    • At this point, a yellow ribbon will be connecting both the front and back panels of the device. Carefully use the plastic opening tool to detach the ribbon from the connector pins.

  4. HP iPAQ H3850 Buttons Replacement: 手順 4、 1の画像 1
    • Remove the ribbon cable connected to the display motherboard by pulling the plastic clips on both sides towards the top of the device.

    • Use a plastic opening tool to carefully pull the brown ribbon cable from the connector.

  5. HP iPAQ H3850 Buttons Replacement: 手順 5、 3の画像 1 HP iPAQ H3850 Buttons Replacement: 手順 5、 3の画像 2 HP iPAQ H3850 Buttons Replacement: 手順 5、 3の画像 3
    • Use the plastic opening tool to carefully remove the display motherboard from its housing.

    • Unplug the connector from the opposite end of the display motherboard.

    • Completely remove the component.

  6. HP iPAQ H3850 Buttons Replacement: 手順 6、 2の画像 1 HP iPAQ H3850 Buttons Replacement: 手順 6、 2の画像 2
    • Remove three small screws from the corners of the motherboard using a Phillips head screwdriver.

    • Use your hands or plastic opening tool to carefully lift the motherboard out of its housing.

    • Remove two screws from the silver cover using a Phillips #00 screwdriver.

  7. HP iPAQ H3850 Buttons Replacement: 手順 7、 3の画像 1 HP iPAQ H3850 Buttons Replacement: 手順 7、 3の画像 2 HP iPAQ H3850 Buttons Replacement: 手順 7、 3の画像 3
    • Use a Phillips #00 screwdriver to remove the two screws at the bottom of the device.

    • Use a plastic opening tool to remove the button motherboard.

終わりに

To reassemble your device, follow these instructions in reverse order.

作成者

5人の作成者と共同で作成されました。

Josias

メンバー登録日: 04/07/15

143 ポイント

1ガイドが承認済み

チーム

Eastern Washington University, Team 1-3, Plummer Spring 2015 Eastern Washington University, Team 1-3, Plummer Spring 2015人のメンバー

EWU-PLUMMER-S15S1G3

4 メンバー

5のガイドは作成済み

0 件のコメント

コメントを追加

統計データ:

過去 24時間: 3

過去 7 日: 6

過去 30 日: 10

今までの合計 214