メインコンテンツにスキップ
リペアコミュニティに参加 - アカウントの作成

HP iPAQ H2200 faceplate replacement

必要な工具と部品

    1. HP iPAQ H2200 faceplate replacement, Battery: 手順 1、 1の画像 1
      • Press and slide the battery cover tab to remove battery cover.

      FixBotに聞いてみる

      コメントを追加

    2. HP iPAQ H2200 faceplate replacement: 手順 2、 2の画像 1 HP iPAQ H2200 faceplate replacement: 手順 2、 2の画像 2
      • Pull on the black tab to lift the battery out of the battery compartment.

      FixBotに聞いてみる

      コメントを追加

    1. HP iPAQ H2200 faceplate replacement, Main Board: 手順 3、 1の画像 1
      • Remove the stylus by sliding it out of the slot.

      FixBotに聞いてみる

      コメントを追加

    2. HP iPAQ H2200 faceplate replacement: 手順 4、 1の画像 1
      • Remove the CF card by sliding it out of the slot at the top of the device.

      FixBotに聞いてみる

      コメントを追加

    3. HP iPAQ H2200 faceplate replacement: 手順 5、 1の画像 1
      • Press down and push the black side strips toward the top of the device to remove them.

      FixBotに聞いてみる

      コメントを追加

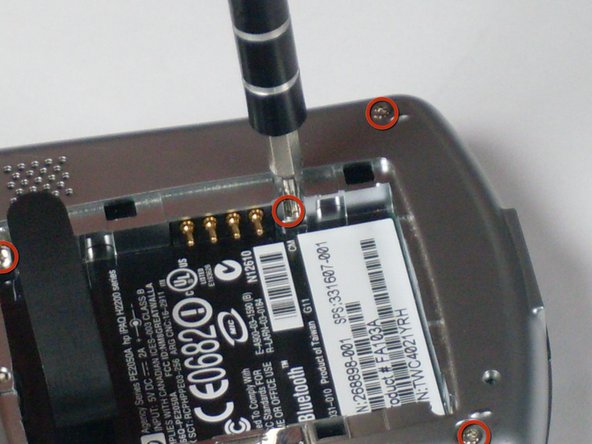
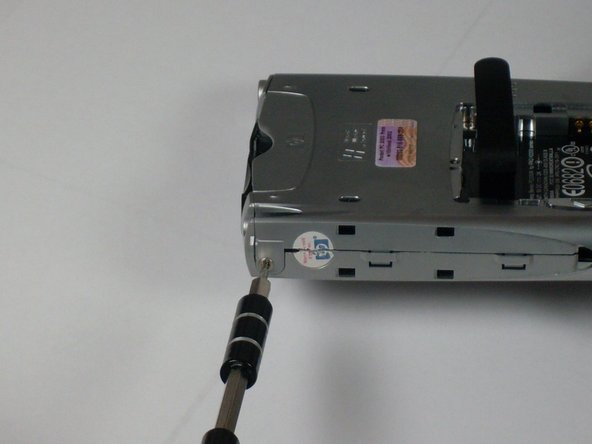
    4. HP iPAQ H2200 faceplate replacement: 手順 6、 3の画像 1 HP iPAQ H2200 faceplate replacement: 手順 6、 3の画像 2 HP iPAQ H2200 faceplate replacement: 手順 6、 3の画像 3
      • Using the T5 Torx screwdriver, remove all six screws on the back and all screws on each side of the device.

      FixBotに聞いてみる

      コメントを追加

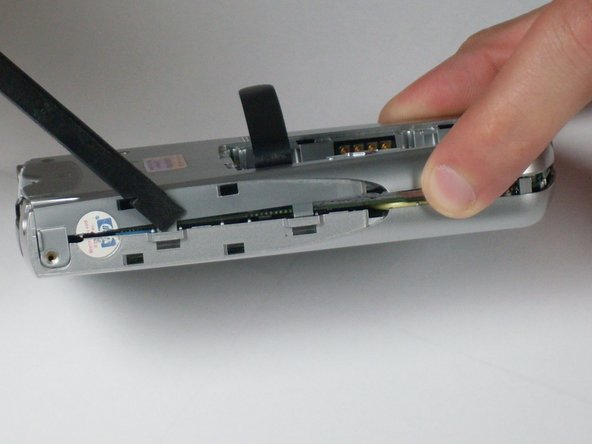
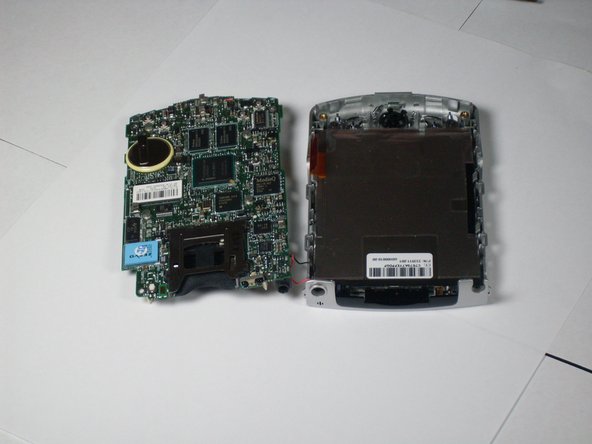
    5. HP iPAQ H2200 faceplate replacement: 手順 7、 2の画像 1 HP iPAQ H2200 faceplate replacement: 手順 7、 2の画像 2
      • Remove the back faceplate by pushing and loosening the 4 side slots (2 on each side).

      FixBotに聞いてみる

      コメントを追加

    6. HP iPAQ H2200 faceplate replacement: 手順 8、 1の画像 1
      • Open the LCD connector, where the orange strip attaches to the main board.

      FixBotに聞いてみる

      コメントを追加

    7. HP iPAQ H2200 faceplate replacement: 手順 9、 1の画像 1
      • Carefully remove the orange LCD strip from the connector.

      FixBotに聞いてみる

      コメントを追加

    8. HP iPAQ H2200 faceplate replacement: 手順 10、 1の画像 1
      • Unscrew the 2 screws located at each top corner of the main board.

      FixBotに聞いてみる

      コメントを追加

    9. HP iPAQ H2200 faceplate replacement: 手順 11、 1の画像 1
      • Remove the main board by pushing outward on the two tabs located on each side near the bottom of the device.

      FixBotに聞いてみる

      コメントを追加

    1. HP iPAQ H2200 faceplate replacement, LCD Screen: 手順 12、 1の画像 1
      • Unscrew the two bottom screws on LCD screen that were previously located under the main board.

      FixBotに聞いてみる

      コメントを追加

    2. HP iPAQ H2200 faceplate replacement: 手順 13、 2の画像 1 HP iPAQ H2200 faceplate replacement: 手順 13、 2の画像 2
      • Press on side tabs to loosen and remove the LCD screen.

      FixBotに聞いてみる

      コメントを追加

    1. HP iPAQ H2200 faceplate replacement, Faceplates: 手順 14、 1の画像 1
      • Remove the faceplate by unscrewing the green screw located on the top right of the front faceplate.

      FixBotに聞いてみる

      コメントを追加

終わりに

To reassemble your device, follow these instructions in reverse order.

キャンセル: このガイドを終了できませんでした。

作成者

6人の作成者と共同で作成されました。

Tyler Andrews

メンバー登録日: 01/13/10

209 ポイント

5のガイドは作成済み

チーム

Cal Poly, Team 4-12, Forte Winter 2010 Cal Poly, Team 4-12, Forte Winter 2010人のメンバー

CPSU-FORTE-W10S4G12

3 メンバー

20のガイドは作成済み

0件のガイドコメント

コメントを追加

統計データ:

過去 24時間: 3

過去 7 日: 7

過去 30 日: 39

今までの合計 1,982