メインコンテンツにスキップ

HP dv5-1125nr Motherboard Replacement

必要な工具と部品

  1. HP dv5-1125nr Motherboard Replacement, Battery: 手順 1、 1の画像 1
    • Ensure your computer is shut down. Removing the battery while the laptop is still on may corrupt your files. Remove any power adapters and cords connected to the laptop body.

    • Slide the switch to the left until the release clicks.

  2. HP dv5-1125nr Motherboard Replacement: 手順 2、 1の画像 1
    • Remove the battery.

    • The release switch may need to be held down while removing the battery.

  3. HP dv5-1125nr Motherboard Replacement, Hard Drive: 手順 3、 2の画像 1 HP dv5-1125nr Motherboard Replacement, Hard Drive: 手順 3、 2の画像 2
    • Remove the two 5mm Phillips screws on the hard drive cover using a Phillips #00 screwdriver.

  4. HP dv5-1125nr Motherboard Replacement: 手順 4、 1の画像 1
    • Remove the plastic hard drive cover.

  5. HP dv5-1125nr Motherboard Replacement: 手順 5、 2の画像 1 HP dv5-1125nr Motherboard Replacement: 手順 5、 2の画像 2
    • Pull up on the two plastic flaps on the hard drive enclosure to remove it.

  6. HP dv5-1125nr Motherboard Replacement: 手順 6、 2の画像 1 HP dv5-1125nr Motherboard Replacement: 手順 6、 2の画像 2
    • Gently lift the ribbon cable away from the hard drive enclosure to free the drive.

  7. HP dv5-1125nr Motherboard Replacement: 手順 7、 2の画像 1 HP dv5-1125nr Motherboard Replacement: 手順 7、 2の画像 2
    • Locate four 2mm Phillips screws on the side of the enclosure and remove them using a Phillips #00 screwdriver.

    • Slide the hard drive out of the enclosure to complete the removal process.

  8. HP dv5-1125nr Motherboard Replacement, WLAN Card: 手順 8、 1の画像 1
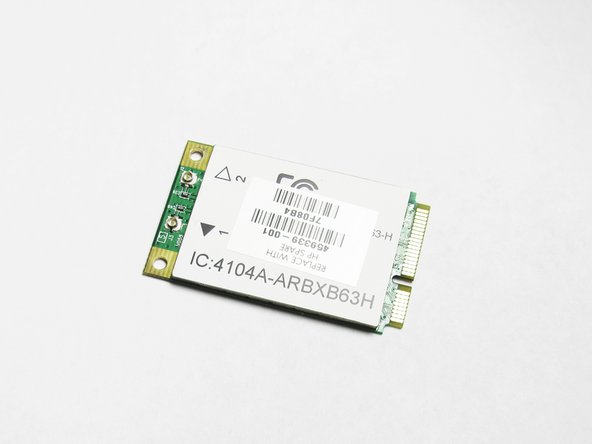
    • Locate the wireless card and the two wires attached to it.

    • Caution: Prying on the WLAN card wires in the wrong direction could damage your wireless card. Make sure to lift straight up when removing the wires.

    • Using a plastic spudger tool, carefully lift up on each wire connecting the card to unsnap the connectors.

  9. HP dv5-1125nr Motherboard Replacement: 手順 9、 2の画像 1 HP dv5-1125nr Motherboard Replacement: 手順 9、 2の画像 2
    • Locate the 2.5mm Phillips screw on the corner of the WLAN card and remove it using a Phillips #000 screwdriver.

  10. HP dv5-1125nr Motherboard Replacement: 手順 10、 2の画像 1 HP dv5-1125nr Motherboard Replacement: 手順 10、 2の画像 2
    • Upon removing the screw, the WLAN card will pop up. Keeping a natural angle, slide the card out of the slot.

    • The card is now free from your computer.

  11. HP dv5-1125nr Motherboard Replacement, Disk Drive: 手順 11、 2の画像 1 HP dv5-1125nr Motherboard Replacement, Disk Drive: 手順 11、 2の画像 2
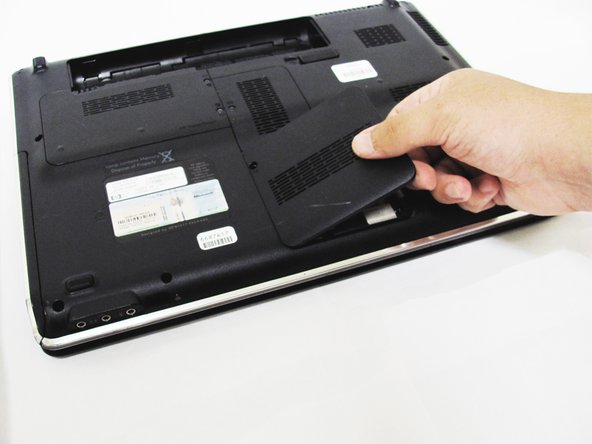
    • Locate two 3mm Phillips screws on the CMOS panel cover and remove them with a Phillips #00 screwdriver.

    • Remove the CMOS panel cover.

  12. HP dv5-1125nr Motherboard Replacement: 手順 12、 3の画像 1 HP dv5-1125nr Motherboard Replacement: 手順 12、 3の画像 2 HP dv5-1125nr Motherboard Replacement: 手順 12、 3の画像 3
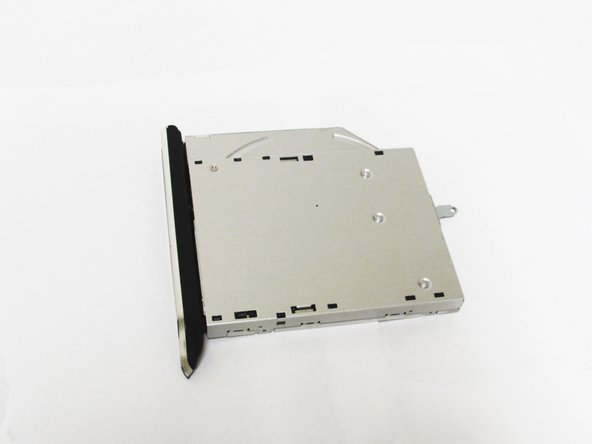
    • The optical drive is now ready for removal. Using a plastic removal tool, lift the optical drive away from your computer.

    • Using your hands, slide the remainder of the drive out of the computer.

  13. HP dv5-1125nr Motherboard Replacement, CMOS Battery: 手順 13、 2の画像 1 HP dv5-1125nr Motherboard Replacement, CMOS Battery: 手順 13、 2の画像 2
    • Remove these two 4mm Phillips screws on the back panel using a Phillips #00 screwdriver and remove the cover to reveal the CMOS battery

  14. HP dv5-1125nr Motherboard Replacement: 手順 14、 2の画像 1 HP dv5-1125nr Motherboard Replacement: 手順 14、 2の画像 2
    この手順で使用する道具:
    Flathead 3/32" or 2.5 mm Screwdriver
    $5.49
    購入する
    • Locate the CR2032 watch battery

    • Using a 2.5mm flathead screwdriver, carefully pry up the battery using the tab to the right of the battery

  15. HP dv5-1125nr Motherboard Replacement: 手順 15、 1の画像 1
    • The CMOS battery is now removed from your system.

  16. HP dv5-1125nr Motherboard Replacement, RAM: 手順 16、 1の画像 1
    • Remove the one 4mm Phillips screw from the RAM cover using a Phillips #00 screwdriver.

  17. HP dv5-1125nr Motherboard Replacement: 手順 17、 2の画像 1 HP dv5-1125nr Motherboard Replacement: 手順 17、 2の画像 2
    • Remove the RAM cover to reveal the module's underneath.

  18. HP dv5-1125nr Motherboard Replacement: 手順 18、 3の画像 1 HP dv5-1125nr Motherboard Replacement: 手順 18、 3の画像 2 HP dv5-1125nr Motherboard Replacement: 手順 18、 3の画像 3
    • Make sure to ground yourself before touching the RAM modules; they are very sensitive to static electricity.

    • Push the two metal tabs on the side of the RAM module outwards, towards the battery and CMOS compartments (up and down).

    • Once the module is released, gently pull the module upwards.

    • Repeat for the RAM module underneath the first one.

  19. HP dv5-1125nr Motherboard Replacement, Keyboard: 手順 19、 1の画像 1
    • Begin by unscrewing the three 3mm Phillips head screws inside the battery bay with the Phillips #00 screwdriver.

  20. HP dv5-1125nr Motherboard Replacement: 手順 20、 1の画像 1
    • Remove the five remaining 2mm screws using a Phillips #00 screwdriver.

  21. HP dv5-1125nr Motherboard Replacement: 手順 21、 1の画像 1
    • Unscrew the 4mm Phillips screw inside the hard drive bay.

    • Make sure to keep track of which screw goes where. The sizes are different for each set of screws!

  22. HP dv5-1125nr Motherboard Replacement: 手順 22、 2の画像 1 HP dv5-1125nr Motherboard Replacement: 手順 22、 2の画像 2
    • Locate the hole in between the hard drive and RAM compartments.

    • The hole is marked by a small keyboard symbol in the plastic (see the second picture).

    • Unscrew the 4mm Phillips head screw from this hole.

  23. HP dv5-1125nr Motherboard Replacement: 手順 23、 2の画像 1 HP dv5-1125nr Motherboard Replacement: 手順 23、 2の画像 2
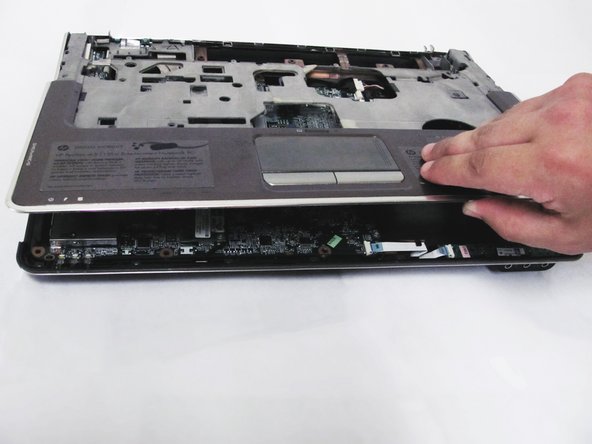
    • Flip the laptop, and use the plastic opening tool on the side seam to remove the top cover.

    • You may need to use the opening tool on both sides of the cover.

    • Be careful not to break the ribbon cables under the cover.

  24. HP dv5-1125nr Motherboard Replacement: 手順 24、 1の画像 1
    この手順で使用する道具:
    Flathead 3/32" or 2.5 mm Screwdriver
    $5.49
    購入する
    • Use a 2.5mm flathead screwdriver to remove the four 3mm screws on top of the keyboard.

  25. HP dv5-1125nr Motherboard Replacement: 手順 25、 1の画像 1
    • Dislodge the keyboard to access the underside.

    • Do not fully remove the keyboard. It is still attached by a ribbon cable, and forceful removal could break this necessary connection.

  26. HP dv5-1125nr Motherboard Replacement: 手順 26、 2の画像 1 HP dv5-1125nr Motherboard Replacement: 手順 26、 2の画像 2
    • Locate the ribbon cable connection between the keyboard and motherboard.

    • Pull upwards on the small black bar to release the ribbon cable and remove it.

    • Do not yank on the ribbon or try to pull it out. This may break the cable or motherboard.

  27. HP dv5-1125nr Motherboard Replacement: 手順 27、 1の画像 1
    • The keyboard is now ready for replacement.

  28. HP dv5-1125nr Motherboard Replacement, Display: 手順 28、 3の画像 1 HP dv5-1125nr Motherboard Replacement, Display: 手順 28、 3の画像 2 HP dv5-1125nr Motherboard Replacement, Display: 手順 28、 3の画像 3
    • Locate four 3mm screws in the upper corners of the keyboard tray and remove them using a #00 Phillips screwdriver.

  29. HP dv5-1125nr Motherboard Replacement: 手順 29、 2の画像 1 HP dv5-1125nr Motherboard Replacement: 手順 29、 2の画像 2
    • Locate the two ribbon cable connectors that attach the speaker assembly to the motherboard.

    • Using your fingers, carefully detach the ribbon cables from the motherboard by pulling them straight out on the connector.

  30. HP dv5-1125nr Motherboard Replacement: 手順 30、 1の画像 1
    • Remove the speaker assembly from the keyboard tray.

  31. HP dv5-1125nr Motherboard Replacement: 手順 31、 1の画像 1
    • Locate the large display ribbon connector near the upper left corner of the keyboard tray and remove the ribbon by pulling straight out on the connector.

  32. HP dv5-1125nr Motherboard Replacement: 手順 32、 1の画像 1
    • The display should now be loose, but make sure to remove all ribbon connectors before attempting to take off the display.

    • Locate the two final ribbon connectors for the display on the motherboard and remove them similarly by pulling straight outward on the connectors.

    • You are now free to remove the display from the computer.

  33. HP dv5-1125nr Motherboard Replacement, Motherboard: 手順 33、 1の画像 1
    • Remove the three 3mm Phillips head screws on the top of the frame using the Phillips #00 screwdriver.

  34. HP dv5-1125nr Motherboard Replacement: 手順 34、 2の画像 1 HP dv5-1125nr Motherboard Replacement: 手順 34、 2の画像 2
    • Using a plastic opening tool, carefully pry off the top plastic cover by lifting it up at the seam at various points around the edge, then remove it completely.

  35. HP dv5-1125nr Motherboard Replacement: 手順 35、 2の画像 1 HP dv5-1125nr Motherboard Replacement: 手順 35、 2の画像 2
    • Remove the two 2mm screws on the bottom right of the motherboard using the Phillips #00 screwdriver.

  36. HP dv5-1125nr Motherboard Replacement: 手順 36、 2の画像 1 HP dv5-1125nr Motherboard Replacement: 手順 36、 2の画像 2
    • Using the Phillips #00 screwdriver, unscrew the spring-release fasteners on the modem card and remove it from the board.

    • Do not try to remove the modem card from the laptop, it is still attached to the modem connector on the underbody.

  37. HP dv5-1125nr Motherboard Replacement: 手順 37、 1の画像 1
    • Remove the power cable and two ribbons on the top right side of the board.

    • These ribbons can be removed by simply pulling to the right of the connector.

  38. HP dv5-1125nr Motherboard Replacement: 手順 38、 1の画像 1
    • Remove the ribbon on the bottom left of the board.

  39. HP dv5-1125nr Motherboard Replacement: 手順 39、 1の画像 1
    • Remove the one 3mm Phillips screw on the bottom left corner of the board using the Phillips #00 Screwdriver.

  40. HP dv5-1125nr Motherboard Replacement: 手順 40、 1の画像 1
    • Make sure to ground yourself to a metal object before attempting to remove the motherboard. Static charge build-up is dangerous to electronics and may ruin your motherboard if not properly grounded.

    • Remove the motherboard from the laptop body, being careful to keep the modem board from dislodging itself.

    • Your motherboard is now removed.

終わりに

To reassemble your device, follow these instructions in reverse order. Ensure the ribbons and plastic connectors are placed in the correct orientation.

8 の人々がこのガイドを完成させました。

作成者

3人の作成者と共同で作成されました。

Nick Loey

メンバー登録日: 04/01/14

1,676 ポイント

8のガイドは作成済み

チーム

Cal Poly, Team 9-15, Regan Spring 2014 Cal Poly, Team 9-15, Regan Spring 2014人のメンバー

CPSU-REGAN-S14S9G15

4 メンバー

10のガイドは作成済み

2 件のコメント

I hv Hp dv 5 1125nr laptop it display problems I m not getting cpu or graffic card

Vijay - 返信

Problema con hp dv5 1050es, no arranca cuando pulso botón de encendido

Nacho - 返信

コメントを追加

統計データ:

過去 24時間: 1

過去 7 日: 4

過去 30 日: 9

今までの合計 4,479