メインコンテンツにスキップ

HP Windows Mixed Reality Controllers TPC-Q044 Touch Pad Replacement

必要な工具と部品

  1. HP Windows Mixed Reality Controllers TPC-Q044 Touch Pad   Replacement, Batteries: 手順 1、 3の画像 1 HP Windows Mixed Reality Controllers TPC-Q044 Touch Pad   Replacement, Batteries: 手順 1、 3の画像 2 HP Windows Mixed Reality Controllers TPC-Q044 Touch Pad   Replacement, Batteries: 手順 1、 3の画像 3
    • Slide the rear compartment cover in the direction of the arrow.

    • If replacing batteries, ensure the (+) and (-) on the battery match the (+) and (-) labeled in the battery compartment.

  2. HP Windows Mixed Reality Controllers TPC-Q044 Touch Pad   Replacement, Shell: 手順 2、 2の画像 1 HP Windows Mixed Reality Controllers TPC-Q044 Touch Pad   Replacement, Shell: 手順 2、 2の画像 2
    • Remove the four 4mm screws using a Phillips #00 screwdriver.

  3. HP Windows Mixed Reality Controllers TPC-Q044 Touch Pad   Replacement: 手順 3、 3の画像 1 HP Windows Mixed Reality Controllers TPC-Q044 Touch Pad   Replacement: 手順 3、 3の画像 2 HP Windows Mixed Reality Controllers TPC-Q044 Touch Pad   Replacement: 手順 3、 3の画像 3
    • Grip the main body and pull the joystick outwards until the entire front panel pops off.

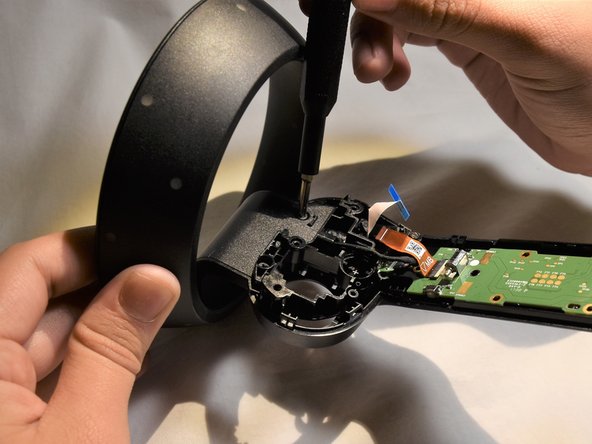
    • Remove the 6mm screw in the corner of the joystick well using a Phillips #00 screwdriver.

  4. HP Windows Mixed Reality Controllers TPC-Q044 Touch Pad   Replacement: 手順 4、 2の画像 1 HP Windows Mixed Reality Controllers TPC-Q044 Touch Pad   Replacement: 手順 4、 2の画像 2
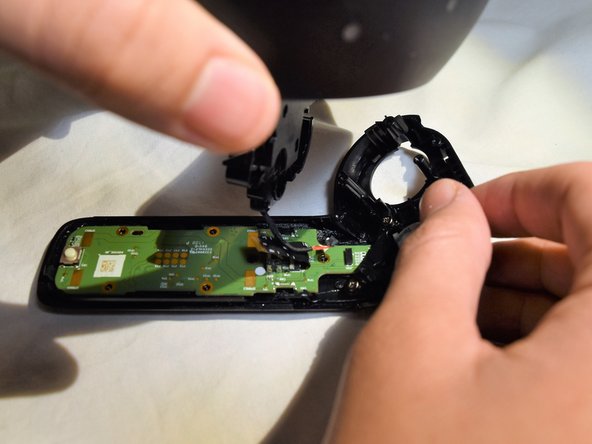
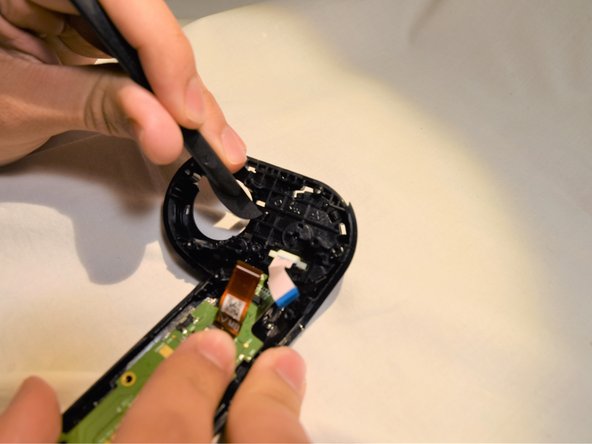
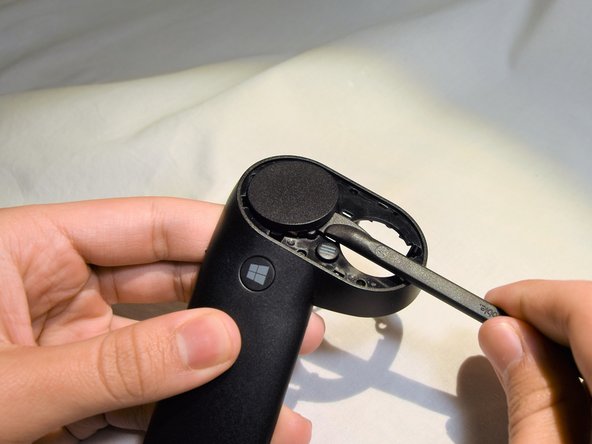
    • Use a spudger to pry apart the two halves of the assembly.

    • Work slowly, prying a small section at a time until the halves are completely separated.

  5. HP Windows Mixed Reality Controllers TPC-Q044 Touch Pad   Replacement, Small Circuit Board: 手順 5、 2の画像 1 HP Windows Mixed Reality Controllers TPC-Q044 Touch Pad   Replacement, Small Circuit Board: 手順 5、 2の画像 2
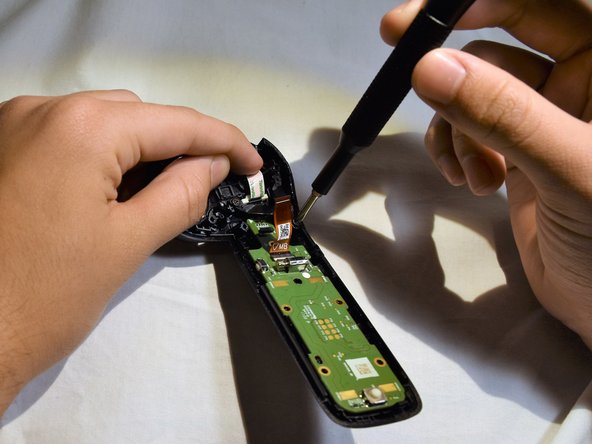
    • Using a Phillips #00 screwdriver, remove the four 4mm screws located on the joystick circuit board underneath the top half of the controller.

  6. HP Windows Mixed Reality Controllers TPC-Q044 Touch Pad   Replacement: 手順 6、 3の画像 1 HP Windows Mixed Reality Controllers TPC-Q044 Touch Pad   Replacement: 手順 6、 3の画像 2 HP Windows Mixed Reality Controllers TPC-Q044 Touch Pad   Replacement: 手順 6、 3の画像 3
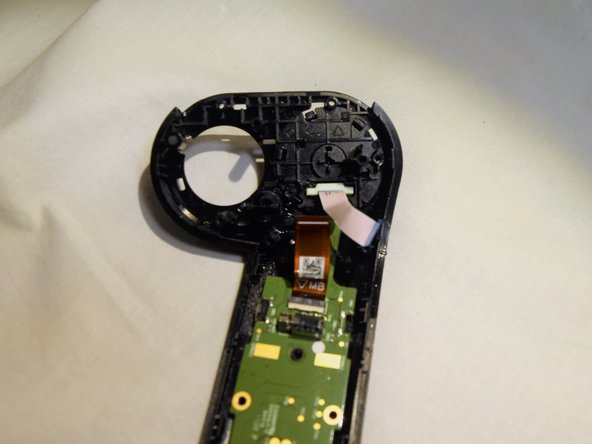
    • Remove the orange flat cable by pulling the orange tab parallel to the circuit board.

    • Release the blue flat cable by lifting up the white latch with a spudger.

  7. HP Windows Mixed Reality Controllers TPC-Q044 Touch Pad   Replacement, Touch Pad: 手順 7、 3の画像 1 HP Windows Mixed Reality Controllers TPC-Q044 Touch Pad   Replacement, Touch Pad: 手順 7、 3の画像 2 HP Windows Mixed Reality Controllers TPC-Q044 Touch Pad   Replacement, Touch Pad: 手順 7、 3の画像 3
    • Remove the two 6mm screws at the base of the rings using a Phillips #0 screwdriver.

    • Release the halo wire from the connector on the circuit board.

    • Pull the halo ring apart from the rest of the controller.

  8. HP Windows Mixed Reality Controllers TPC-Q044 Touch Pad   Replacement: 手順 8、 3の画像 1 HP Windows Mixed Reality Controllers TPC-Q044 Touch Pad   Replacement: 手順 8、 3の画像 2 HP Windows Mixed Reality Controllers TPC-Q044 Touch Pad   Replacement: 手順 8、 3の画像 3
    • Remove the two 3mm screws on the V-clip using a Phillips #00 screwdriver.

    • Remove the V-clip from the device.

  9. HP Windows Mixed Reality Controllers TPC-Q044 Touch Pad   Replacement: 手順 9、 3の画像 1 HP Windows Mixed Reality Controllers TPC-Q044 Touch Pad   Replacement: 手順 9、 3の画像 2 HP Windows Mixed Reality Controllers TPC-Q044 Touch Pad   Replacement: 手順 9、 3の画像 3
    • Unclip one of the tabs on the underside of the touch pad.

    • Using a spudger, pop off the touch pad.

終わりに

To reassemble your device, follow these instructions in reverse order.

ある他の人がこのガイドを完成しました。

作成者

2人の作成者と共同で作成されました。

Seiji Nagasawa

メンバー登録日: 01/24/19

219 ポイント

1ガイドが承認済み

チーム

Cal Poly, Team S18-G5, White Winter 2019 Cal Poly, Team S18-G5, White Winter 2019人のメンバー

CPSU-WHITE-W19S18G5

2 メンバー

14のガイドは作成済み

0 件のコメント

コメントを追加

統計データ:

過去 24時間: 0

過去 7 日: 0

過去 30 日: 9

今までの合計 838