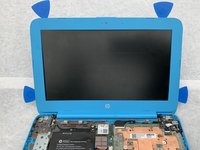
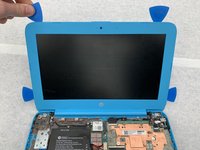
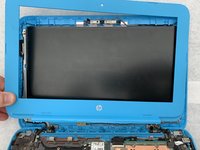
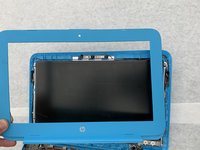
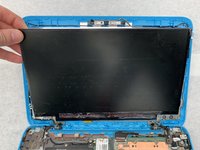
メインコンテンツにスキップ

HP Stream 11-y010nr Screen Replacement

必要な工具と部品

  1. HP Stream 11-y010nr Screen Replacement, Keyboard: 手順 1、 3の画像 1 HP Stream 11-y010nr Screen Replacement, Keyboard: 手順 1、 3の画像 2 HP Stream 11-y010nr Screen Replacement, Keyboard: 手順 1、 3の画像 3
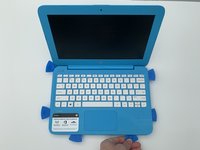
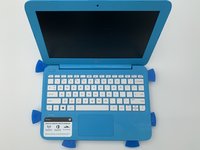
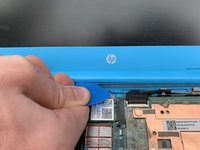
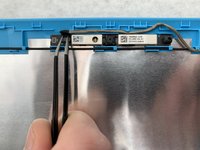
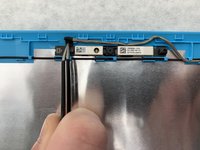
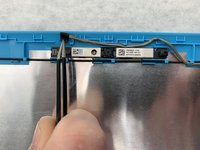
    • Gently peel back the two rubber strips that cover the screws on backside of the computer with the needle nose tweezers.

    • Ensure the laptop is turned off.

  2. HP Stream 11-y010nr Screen Replacement: 手順 2、 2の画像 1 HP Stream 11-y010nr Screen Replacement: 手順 2、 2の画像 2
    • Unscrew the seven 0.4mm screws on the backside of the laptop with the Phillips #0 Screwdriver.

  3. HP Stream 11-y010nr Screen Replacement: 手順 3、 2の画像 1 HP Stream 11-y010nr Screen Replacement: 手順 3、 2の画像 2
    • Take the opening picks and push them into the seam between the keyboard and the laptop casing.

    • Go all the way around the laptop.

  4. HP Stream 11-y010nr Screen Replacement: 手順 4、 1の画像 1
    • Once the cover is loose enough, lift the keyboard up to expose the wiring beneath.

    • Be careful not to pull too hard or fast as there are ribbon cables attached to the keyboard and trackpad.

  5. HP Stream 11-y010nr Screen Replacement: 手順 5、 3の画像 1 HP Stream 11-y010nr Screen Replacement: 手順 5、 3の画像 2 HP Stream 11-y010nr Screen Replacement: 手順 5、 3の画像 3
    • Disconnect the three cables by lifting up on the locking tab of the ZIF connector and pulling the cables out with the needle nose tweezers.

    • Remove the keyboard.

  6. HP Stream 11-y010nr Screen Replacement, Screen: 手順 6、 3の画像 1 HP Stream 11-y010nr Screen Replacement, Screen: 手順 6、 3の画像 2 HP Stream 11-y010nr Screen Replacement, Screen: 手順 6、 3の画像 3
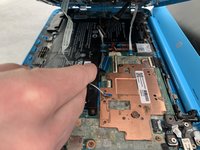
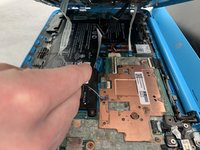
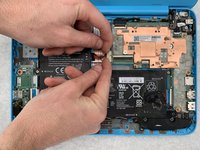
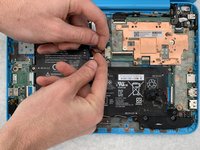
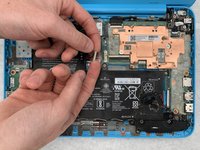
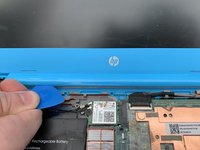
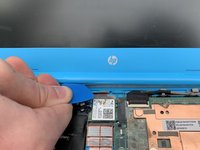
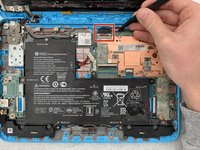
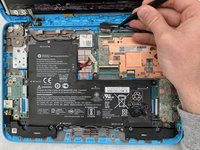
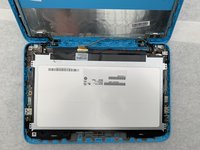
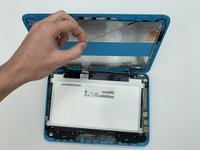
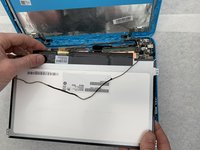
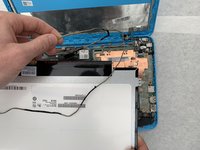
    • Using your fingers or a spudger, pull the battery cable from its connector to disconnect power from the motherboard.

  7. HP Stream 11-y010nr Screen Replacement: 手順 7、 2の画像 1 HP Stream 11-y010nr Screen Replacement: 手順 7、 2の画像 2
    • Insert iFixit opening picks into the edges of the screen to break the seal between the screen and bezel.

  8. HP Stream 11-y010nr Screen Replacement: 手順 8、 3の画像 1 HP Stream 11-y010nr Screen Replacement: 手順 8、 3の画像 2 HP Stream 11-y010nr Screen Replacement: 手順 8、 3の画像 3
    • Peel the hinge up by sliding iFixit opening picks left to right along the hinge.

  9. HP Stream 11-y010nr Screen Replacement: 手順 9、 3の画像 1 HP Stream 11-y010nr Screen Replacement: 手順 9、 3の画像 2 HP Stream 11-y010nr Screen Replacement: 手順 9、 3の画像 3
    • Remove the bezel by pulling upwards on the left bottom corner.

  10. HP Stream 11-y010nr Screen Replacement: 手順 10、 2の画像 1 HP Stream 11-y010nr Screen Replacement: 手順 10、 2の画像 2
    • Disconnect the screen from the motherboard by pulling the display cable from its connector.

  11. HP Stream 11-y010nr Screen Replacement: 手順 11、 1の画像 1
    • Unscrew the four 0.4mm screws surrounding the display using a Phillips #00 screwdriver.

  12. HP Stream 11-y010nr Screen Replacement: 手順 12、 3の画像 1 HP Stream 11-y010nr Screen Replacement: 手順 12、 3の画像 2 HP Stream 11-y010nr Screen Replacement: 手順 12、 3の画像 3
    • Gently remove the screen from its holding and lay the screen down on the keyboard. It is still attached to the computer.

  13. HP Stream 11-y010nr Screen Replacement: 手順 13、 3の画像 1 HP Stream 11-y010nr Screen Replacement: 手順 13、 3の画像 2 HP Stream 11-y010nr Screen Replacement: 手順 13、 3の画像 3
    • Take the tweezers and push up on the small connector to the left of the webcam.

  14. HP Stream 11-y010nr Screen Replacement: 手順 14、 2の画像 1 HP Stream 11-y010nr Screen Replacement: 手順 14、 2の画像 2
    • Gently pull the cord out from around the screen area.

  15. HP Stream 11-y010nr Screen Replacement: 手順 15、 2の画像 1 HP Stream 11-y010nr Screen Replacement: 手順 15、 2の画像 2
    • Remove the screen with the display cable attached.

終わりに

To reassemble your device, follow these instructions in reverse order.

作成者

3人の作成者と共同で作成されました。

Adam Sitzmann

メンバー登録日: 01/26/20

914 ポイント

6のガイドは作成済み

0 件のコメント

コメントを追加

統計データ:

過去 24時間: 0

過去 7 日: 7

過去 30 日: 14

今までの合計 474